So, when Dan decided he wanted to learn how to grill, I made a decision that I’m still proud of—I stayed out of it completely. Fifteen years of professional cooking, and I handed him the tongs, stepped back, and let him figure out the basics on his own. What I did do was quietly leave him a very short list of recipes on the kitchen counter. Simple things. Forgiving things. Recipes where even if the timing was a little off or the heat was a little high, the result would still be something worth eating, you know?
Here’s the thing about grilling that nobody really tells beginners—it’s actually one of the more forgiving cooking methods out there, as long as you understand a few basic principles going in. High heat. Dry protein. Don’t move things around constantly. Know when to walk away. That’s genuinely most of it. The rest is just practice and confidence, and confidence comes from making something good the first few times, which is exactly why the recipes you start with matter so much.
These are the six recipes I give to every beginner griller I know. They’re the ones I wish someone had given me before I burned my first attempt at chicken thighs in culinary school and stood there confused about what went wrong. They work on a gas grill, a charcoal grill, or a grill pan on your stovetop if that’s what you’ve got. And every single one of them will make you feel like you know exactly what you’re doing out there, you know?
Before We Start — The Four Rules of Beginner Grilling
Now I know everyone wants to jump straight to the recipes, and we’ll get there, I promise. But reading this section for 4 minutes will save you from the mistakes that make people give up on grilling entirely. Trust me on this.
Rule one — preheat your grill properly. A cold grill is responsible for more stuck, torn, and flavorless grilled food than any other mistake beginners make. Gas grill: high heat, lid closed, ten full minutes before anything goes on. Charcoal: let the coals ash over completely until they’re glowing gray, not black. The grill should feel genuinely hot when you hold your hand six inches above the grate for no more than two seconds. That’s ready.
Rule two — dry your protein before it goes on the grill. Pat everything with paper towels until the surface is dry. Wet surfaces steam instead of sear, and you lose the beautiful caramelized crust that makes grilled food taste like grilled food. Dry surface, hot grill, good oil — that’s your recipe for the perfect sear every single time.
Rule three — oil the grates, not just the food. Fold a paper towel, dip it in vegetable oil, and use tongs to wipe it across the grates right before the food goes on. This prevents sticking in a way that oiling the protein alone doesn’t. Do this every single time.
Rule four — leave things alone. The single most common beginner mistake is constant poking, prodding, and moving. When the protein is ready to flip, it naturally releases from the grate. If you try to move it and it sticks, it’s telling you it’s not ready yet. Give it another minute and try again. The grill knows what it’s doing, you know?
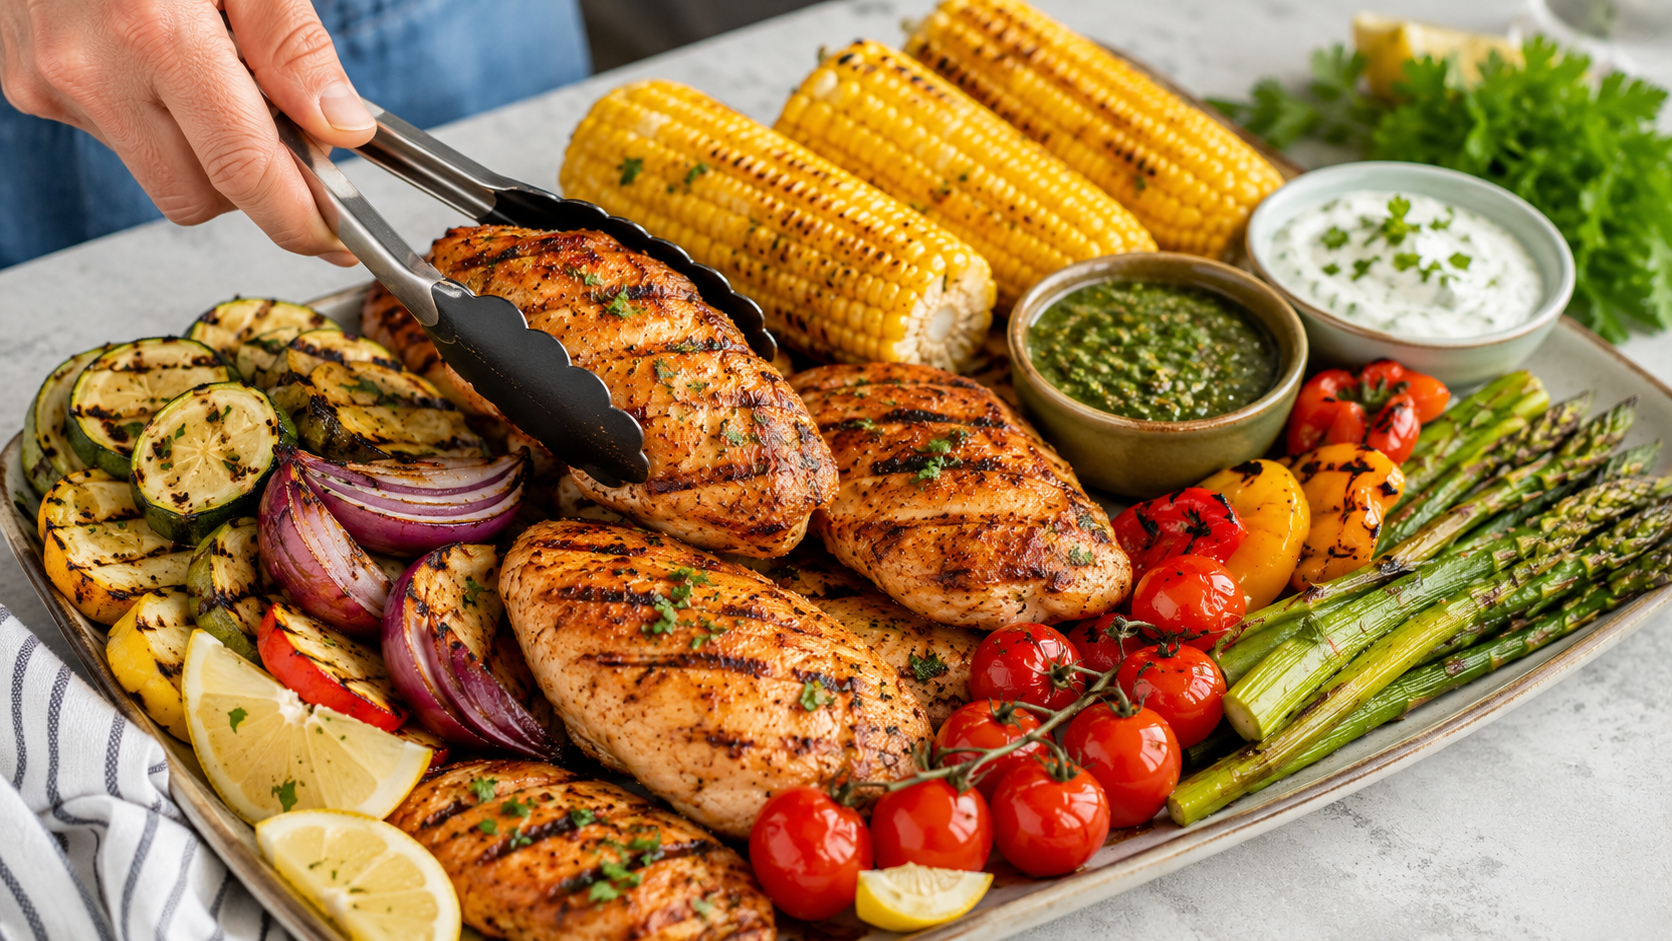
1. Simple Grilled Chicken Thighs
Here’s the thing—chicken thighs are the most forgiving protein you can put on a grill, and I genuinely don’t understand why beginners always reach for chicken breasts first. Breasts are easy to overcook and dry out quickly. Thighs have enough fat that they stay juicy even if your timing is slightly off, and they get these incredible, crispy edges from the grill that make people think you’ve been doing this for years. This is where every beginner should start, you know?
What you need (serves 4): 8 bone-in, skin-on chicken thighs, 3 tablespoons of olive oil, 1 teaspoon of garlic powder, 1 teaspoon of smoked paprika,ika 1 teaspoon of onion powder, half Half a teaspoon of dried or half a teaspoon of dried salt, and black pepper—be genuinely generous here
Now here’s how it goes: Mix all the seasonings with the olive oil to make a quick paste. Pat the chicken thighs completely dry with paper towels, then rub the seasoning mixture all over every surface—under the skin too if you can get your fingers in there without tearing it. Let them sit at room temperature for twenty to thirty minutes before grilling. Cold chicken straight from the fridge cooks unevenly, with the outside done before the inside is anywhere close, you know?
Set up your grill for two-zone cooking—one side on high heat, the other on low heat. With this, this is the beginner technique that changes everything. Start the thighs skin-side down on the hot side for 4 to 5 minutes until the skin is golden and crispy and releases naturally from the grate. Flip, cook for another 4 minutes, then move them to the cool side, close the lid, and let them finish cooking through indirect heat for another 20 to 25 minutes.
The internal temperature you’re looking for is 165°F at the thickest part, not touching bone. If you don’t have a meat thermometer—and every beginner griller should own one; they cost about ten dollars and remove all the guesswork—the juices should run completely clear when you pierce the thickest part.
Julia’s real tip: Don’t skip the two-zone setup. Direct heat gives you the crispy skin. Indirect heat cooks the chicken through without burning the outside. It’s the technique that prevents the beginner’s nightmare of burnt-outside, raw-inside chicken, and once you understand it, you’ll use it for everything.
Family verdict: This is Dan’s go-to recipe now that he’s gotten comfortable at the grill. He makes it with such confidence that the neighbors genuinely think he’s the cook in our family. I’ve decided to let that narrative stand because the chicken really is excellent.
2. Easy Grilled Burgers
Now burgers are the quintessential backyard grill recipe, and they’re also, not going to lie, one of the most commonly made wrong. Packed too tight, flipped too many times, pressed down with the spatula — OH MY GOSH, please don’t press down on your burgers with the spatula. You’re squeezing all the juice out onto the coals, wondering why your burgers are dry. I’ve watched people do this at cookouts, and it takes everything in me not to say something, you know?
What you need (serves 4): 2 pounds of ground beef — 80/20 fat ratio, not lean; fat equals flavor and juiciness 1 teaspoon of garlic powder 1 teaspoon of Worcestershire sauce Salt and black pepper 4 burger buns, toasted Your toppings—keep it simple to start
Now here’s how it goes: This is important — handle the meat as little as possible. Overworking ground beef causes the proteins to contract, resulting in a dense, tough burger rather than a tender, juicy one. Combine the garlic powder and Worcestershire sauce with the meat using just your hands and just until combined—eight or ten turns of the meat, no more.
Divide into four equal portions. Now here’s the indent trick that every griller needs to know—press a shallow dimple into the center of each patty with your thumb, about half an inch deep. Burgers puff up in the center as they cook because the edges contract faster than the middle. That dimple counteracts the puffing, giving you a flat, even burger instead of a dome. Season both sides generously with salt and pepper right before they go on—not before, because salt draws moisture out and you want that moisture inside the burger, not on the surface.
Grill over high heat for 3 to 4 minutes per side until the interior is medium-pink and juicy. Don’t touch them between flips. One flip only. If you’re adding cheese, put it on after the first flip and close the lid for the last minute to melt it perfectly.
Julia’s real tip: Toast your buns cut-side down on the grill for the last ninety seconds of cooking time. A toasted bun holds up to the burger without going soggy, and the slight char adds a flavor dimension that a plain bun can’t match. This is a tiny detail that makes a real difference in the final result.
Family verdict: Jake rates every burger he eats on a scale he invented himself, and this one consistently gets what he calls “a solid ten on bun.” I’ve chosen to interpret this as the highest possible praise. Maya builds hers with about 14 toppings, which slightly undermines the simplicity, but the burger underneath is excellent, and that’s the part I’m responsible for.
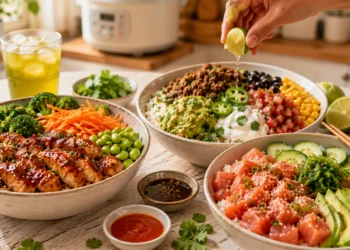
3. Beginner Grilled Vegetables
Here’s the thing that surprises most beginner grillers—vegetables might actually be the easiest thing you can cook on a grill. They’re forgiving about timing; they benefit from char in a way that completely transforms their flavor, and they require almost no technique beyond getting them cut to the right size and seasoned well. The grill does something to zucchini, bell peppers, and mushrooms that a stovetop or oven can’t replicate, and once you’ve had it that way, you’ll understand why, you know?
What you need (serves 4): 2 zucchini, sliced lengthwise into thick planks 2 bell peppers, quartered and seeded 1 large red onion, sliced into half-inch rounds 8 ounces of cremini mushrooms, whole if small or halved if large 1 bunch of asparagus, woody ends snapped off 4 tablespoons of olive oil 3 cloves of garlic, minced 1 teaspoon of Italian seasoning Salt and pepper Fresh lemon juice and fresh herbs to finish
Now here’s how it goes: Toss all the vegetables with the olive oil, garlic, Italian seasoning, salt, and pepper in a large bowl until everything is well coated. The oil coating gives you the char marks and prevents sticking — don’t skimp on it.
Grill over medium-high heat, turning once. The timing varies by vegetable—asparagus and mushrooms take about 4 to 5 minutes total, zucchini planks about 6 to 8 minutes, and bell peppers and onions about 8 to 10 minutes. You’re looking for tender flesh with visible grill marks and slightly charred edges. That char is flavor, not failure.
The one beginner mistake with grilled vegetables is cutting them too small — small pieces fall through the grates and get lost in the coals. Keep everything in large pieces or use a grill basket if you have one. Finish with a squeeze of fresh lemon juice and a handful of torn fresh herbs right before serving.
Julia’s real tip: Grill the vegetables in batches by cooking time rather than throwing everything on at once and trying to manage different timings simultaneously. Start with the items that take the longest, then add the quicker ones. It sounds like more effort, but it actually makes the whole process less stressful, you know?
Family verdict: Grilled vegetables converted Jake from a vegetable avoider into someone who will specifically ask for grilled zucchini, which I consider one of the great parenting wins of my life. Something about the char and the slight sweetness that the grill brings out—it tastes completely different from any other cooking method, and kids respond to it. Use this knowledge.
4. Grilled Corn on the Cob
Now, I know I talked about grilled corn in the summer sides article, but I’m including it here specifically because it’s the perfect beginner recipe. Here, I want to give you the full technique breakdown for someone who’s never done it before. Corn on the grill is the recipe that makes new grillers feel genuinely confident, because it’s nearly impossible to mess up, it’s done in fifteen minutes, and the result is so dramatically better than boiled corn that people react to it in a way that makes you feel like you’ve done something genuinely impressive, you know?
What you need (serves 4): 4 ears of fresh corn, husked 3 tablespoons of olive oil or softened butter Salt and pepper.
For the flavored butter (optional but highly recommended): 4 tablespoons of softened butter, half a teaspoon of smoked paprika, half a teaspoon of garlic powder, a pinch of cayenne, salt, and fresh parsley or cilantro, finely chopped.
Now here’s how it goes: Mix the flavored butter ingredients and set aside—this can be done hours ahead and kept in the fridge, which is the kind of prep-ahead thinking that makes cookout day much less stressful.
Brush each ear of corn with olive oil or softened plain butter, and season with salt and pepper. Place directly on the grill over medium-high heat. Now—and this is the beginner key—you’re going to turn the corn every 3 to 4 minutes, giving it a quarter turn each time, so all 4 sides get time directly above the heat. Total cook time is about twelve to fifteen minutes. You’re looking for kernels that are slightly golden and charred in spots, with the occasional deeply darkened kernel here and there. That’s perfect. That’s where all the flavor is.
Brush generously with the flavored butter the moment it comes off the grill while it’s still hot enough to melt it instantly.
Julia’s real tip: Don’t be nervous about the chair. First-time grillers often pull the corn too early because the dark spots look like they’re burning. They’re not burning — they’re caramelizing. The sugars in the corn are browning under the direct heat, and that’s precisely what makes grilled corn taste so different and so much better than the boiled version. Lean into the chair, you know?
Family verdict: This remains Jake’s summer dessert island food. He eats it with complete focus and dedication. Maya adds cotija cheese to hers. Both of them have started asking if we can have grilled corn on non-cookout nights, which tells me everything I need to know about this recipe.
5. Simple Grilled Salmon Fillets
Now, salmon was the recipe that made me realize grilling fish doesn’t have to be the terrifying experience most beginners assume it is. Fish has a reputation for sticking and falling apart on the grill, and that reputation is mostly the result of one or two mistakes that are completely easy to avoid once you know what they are. Get these right, and grilled salmon becomes one of the fastest, most impressive things in your beginner repertoire, you know?
What you need (serves 4): 4 salmon fillets, skin-on, about six ounces each, 3 tablespoons of olive oil, 2 cloves of garlic, juice and zest of one lemon, 1 teaspoon of Dijon mustard, half a teaspoon of dried dill or fresh dill if you have it, salt and pepper
Now here’s how it goes: Whisk the olive oil, garlic, lemon juice and zest, Dijon, and dill together for a quick marinade. Pat the salmon completely dry, put it in a shallow dish, pour the marinade over it, and let it sit for only 15 minutes—fish marinates much faster than meat, and too long in an acidic marinade can start to break down the texture.
Now, there are non-negotiable rules for grilling fish. First, get your grill really hot and oil the grates thoroughly right before the fish goes on. Two good swipes with an oil-dipped paper towel. Second, start the salmon skin-side up. Yes, up. You’re going to cook it mostly on the flesh side first, which is counterintuitive but correct.
Place the fillets flesh-side down on the hot, oiled grates. Don’t touch them for four minutes. The fish will release naturally when it’s ready—if it sticks, it needs another thirty seconds. Once it releases, flip it over to the skin side and cook for another 2 to 3 minutes, depending on thickness. The salmon is done when it flakes easily with a fork but still has a slightly translucent, darker pink center—that’s medium, which is the ideal doneness for salmon. Fully cooked through is overcooked for salmon, and that’s where the dry, chalky texture that puts people off comes from.
Julia’s real tip: The skin acts as a natural barrier between the delicate flesh and the grill grates, which is why skin-on fillets are so much easier to grill than skinless ones. Always buy skin-on for grilling. You can always choose not to eat the skin afterward, but it does important protective work during the cooking process.
Family verdict: Maya declared grilled salmon her favorite summer dinner two years ago and hasn’t changed her position. Jake will eat it if I don’t make a production of the fact that it’s fish, which I’ve learned not to do. Dan was convinced he didn’t like salmon until he had it grilled this way. Now he requests it. The grill changes things.
6. Grilled Flatbread Pizza
So this last one gets the biggest reaction from beginners every single time—not because it’s the most technically impressive, but because nobody expects pizza to come off a backyard grill, and people cannot believe how good it is. The grill gives you a blistered, slightly charred crust with a light crunch that no home oven can replicate because no home oven gets hot enough. It’s genuinely the closest thing to a wood-fired pizza you can make at home, and it takes about eight minutes start to finish, you know?
What you need (serves 4): Store-bought pizza dough—one pound, at room temperature for at least thirty minutes before grilling. Olive oil for brushing. Half a cup of good marinara sauce or crushed tomatoes and 1 and a half cups of shredded mozzarella. Your toppings—keep them light and thin; heavy toppings don’t cook through properly on a grill
Simple topping combinations to start with: Margherita—fresh mozzarella, tomato sauce, and fresh basil added after grilling. Summer — thinly sliced zucchini, corn kernels, ricotta, fresh herbs. A white olive oil base instead of tomato, garlic, mozzarella, and arugula added after
Now here’s how it goes: This is a two-stage process, and understanding that is the whole key to grilled pizza. Divide the dough into two portions, depending on what you. Stretch each piece on a lightly oiled surface into a rough, thin oval—don’t worry about making it perfectly round; irregular shapes actually look more beautiful and cook more evenly.
Brush one side of each dough piece with olive oil. Carry them out to the grill on a sheet pan or cutting board—this is not the moment to be walking back and forth. Place the dough, oiled side down, on the hot grill and close the lid for 2 minutes. The dough will puff up dramatically, and you’ll see grill marks forming on the bottom. Using tongs, flip the dough pieces and immediately work fast—brush the grilled side with a thin layer of sauce, scatter the cheese, and add your toppings. Close the lid and grill for another 2 to 3 minutes, until the cheese is melted and the bottom is crispy.
Slide off onto a cutting board, add any fresh herbs or greens that go on after cooking, cut, and serve immediately. Grilled pizza waits for no one, you know.
Julia’s real tip: Work fast during the topping stage—the dough is on direct heat, and it won’t wait around while you carefully arrange ingredients. Have all your toppings prepped, portioned, and right next to the grill before the dough goes on. The whole topping process should take about sixty seconds per pizza. Speed and confidence are the techniques here.
Family verdict: This completely replaced delivery pizza on summer Friday nights in our house, which I consider one of my greatest achievements as both a professional cook and a parent. Jake designs his own with the focus and seriousness of an architect. Maya makes one with everything in the garden. Dan has started inviting the neighbors over specifically for grilled pizza nights. I’ve created a situation, and I’m completely fine with it.
The Beginner Griller’s Starter Kit
So, before I let you go, here are the four tools that will make every single one of these recipes easier and serve you for years of grilling beyond these recipes.
A good instant-read meat thermometer is the single most important tool a beginner griller can own. It removes all the guesswork from the most stressful part of grilling — knowing when things are actually done. Chicken to 165°F, burgers to 160°F for well-done or 145°F for medium. Ten dollars at any kitchen store. Buy it before your first cookout, you know?
Long-handled tongs are your primary grilling tool. —at least 12 inches to keep our hands from the heat. Get a pair with a locking mechanism for easy storage. Everything else is optional—tongs are not.
A stiff wire grill brush for cleaning the grates before each session. Clean grates mean food releases properly and tastes like the food, not last week’s dinner. Brush the grates when they’re hot, right after preheating, before oil, and before food.
A sheet pan or large cutting board to carry things back and forth from the kitchen. This sounds obvious until you’re standing at the grill with raw chicken in your hands and nothing to put it on. Prep everything inside, carry it out on the sheet pan, and bring it back in to rest. Every trip outside and back should be intentional and equipped.
Here’s the thing about learning to grill that I tell everyone who asks—the first time is the hardest because you don’t know what things are supposed to look like, smell like, or sound like yet. By the third time you make any of these recipes, your instincts will start to kick in, and you’ll stop second-guessing yourself and start trusting the process. That’s when grilling gets genuinely fun instead of stressful, and that’s when you start experimenting and making it your own.
Start with the chicken thighs. Make them twice before you move on. Then add the burgers. Then the vegetables. Build your confidence one recipe at a time and don’t rush the learning curve. Fifteen years in professional kitchens, and I’ll tell you honestly—the most important thing about cooking isn’t technique; it’s showing up at the grill with the confidence to try.
You’ve absolutely got this. Now go fire it up, you know?
— Chef Julia


Discussion about this post