So the summer dessert situation in our house operates on a very specific philosophy that took me a few years to fully commit to—when the fruit is this good, the dessert’s job is mostly not to mess it up. I know that sounds like I’m giving up on technique, and I promise I’m not. It’s more than I’ve learned over fifteen years of professional cooking that a perfectly ripe peach with a little brown butter and some vanilla ice cream will beat a complicated tart made from February peaches every single time. The season does work that no recipe can replicate. Peak summer fruit is genuinely one of the greatest dessert ingredients that exists, and it doesn’t need a culinary degree to do something spectacular with it, you know?
These ten desserts are the ones I actually make—on weeknights when the kids are looking for something sweet after dinner, at cookouts when I need something that’ll feed a crowd and earn compliments, and on lazy weekend afternoons when Maya and I are in the kitchen together. She’s learning that the best things in a summer kitchen often take about fifteen minutes and a really good piece of fruit. Every single one comes together quickly, uses peak summer produce, and produces results that are way out of proportion to the effort involved. That’s my forever goal with summer desserts, you know?
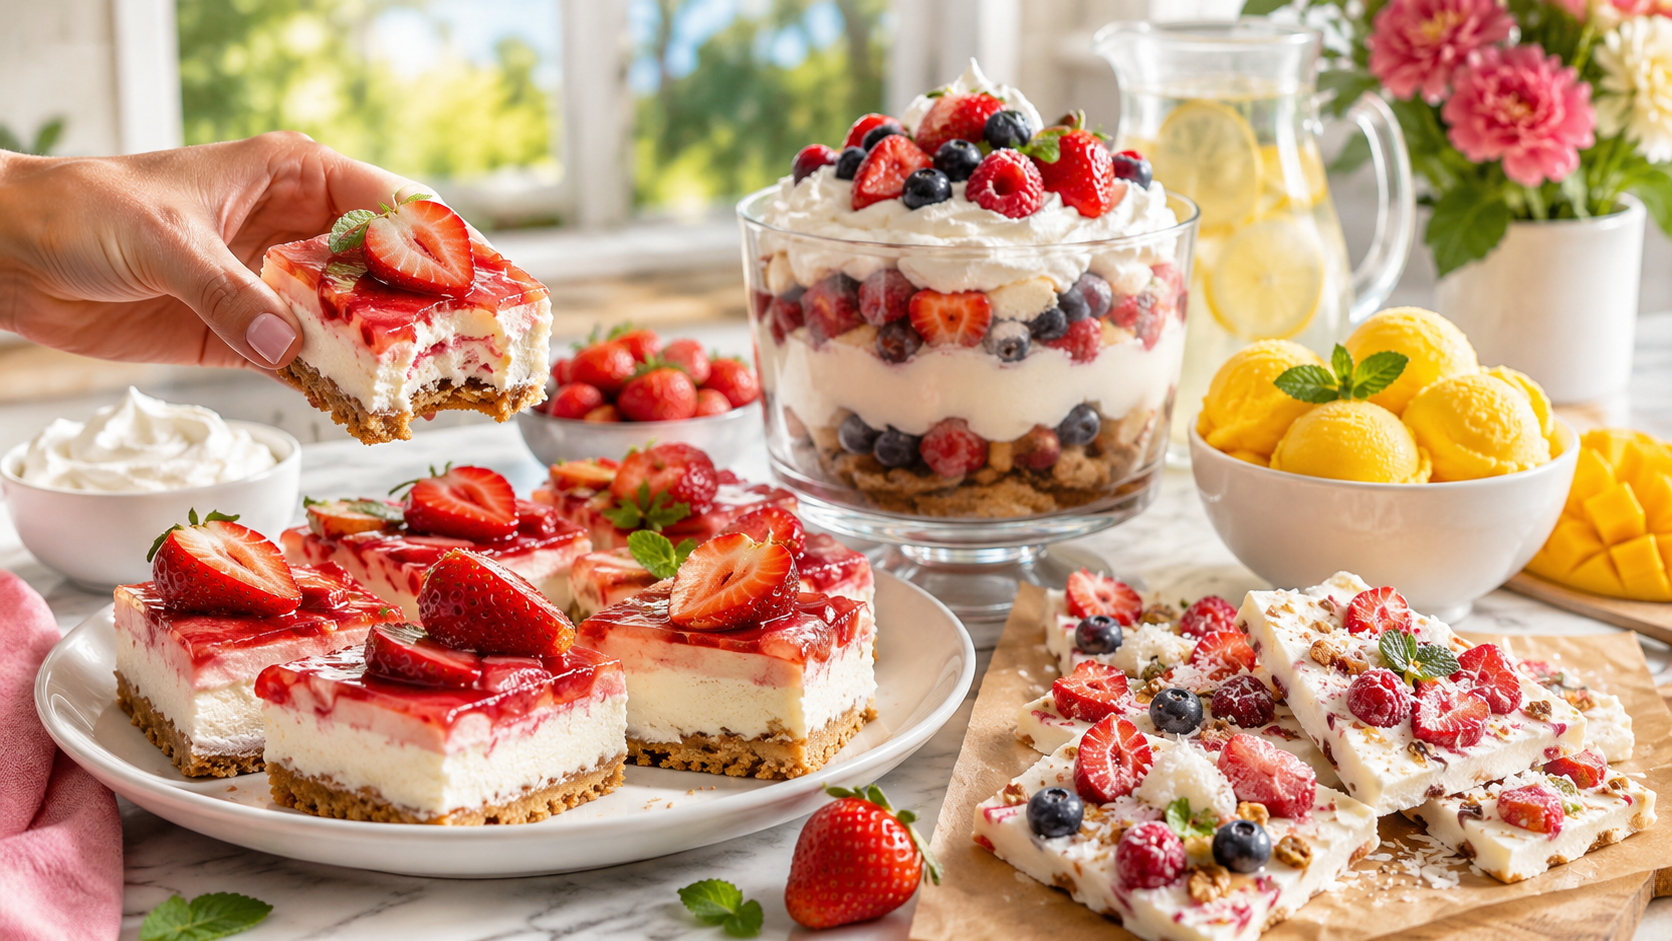
1. Honey Ricotta with Roasted Strawberries
So here’s the thing—roasted strawberries sound like something that should require a pastry chef, and they genuinely don’t. Twenty minutes in a hot oven transforms even slightly disappointing strawberries into something deeply jammy and almost wine-like in their intensity. Spooned over whipped ricotta with honey and a little lemon zest, it’s one of the most effortlessly elegant desserts I know how to make, you know?
What you need (serves 4): 1 pound of fresh strawberries, hulled and halved 2 tablespoons of honey, divided 1 teaspoon of balsamic vinegar Half a tablespoon of vanilla extract 1 cup of whole milk ricotta 2 tablespoons of powdered sugar Zest of half a lemon Fresh mint and flaky sea salt to finish Store-bought shortbread cookies or sliced pound cake to serve alongside
Here’s how it goes: Preheat the oven to 400°F. Toss the strawberries with one tablespoon of honey, the balsamic vinegar, and vanilla. Spread in a single layer on a sheet pan and roast for eighteen to twenty minutes until they’re soft, jammy, and releasing beautiful ruby-red juices. Let them cool slightly.
While they roast, whip the ricotta with the powdered sugar, the remaining tablespoon of honey, and lemon zest until smooth and creamy—a fork or a hand mixer both work. Spread a generous mound of whipped ricotta on each plate or in small bowls, and spoon the warm roasted strawberries and all their gorgeous juices over the top. Finish with a tiny pinch of flaky salt—this sounds wrong on a dessert, and it is exactly right—a few fresh mint leaves, and serve with the shortbread alongside for scooping, you know?
Julia’s real tip: The flaky salt over the finished dessert is a technique I’ve used for years, and it never stops surprising people. Salt on a strawberry dessert amplifies the sweetness in a way that’s genuinely hard to explain until you taste it—one tiny pinch. Don’t skip it.
Family verdict: Maya made this herself for a sleepover dessert last summer and sent me a picture before serving it, which is her version of showing off. I was delighted. Jake ate the roasted strawberries directly off the pan before they made it to the plates, which meant we had a somewhat improvised dessert situation, which I’ve since addressed by making extra.
2. Brown Butter Peach Crumble
Here’s the thing about peach crumble—it’s the dessert that sounds like it requires an hour of commitment and actually requires about fifteen minutes of work plus thirty minutes of the oven doing everything while you’re not in the kitchen. The brown butter in the topping is the detail that takes it from good crumble to OH MY GOSH crumble, and it adds about four minutes to the process. Worth every one of them, you know?
What you need (serves 6): 4 large ripe peaches, pitted and sliced—no need to peel 3 tablespoons of sugar 1 tablespoon of cornstarch 1 teaspoon of vanilla extract Half a teaspoon of cinnamon Juice of half a lemon
For the brown butter crumble topping: 6 tablespoons of unsalted butter, Three-quarters of a cup of old-fashioned rolled oats, half a cup of all-purpose flour, a third of a cup of brown sugar, packed, a quarter teaspoon of cinnamon, a pinch of .salt
Here’s how it goes: Preheat the oven to 375°F. Toss the peach slices with the sugar, cornstarch, vanilla, cinnamon, and lemon juice directly in a nine-inch cast-iron skillet. Spread them in an even layer.
Now brown the butter for the topping. Melt the butter in a small saucepan over medium heat, swirling occasionally, until it turns deep golden and smells unmistakably nutty—about four minutes. Watch it closely because the line between perfect and burned is fast. Pour the browned butter into a bowl with the oats, flour, brown sugar, cinnamon, and salt. Mix with a fork until it comes together into clumps—some large, some small—and that textural variety is intentional and good. Scatter the topping over the peaches in an uneven layer that covers without being completely flat.
Bake for thirty to thirty-five minutes until the topping is deeply golden and the peach juices are bubbling around the edges. Rest for ten minutes—this is the hardest part—then serve warm with vanilla ice cream.
Julia’s real tip: Rest it for ten minutes before serving. The juices need to thicken slightly, and the crumble needs to set up from the first five layers of crunch to something that holds together when you scoop it. Cut the wait short, and you get a runny, though very delicious, dessert soup situation.
Family verdict: This is Maya’s birthday dessert request every year—not the cake, the crumble. She’s been requesting it since she was nine. Dan eats it for breakfast the next day when he thinks I’m not looking. I’ve always been looking. Jake eats the crumble topping specifically and scoops around the peaches with surgical precision, but he eats it with great enthusiasm, which I count.
3. No-Churn Mango Coconut Ice Cream
So this is the recipe that made me realize I’d been completely wrong about needing an ice cream maker. No-churn ice cream—whipped cream folded into sweetened condensed milk—produces a creamy, scoopable, genuinely real ice cream with zero equipment beyond a hand mixer and a loaf pan. The mango coconut version is the one I make most often because the flavors are so completely of summer that eating it feels like actual tropical weather, you know?
What you need (makes about 1 quart): 2 cups of heavy whipping cream, very cold. One 14-ounce can of sweetened condensed milk. One 13-ounce can of coconut cream—full-fat, not light 1 and a half cups. Half-ripe mango, pureed smooth—about two large mangoes or a cup and a half of frozen mango, thawed and blended. 1 teaspoon of vanilla extract J, juice of half a lime A, and a pinch of salt
Here’s how it goes: Whip the heavy cream until it holds stiff peaks—this takes about three to four minutes with a hand mixer on high. In a separate large bowl, whisk the sweetened condensed milk, coconut cream, mango puree, vanilla, lime juice, and salt together until completely combined. Taste it—it should be sweet, tropical, and bright. It needs to be slightly more intensely flavored than you want the final ice cream to taste, because freezing dulls flavors somewhat.
Now fold the whipped cream into the mango coconut mixture in three additions—use a light hand and a folding motion rather than stirring, because you want to keep as much air in the cream as possible. A few streaks are fine. Pour into a loaf pan, press plastic wrap directly onto the surface, and freeze for at least six hours. Overnight is better. Scoop directly from the loaf pan with a good ice cream scoop dipped in warm water between each scoop, you know?
Julia’s real tip: The direct contact plastic wrap prevents ice crystals from forming on the surface of the ice cream. Same principle as the guacamole and the smoothie bowl—air is the enemy here. Press it right down onto the surface, no gaps, before freezing.
Family verdict: OH MY GOSH, The first summer I made this, Jake ate three scoops back to back and told me it was “the best ice cream” he’d ever had. I reminded him we’d been to several artisan ice cream shops that summer. He maintained his position. Dan asked if we could keep a loaf pan of this in the freezer all summer. We now do.
4. Five-Minute Blueberry Lemon Fool
Now here’s the dessert that takes about five minutes of actual work and produces something that looks completely intentional and tastes like the best version of blueberry and lemon you’ve ever had together. A fool is just fruit folded into whipped cream—I wrote about this in the summer fruit desserts article—but this version with fresh blueberries and lemon curd is the one I keep coming back to because the combination is simply perfect, you know?
What you need (serves 4): 2 cups of fresh blueberries—a small handful reserved for garnish 3 tablespoons of sugar Zest of one lemon plus two tablespoons of lemon juice 1 cup of heavy whipping cream, very cold 3 tablespoons of powdered sugar 1 teaspoon of vanilla extract 4 tablespoons of store-bought lemon curd—yes, store-bought, it’s completely excellent.
Here’s how it goes: Put one and a half cups of blueberries in a bowl with the sugar and lemon juice. Mash about a third of them gently with a fork, leaving the rest whole. Let them sit for ten minutes—they’ll release their gorgeous deep purple juice, and everything will come together into a jammy, bright mixture that smells incredible.
Whip the cream with the powdered sugar and vanilla to medium-soft peaks—billowy and light. Swirl the lemon curd through the cream with just two or three folds, leaving visible ribbons of yellow through the white. Now fold the blueberry mixture through in three additions, using a very light hand—you want swirls of purple and cream and yellow, not a uniformly blended lavender situation. Spoon into glasses, and top with the reserved fresh blueberries and lemon zest. Refrigerate for thirty minutes if you have time; serve immediately if you don’t.
Julia’s real tip: The lemon curd ribbons are the secret weapon here. Don’t fully mix them in—the pockets of intensely lemony, silky curd against the lighter cream and the blueberries create layers of flavor in every spoonful that are far more interesting than a homogeneous mixture, you know?
Family verdict: Maya described the color of this as “museum-worthy,” which I thought was a slightly unusual dessert review,w but which I accepted completely. Dan ate his in about forty-five seconds and asked what was in it. Jake ate the cream parts and the blueberries off the top and left the lemon curd ribbons behind, producing what I described as “a deconstructed fool,” which he accepted as a reasonable characterization.
5. Grilled Pound Cake with Macerated Peaches
Here’s the thing I love about this dessert—it sounds like something that should be at a nice restaurant, and it takes about eight minutes. Thick slices of store-bought pound cake grilled directly on the grate or in a grill pan until golden and slightly charred at the edges, topped with peaches that have been sitting in a little sugar and bourbon for twenty minutes. That’s it. The combination of warm, toasty, caramelized cake against sweet, juicy, slightly boozy peaches and cold, melting ice cream is seriously amazing, you know?
What you need (serves 6): One store-bought pound cake, sliced into one-inch thick slices—six slices 3 large ripe peaches, pitted and sliced 3 tablespoons of sugar 2 tablespoons of bourbon or peach schnapps—or just vanilla extract if you’re skipping the alcohol. 1 teaspoon of vanilla extract, juice of half a lemon, vanilla ice cream or whipped cream to serve, fresh mint for garnish
Here’s how it goes: Toss the peach slices with the sugar, bourbon, vanilla, and lemon juice and let them sit for at least twenty minutes. This is the macerating step, and it’s what turns good peaches into great peaches for this dessert—the sugar draws out the juice, the bourbon adds warmth and depth, and the lemon keeps everything bright, you know?
Brush the pound cake slices lightly with butter and grill over medium-high heat—on the grill grate, in a grill pan, or in a very hot cast iron skillet—for two to three minutes per side until golden with visible grill marks or a toasted, slightly charred crust. Serve immediately with the macerated peaches spooned generously over the top and a scoop of vanilla ice cream alongside. Finish with fresh mint.
Julia’s real tip: The pound cake needs to be at least an inch thick—thinner slices fall apart on the grill before they have time to develop that crust. One inch minimum, and handle them carefully with a wide spatula when flipping. They’re more delicate than they look at room temperature,e but become sturdier once the outside has crisped up, you know?
Family verdict: Dan called this “the dessert of the summer” for two consecutive summers, which I think is his way of saying he wants it every week. Jake eats his ice cream first, then the pound cake, then occasionally the peaches if they’re sitting in enough of that sweet syrup. Maya eats everything in careful spoonfuls designed to get a bit of each component in every bite, which shows excellent dessert strategy.
6. Watermelon Lime Popsicles
Here’s the thing about homemade popsicles—they require about ten minutes of work, and then the freezer handles everything else for four hours. They come out of the molds, and both kids treat them like they’re receiving something genuinely special, which they are—they’re just frozen watermelon juice, essential. Still, with enough lime and a tiny pinch of salt, they taste like the most concentrated, perfect version of a hot summer day, you know?
What you need (makes 8 to 10 popsicles): 4 cups of seedless watermelon, cubed, juice of 2 limes and zest of one, 2 tablespoons of honey—taste your watermelon first; if it’s very sweet, then you may want less. A tiny pinch of salt—same principle as everything else; it amplifies the sweetness. Optional: a few fresh mint leaves blended in, or a teaspoon of Tajín stirred in at the end.
For the two-tone version (optional but beautiful): Half a cup of coconut cream blended with one tablespoon of honey, poured in first to create a white layer, frozen for one hour, then the watermelon mixture poured on top.
Here’s how it goes: Blend the watermelon until completely smooth. Add the lime juice and zest, honey, and salt,t and blend again for thirty seconds. Taste it—it should be bright, sweet, and just barely tart. Pour through a fine mesh strainer if you want a completely smooth popsicle—or don’t; the tiny bit of fiber from the watermelon is perfectly fine and adds a slight texture, you know?
Pour into popsicle molds, insert the sticks, and freeze for at least four hours. To unmold, run the outside of the molds briefly under warm water—not hot, just warm—for about ten seconds. They should slide right out.
Julia’s real tip: Fill the molds, leaving a quarter inch at the top—the liquid expands slightly as it freezes, and an overfull mold will be difficult to unmold and slightly misshapen. A little space at the top gives you a clean, professional-looking popsicle that comes out smoothly, you know?
Family verdict: Jake has established a personal popsicle protocol where he eats the pointed tip first, then works his way down in concentric circles, maintaining the shape as long as possible. This approach collapses eventually, and he finishes the remainder of the stick in approximately two bites. Maya makes the two-tone version when she’s feeling creative and presents them with real artistic satisfaction. I make double batches every time because single batches don’t last.
7. Raspberry Lemon Trifle Cups
So this dessert is the one that makes people think I spent an afternoon on dessert when I spent about fifteen minutes. Individual trifle cups assembled in glasses—store-bought ladyfingers, lemon curd, whipped cream, and fresh raspberries layered into something that looks completely composed and intentional and tastes like a very elegant dessert experience, you know?
What you need (serves 6): One package of ladyfinger cookies—store-bought, found near the Italian baking section One 10-ounce jar of good-quality lemon curd 2 cups of heavy whipping cream 3 tablespoons of powdered sugar 1 teaspoon of vanilla extract 2 cups of fresh raspberries—reserve some for the top. Zest of one lemon. Optional: two tablespoons of limoncello or orange juice to brush on the ladyfingers.
Here’s how it goes: Whip the heavy cream with the powdered sugar and vanilla to medium-soft peaks. The cream should hold its shape but still feel light and airy rather than stiff.
Now assemble each glass. Break one or two ladyfingers to fit the bottom of each glass—brush them very lightly with the limoncello or orange juice if using, just enough to soften them slightly and add a little flavor without making them soggy. Spoon a tablespoon of lemon curd over the ladyfingers, add a generous layer of whipped cream, scatter a handful of raspberries, and repeat the layers—ladyfingers, lemon curd, cream, raspberries—until you reach the top of the glass. Finish with a generous cloud of whipped cream, a few perfect raspberries, and a scatter of lemon zest.
Refrigerate for at least thirty minutes before serving. This resting time allows the ladyfingers to soften completely into almost a cake-like texture, which is the whole transformation that makes this dessert work, you know?
Julia’s real tip: Make these up to four hours ahead and refrigerate. They hold beautifully and actually improve as the layers settle, and the ladyfingers fully hydrate. This is the make-ahead dessert that makes hosting genuinely effortless—done before the guests arrive, nothing to do at serving time, pulls out of the fridge ready to go.
Family verdict: Maya has requested these for every family celebration for the last two years. She considers them “the most beautiful dessert” and photographs them before every serving. Dan ate his in approximately ninety seconds and spent the next five minutes periodically looking at his empty glass. Jake scraped every layer clean methodically, which is about the most enthusiastic endorsement his dessert style is capable of producing.
8. Three-Ingredient Mango Sorbet
Now here’s the dessert that completely blows people’s minds when I tell them how it’s made. Three ingredients. No ice cream maker. No cooking. No churning. Just frozen mango blended with a tiny bit of honey and lime juice until it reaches a perfect, smooth, scoopable sorbet consistency that tastes completely like professional sorbet. The trick is using frozen mango that’s already at the right temperature and blending it with just enough liquid to get everything moving without losing the frozen texture, you know?
What you need (serves 4): 4 cups of frozen mango chunks—straight from the freezer 2 tablespoons of honey Juice of one lime—about two tablespoons A tiny pinch of salt
Here’s how it goes: That’s genuinely the whole ingredient list. Put the frozen mango in a high-powered blender or food processor. Add the honey, lime juice, and salt. Start on low speed, using the tamper if your blender has one, increasing to high. It’ll look like it’s not working for about thirty seconds, and then it’ll suddenly come together into a smooth, creamy, thick frozen mass. Blend until just smooth—overblending warms it up, and you lose the sorbet texture.
Serve immediately as soft serve, or transfer to a container and freeze for one hour for a firmer, scoopable sorbet. Between servings, leave it on the counter for five minutes to soften slightly for the best scooping texture.
Julia’s real tip: The blender does struggle initially with frozen fruit—that’s normal. Use the tamper, or stop the blender and push the fruit down with a spatula, restart on low, and increase speed gradually. If your blender really won’t cooperate, let the mango sit for five minutes to soften slightly at the edges before blending again. The goal is blended smoothly without being melted, you know?
Family verdict: Jake declared this “basically healthy,” which I found both accurate and amusing as a dessert endorsement. Maya makes it herself now and adds a splash of coconut milk to hers for a creamier texture—an excellent instinct. Dan had two servings the first time and asked if we could have it “instead of regular ice cream all summer,” a question I answered diplomatically.
9. Chocolate Strawberry Bark
Here’s the dessert that takes about ten minutes of actual work—three of which are melting chocolate—and produces something that looks like it came from an artisan chocolate shop. Melted chocolate spread thin, topped with sliced strawberries, flaky salt, and whatever other toppings you want, frozen until solid,d and then broken into jagged pieces. It’s dramatic, it’s beautiful, it’s completely delicious, and it keeps in the freezer for a week, you know?
What you need (makes a large sheet): 8 ounces of good dark chocolate—at least 60% cacao, chopped 1 cup of fresh strawberries, hulled and thinly sliced 2 tablespoons of freeze-dried strawberries for concentrated flavor—optional but excellent. Flaky sea sa.lt Optional: crushed pistachios, white chocolate drizzle, dried rose petals, toasted coconut
Here’s how it goes: Line a sheet pan or large cutting board with parchment paper. Melt the chocolate in a double boiler or in the microwave in thirty-second increments, stirring between each, until just smooth. Pour it onto the parchment and spread it thin—about a quarter inch—using a spatula. Work quickly because chocolate sets fast.
Immediately arrange the fresh strawberry slices across the surface, scatter the freeze-dried strawberries, add any other toppings, and finish with a generous pinch of flaky sea salt. Freeze for thirty to forty-five minutes until completely solid. Lift the parchment off the pan and break the bark into irregular pieces by hand—the uneven, dramatic shards are part of what makes it beautiful, you know?
Store between layers of parchment in an airtight container in the freezer for up to a week.
Julia’s real tip: The freeze-dried strawberries—found in the trail mix section of most grocery stores—add an intensely concentrated strawberry flavor that fresh strawberries alone can’t provide. The fresh ones add beauty and light flavor; the freeze-dried ones add the punch. Together, they make a significantly better bark than either does alone.
Family verdict: This disappeared within twenty minutes of coming out of the freezer at our last cookout. I’d made a full sheet pan, expecting it to last through dessert and two hours of post-dinner lingering. It did not make it to the post-dinner lingering. I’ve since started making two batches, you know?
10. Peach & Honey Ice Cream Sundae Bar
So this last one is less a recipe and more a philosophy—the ice cream sundae bar is the summer dessert format that produces maximum joy for minimum effort and maximum customization, and pairing it with a quick five-minute honey-roasted peach situation turns it into something genuinely special, you know?
What you need (serves as many as you want): Good quality vanilla ice cream—the real stuff with actual vanilla beans. If you can find 4 ripe peaches, halved, pits removed, 2 tablespoons of butter, melted,d 2 tablespoons of honey, half a teaspoon of cinnamon, and a pinch of salt
For the sundae bar: Store-bought hot fudge sauce, warm caramel sauce.Fresh whipped cream—two cups of heavy cream whipped with two tablespoons of powdered sugar. Fresh berries in a bowl. Toasted chopped nuts—pecans, almonds, whatever you have. Sprinkles if there are children involved—and there usually are. Maraschino cherries for the top, crushed graham crackers or cookie crumbles
Here’s how it goes: Brush the peach halves with the melted butter mixed with honey, cinnamon, and salt. Grill cut-side down for three to four minutes until caramelized and beautiful—or roast them cut-side up in a 425°F oven for fifteen minutes. Let cool just slightly, then slice each half into halves.
Set everything else out in its containers—the ice cream in its carton with a good scoop, the sauces in small pitchers or squeeze bottles, and the toppings in small bowls. The warm caramelized peach slices go into a bowl in the center. Let everyone build their own sundae from the ground up, you know?
Julia’s real tip: Warm the hot fudge sauce in a small saucepan or the microwave—cold fudge sauce out of the jar is fine, but warm fudge sauce that pours in a thick, glossy ribbon over ice cream is something else entirely. That contrast of warm fudge against ice cream is one of summer’s great textures. Thirty extra seconds for the warm sauce, every time.
Family verdict: Every single person in our family and every guest we’ve ever served this to goes back to the sundae bar at least twice. Jake builds his with three scoops, hot fudge, crushed graham crackers, and a cherry, no fruit. Maya creates what she describes as “architectural sundaes” that are honestly impressive to look at before eating. Dan puts the warm peaches on everything and has called this “the perfect dessert situation,” which I think is about the most poetic he’s ever been about food.
So ten quick summer desserts have all earned their permanent spots in my kitchen. Some take five minutes. Some take twenty. All of them start from the same place—good summer ingredients, enough respect to not overcomplicate them, and a confident finish that makes the whole thing look like you put in more effort than you did.
Here’s the thing I’ve learned about summer desserts after fifteen years of making them — nobody sitting outside on a warm evening with friends and family needs a technically complicated dessert. They need something cold or warm or sweet or bright or creamy that tastes like summer and comes together without you missing the whole evening standing in the kitchen. Every single one of these does that, you know?
You’ve absolutely got this. Now buy some peaches.
— Chef Julia


Discussion about this post