So that summer, I figured out that the best cookout sides don’t always involve turning on a single burner, a literal weight lifted off my shoulders. I’m talking about the July cookout where I had forty people coming to our backyard, Dan was managing the grill, both kids were orbiting me, asking questions every four minutes, and I had somehow committed to bringing six side dishes. Six. I don’t know what I was thinking. I stood in the kitchen that morning and made a conscious decision—everything I was making was going to require a knife, a bowl, and absolutely nothing that plugs into a wall, you know?
Here’s the thing about no-cook sides that I think gets overlooked—they’re not a compromise. The best summer produce genuinely doesn’t need heat. A perfectly ripe tomato sliced with good olive oil and flaky Salt is better than any cooked tomato dish I know. Fresh corn off the cob, dressed with lime and cotija, is better than most things I’ve ever made on a stove. The summer itself does the cooking, in a way—the sun grows ingredients to a peak of flavor that heat sometimes actually dulls rather than improves. Working with that instead of against it is one of the smarter things I’ve done in fifteen years of cooking, you know?
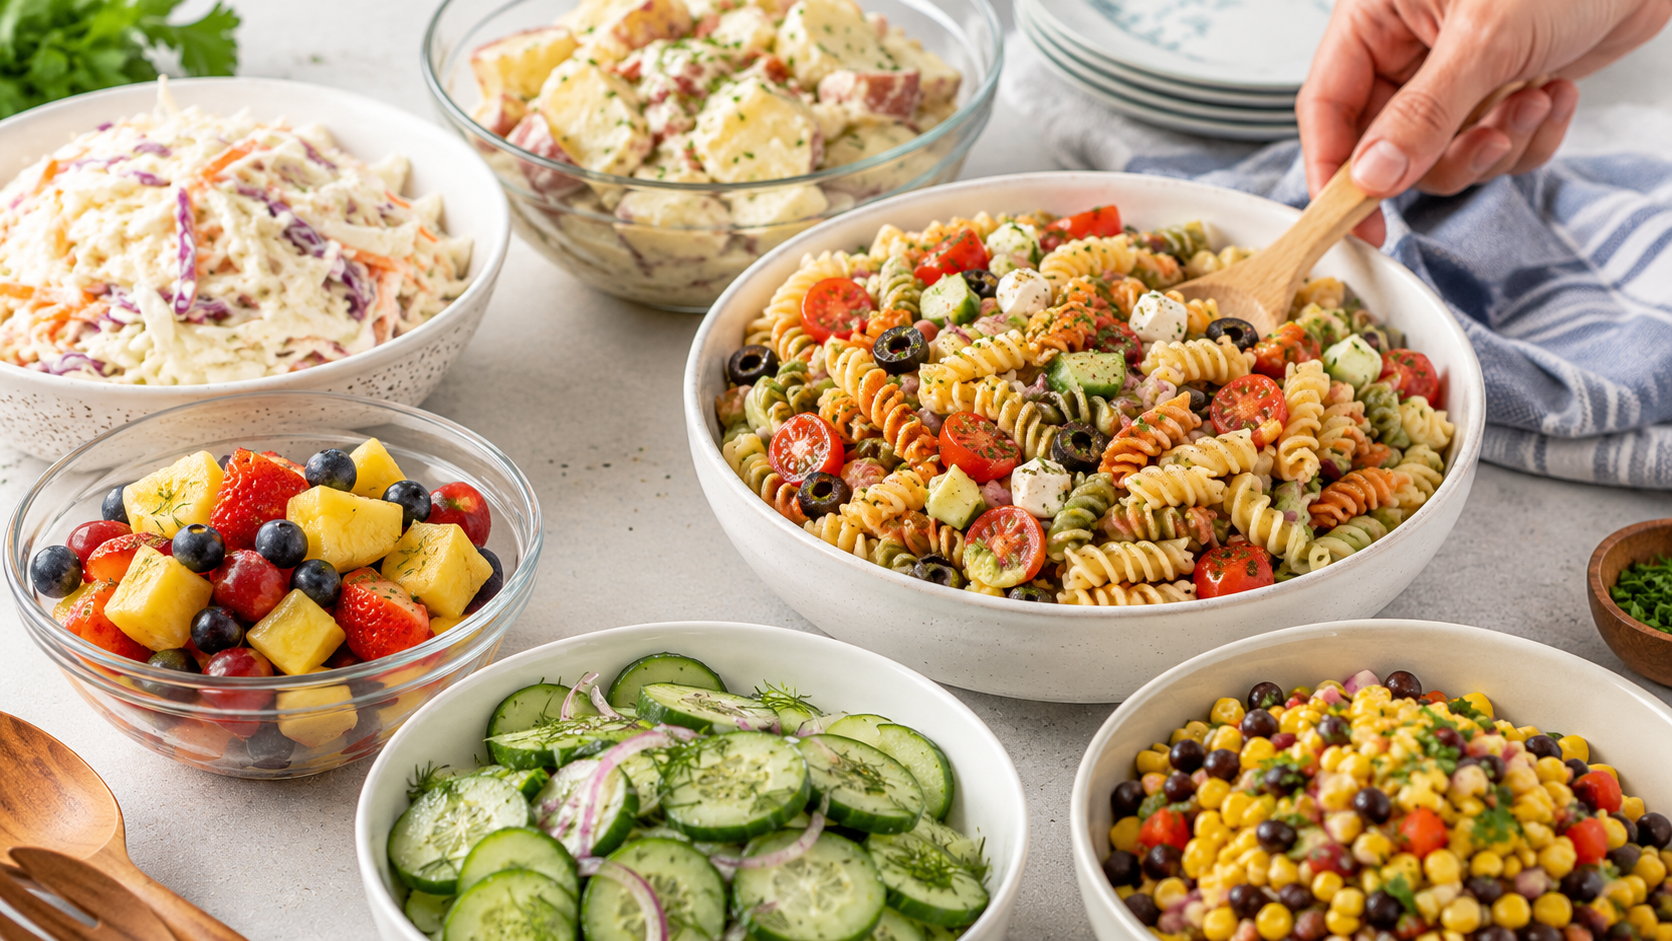
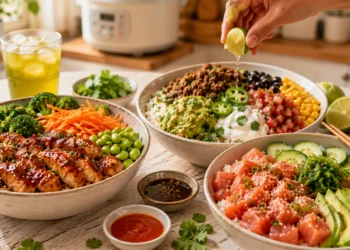
These eight sides are the ones I made that day for forty people and the ones I keep coming back to every summer since. No oven. No stovetop. No grill. Just a knife, a cutting board, a big bowl, and ingredients that are doing all the heavy lifting on their own.
1. Smashed Cucumber Salad with Rice Vinegar & Sesame
So this one looks simple, and it is, but the smashing technique makes it completely different from regular sliced cucumber salad—and I mean that in the best way. Smashing the cucumbers instead of slicing them creates jagged, irregular surfaces that absorb dressing in a way that smooth slices never can. The result is a cucumber that tastes deeply seasoned all the way through instead of just on the outside, you know?
What you need (serves 6 to 8): 4 English cucumbers 2 teaspoons of kosher salt 3 tablespoons of rice wine vinegar 2 tablespoons of soy sauce 1 tablespoon of sesame oil 1 tablespoon of honey 2 cloves of garlic, very finely minced 1 teaspoon of fresh ginger, grated Half a teaspoon of red pepper flakes, 2 tablespoons of toasted sesame seeds, and 3 green onions, thinly sliced. Fresh cilantro to finish.
Here’s how it goes: Cut the cucumbers in half lengthwise, then use the flat side of a large knife or the bottom of a heavy mug to smash each half firmly—you want them to crack and split into irregular pieces rather than break cleanly. Cut those irregular pieces into rough two-inch chunks and put them in a colander set over a bowl. Toss them with the salt and let them drain for at least 15 minutes—this draws out the excess water that would otherwise dilute your dressing. Pat them dry with paper towels.
Whisk the rice vinegar, soy sauce, sesame oil, honey, garlic, and ginger together until combined. Toss the drained cucumbers in white dressing, then scatter the red pepper flakes, sesame seeds, and green onions over the top. Finish with fresh cilantro right before serving. The whole thing takes about twenty minutes, including the draining time and exactly zero heat.
Julia’s real tip: Make the dressing up to a day ahead and keep it in a jar in the fridge. Dress the cucumbers no more than thirty minutes before serving—they release liquid quickly once dressed, and you want them crisp, not swimming.
Family verdict: Maya called this “the cucumber thing I need at every cookout from now on. “Jake ate it because sesame seeds look like they might be some chip component, and he was willing to take the risk; Dan had thirds.
2. Classic Southern-Style No-Cook Coleslaw
Now I know I’ve talked about coleslaw before in the summer sides article, but that was the creamy make-ahead version. This one is the vinegar-forward, lighter, crunchier version that cuts through the richness of BBQ food in a way that creamy coleslaw sometimes can’t. It’s the one that belongs right next to pulled pork and brisket. No cooking, obviously — just good knife work and a dressing that takes two minutes to whisk together.
What you need (serves 8): Half a head of green cabbage, very finely shredded. Half a head of purple cabbage, very finely shredded—the color combination alone makes this worth it. 3 large carrots, grated on the large holes of a box grater 4 green onions, thinly sliced Half a cup of fresh flat-leaf parsley, roughly chopped
For the vinegar dressing: 3 tablespoons of apple cider vinegar, 2 tablespoons of olive oil, 1 tablespoon of honey, 1 teaspoon of celery, and half a teaspoon of dry mustard. Salt and black pepper
Here’s how it goes: Combine the shredded cabbage, carrots, green onions, and parsley in a very large bowl. Whisk the vinegar, olive oil, honey, celery salt, and mustard powder together; season with salt and pepper; and taste—it should be tangy and just barely sweet, with that nice mustardy warmth underneath. Pour over the vegetables and toss thoroughly until every shred is coated. Taste and adjust.
Here’s the thing that makes this one work: let it sit for at least 30 minutes before serving. The salt in the dressing just slightly softens the cabbage while keeping it crisp, and the flavors come together in a way that a just-dressed coleslaw hasn’t had time for yet. Thirty minutes on the counter or up to a few hours in the fridge. Both are great, you know?
Julia’s real tip: The finer you shred the cabbage, the better the dressing distribution and the nicer the texture. Take your time with the knife work here—or use the shredding disc on your food processor if you have one and you’ve got forty people coming over, like I did that day.
Family verdict: This is the coleslaw I bring to every neighborhood gathering, and I always come home with an empty bowl and at least two requests for the recipe. Dan uses it as a topping on his pulled pork sandwiches, which is correct, and I fully endorse it.
3. Caprese Platter with Burrata & Heirloom Tomatoes
Here’s the thing—when tomatoes are at their absolute peak in mid-summer, the most sophisticated thing you can do with them is almost nothing. A proper caprese isn’t really a recipe; it’s an arrangement. The skill is in choosing the best tomatoes you can find, the best burrata, and the best olive oil and getting out of the way. I’ve made elaborate tomato dishes with fifteen ingredients, and they’ve never once topped a simple caprese made with perfect summer tomatoes, you know?
What you need (serves 6 to 8): 2 pounds of mixed heirloom tomatoes—get several colors and sizes; the variety is part of what makes this beautiful. 2 balls of fresh burrata cheese—not fresh mozzarella, burrata specifically A large handful of fresh basil leaves Your best olive oil—this is one of those recipes where the olive oil is a main ingredient; use the good bottle. Flaky sea salt and cracked black pepper. r Balsamic glaze (optional: a few thin slices of prosciutto draped naturally over the platter)
Here’s how it goes: Slice the larger tomatoes into thick rounds, cut the medium ones into wedges, and leave the cherry tomatoes whole or halved. The various sizes and additions give visual interest and texture, you know? Arrange them across a large flat platter or wooden board, slightly overlapping in some places.
Tear the burrata directly over the tomatoes and let it fall in rustic pieces—resist the urge to place it neatly; the organic messiness is part of the beauty. Tuck the fresh basil leaves in among the tomatoes. Drape the prosciutto loosely if you’re using it. Drizzle the olive oil generously—don’t be shy, this dish needs it—then the balsamic glaze in a thin zigzag. Finish with a generous pinch of flaky salt and a good crack of black pepper over everything.
Julia’s real tip: Build this platter at the cookout location, not at home. Tomatoes don’t travel well once they’re dressed, and the olive oil and balsamic will pool, making everything soggy in transit. Bring everything separately—tomatoes in a container, burrata in its water, olive oil in a small jar, and basil leaves in a damp paper towel—and assemble in two minutes when you arrive.
Family verdict: This is the side that makes people stop mid-conversation to look at the platter before they even take a piece. Maya thinks it’s the most beautiful thing at any cookout table. Jake will eat the burrata straight off the platter like cheese and leave the tomatoes behind, which I’ve stopped addressing because at least someone’s eating the burrata.
4. Fresh Corn & Black Bean Salsa Salad
So this one sits right at the line between a salsa and a salad, and I’ve decided it doesn’t matter which side of the line it falls on because it’s excellent either way. Served with tortilla chips, it’s a dip. Spooned alongside grilled chicken or fish, it’s a salad. Either way, it takes about fifteen minutes, requires zero heat, and finishes at every single cookout I’ve ever brought it to, you know?
What you need (serves 8): 4 ears of fresh sweet corn, kernels cut straight off the cob—no cooking required when the corn is this fresh and sweet in peak summer. 2 cans of black beans, drained and rinsed 2 cups of cherry tomatoes, quartered 1 red bell pepper, finely diced 1 jalapeño, seeded and very finely minced Half a red onion, very finely diced 1 ripe avocado, diced — add this right before serving A big handful of fresh cilantro, roughly chopped Juice of 2 limes 2 tablespoons of olive oil 1 teaspoon of cumin Half a teaspoon of chili powder Salt and pepper Cotija cheese or feta, crumbled over the top
Here’s how it goes: Cut the corn kernels off the cob by standing each ear upright in a large bowl and running a sharp knife straight down the sides—the bowl catches all the kernels and the sweet corn milk that comes with them, which adds to the flavor. Add the black beans, cherry tomatoes, bell pepper, jalapeño, and red onion. Whisk together the lime juice, olive oil, cumin, chili powder, salt, and pepper, then pour the mixture over the vegetables. Toss well, then let it sit for 10 minutes while the flavors come together.
Right before serving, gently fold in the diced avocado and fresh cilantro—the avocado needs to go in last so it stays in pieces rather than getting mashed. Scatter cotija or crumbled feta over the top and serve immediately.
Julia’s real tip: The raw, fresh corn right off the cob is the whole point of this salad in summer. I know the instinct is to cook it, but peak summer sweet corn, eaten raw, is genuinely sweet and tender, with a fresh pop of texture that cooked corn doesn’t replicate. Don’t add heat to something that doesn’t need it, you know?
Family verdict: OH MY GOSH, this is the side that gets the most “what IS this?” reactions at cookouts, in the best possible way. Jake eats it with tortilla chips and bypasses the vegetables entirely because it looks like a dip. That’s a parenting win I’ve been milking for two summers.
5. Creamy Avocado Ranch Pasta Salad
Now here’s the thing—I know I told you in the cold pasta salad article to dress warm pasta for the best flavor, and that still applies here. But this version uses a completely different, incredibly fast dressing that doesn’t need to soak in the same way. The avocado ranch dressing is thick and rich enough to coat everything beautifully, even when the pasta is cold straight from the fridge, and it comes together in the blender in about ninety seconds, you know?
What you need (serves 8): 1 pound of rotini or bow tie pasta, cooked al dente and cooled completely. 1 cup of cherry tomatoes, halved; 1 English cucumber, diced; 1/2 cup of frozen corn, thawed—just put it on the counter for 15 minutes. Half a cup of shredded cheddar cheese, half a red onion, finely diced, and 3 strips of cooked bacon, crumbled—you can cook bacon the night before
For the avocado ranch dressing: 2 ripe avocados, 1/2 cup buttermilk, 1/4 cup mayonnaise, 2 tablespoons fresh lemon juice, ice, 1 clove garlic, 2 tablespoons fresh dill, 2 tablespoons fresh parsley, salt, pepper, and a pinch of garlic powder.
Here’s how it goes: Blend all the dressing ingredients until completely smooth and creamy. Taste it—it should be bright and herby. Season well. The dressing can be made up to a day ahead and stored in the fridge with plastic wrap pressed directly on the surface to prevent browning.
Combine the cold pasta with the cherry tomatoes, cucumber, corn, cheddar, and red onion in a large bowl. Pour the dressing over and toss until everything is generously coated. Top with the crumbled bacon right before serving so it stays crispy. Taste, adjust seasoning, and done.
Julia’s real tip: This dressing doubles as a vegetable dip, a sandwich spread, and a salad dressing for any green salad. Make extra and keep it in the fridge. It keeps for two days pressed under plastic wrap, and it improves everything it touches.
Family verdict: Dan requested this at our last three cookouts in a row, which I’m interpreting as the highest form of culinary endorsement from a man who once called pasta salad “cold pasta.” Maya puts the leftovers over a bed of arugula the next day and calls it a proper lunch. She’s not wrong.
6. Mango Jalapeño Slaw
Here’s the thing—regular coleslaw is great, and I make it all the time, but this version takes everything you love about coleslaw and turns it into something tropical and unexpected. The mango adds sweetness and juice, the jalapeño adds a slow-building heat, the lime dressing keeps everything bright, and the whole thing pairs with grilled fish and shrimp in a way that regular coleslaw can’t, you know?
What you need (serves 6 to 8): Half a head of green cabbage, very finely shredded 2 large ripe mangoes, peeled and julienned or diced small 2 jalapeños, seeded and very finely sliced—keep some seeds if you want real heat Half a red onion, very thinly sliced 1 large carrot, grated A big handful of fresh cilantro A small handful of fresh mint leaves, torn.
For the lime dressing: juice of 3 limes, 2 tablespoons of olive oil, 1/2 teaspoon of cumin, salt, and pepper.
Here’s how it’s salted: Whisk together the lime juice, olive oil, honey, and cumin, then season generously. Combine the cabbage, mango, jalapeño, red onion, and carrot in a large bowl. Pour the dressing over and toss well. Let it sit for 15 to 20 minutes before serving—the lime juice softens the red onion slightly, the cabbage picks up the mango juice, and everything becomes more cohesive. Scatter the cilantro and fresh mint over the top right before serving.
Julia’s real tip: This slaw gets better as it sits for up to about 2 hours, then about an hour when it’s soft. Make it within two hours of serving—not the day before—for this one; the mango releases too much liquid, which softens the cabbage. Same-day only, you know?
Family verdict: Maya called this “resort food,” which I think she meant as a compliment. Jake said, “This tastes weird,” and then ate a large portion, which is his highest rating for anything containing cabbage. I’ll take it.
7. Antipasto Skewers
So now here’s the side that requires the least skill and gets the most attention at any cookout table—antipasto skewers. Everything you love about an antipasto platter, threaded onto a toothpick or small skewer in the right order so every bite has a little of everything. No cooking, about ten minutes of assembly, and they look like you spent the morning on them, you know?
What you need (makes about 30 skewers): One eight-ounce container of fresh ciliegine mozzarella balls—the small ones. One six-ounce container of marinated artichoke hearts, drained. One cup of Kalamata olives. One cup of pepperoncini peppers. One six-ounce package of salami slices, folded into quarters. One six-ounce package of prosciutto, torn into small pieces. One pint of cherry tomatoes. Fresh basil leaves. Toothpicks or small bamboo skewers.
For the drizzle: Good olive oil, balsamic glaze, dried oregano, flaky salt
Here’s how it goes: Thread each skewer with a pattern—cherry tomato, folded salami, mozzarella ball, basil leaf, prosciutto piece, artichoke heart, olive, and pepperoncini—in any order you like. The order is flexible, but vary the colors so each skewer looks interesting. Arrange them all on a platter, drizzle olive oil and balsamic glaze over everything, and scatter dried oregano and flaky salt over the top.
That’s genuinely it. The Saltolele assembly takes about 10 minutes once you get into a rhythm. Set them up on the platter the morning of the cookout, cover with plastic wrap, refrigerate, and pull them out thirty minutes before serving to come to room temperature. They hold beautifully, you know?
Julia’s real tip: Set up a little assembly line—ingredients in separate bowls in order of threading. Put on a podcast or music, get into the rhythm, and you’ll have thirty skewers done in ten minutes. Trying to gather ingredients one skewer at a time is how this takes forty-five minutes, leaving you frustrated. Assembly line, every time.
Family verdict: These disappear faster than anything else on the table. Faster than the main protein even, which I find both validating and slightly ridiculous. Jake picks off the mozzarella and the salami and declares himself satisfied. Maya makes them herself now and presents them with what I can only describe as quiet artistic pride.
8. Watermelon, Cucumber & Tajín Salad
So last but absolutely not least favorite—this is the side that makes people stop at the table and say, “Wait, what is that?” It’s watermelon and cucumber, the most hydrating, refreshing combination on a hot summer day, with a heavy dusting of Tajín—that Mexican chili-lime seasoning that makes everything it touches more interesting. It takes eight minutes. It serves a crowd. It tastes like the best possible version of summer, you know?
What you need (serves 8): Half a large seedless watermelon, cut into triangles or cubed. 2 English cucumbers, sliced into thick rounds. Juice of Juicemes: 2 to 3 teaspoons of Tajín seasoning—more if your crowd likes it. Eat a handful of fresh mint, Tor. n. Flaky sea salt. Optional: crumbled cotija cheese scattered over the top. Optional: a thin drizzle of honey
Here’s how it goes: Arrange the watermelon and cucumber on a wide platter, alternating them so each piece of watermelon sits next to a piece of cucumber—the visual contrast is beautiful. The flavor pairing of each bite is the whole point. Squeeze the lime juice over everything. Dust generously with Tajín—don’t be timid; the seasoning needs to be visible and present, not just hinted at. Scatter the fresh mint and a pinch of flaky salt over the top. Add the cotija, if using. Salt with a very light drizzle of honey.
Serve immediately—this doesn’t hold well once the lime juice is on, as the watermelon starts releasing liquid and the Tajín gets absorbed. Make it, serve it, and eat it. That’s the whole contract.
Julia’s real tip: Find Tajín at any grocery store in the international aisle or the spice section—it’s become much more widely available over the last few years. If your store doesn’t carry it, a mix of chili powder, lime zest, and salt gets you most of the way there. But the salt thing is worth finding because the flavor balance is very specific and very right, you know?
Family verdict: Jake asked me to put Tajín on his watermelon every summer for the rest of his life after the first time he tried this. That’s a direct quote. I’m holding him to it. Maya brings this to any summer gathering she’s invited to contribute food to and accepts the compliments on my behalf, which is fine; I’ve made my peace with it.
So eight sides require nothing but a knife, a bowl, and good ingredients. No oven competing with your air conditioning. No stove that needs watching. No timing coordination with whatever’s on the grill. Just prep it, put it on the table, and let summer produce do what summer produce does best when you leave it mostly alone.
The whole point of a no-cook side dish isn’t to take a shortcut. It’s that you’re making a smart decision about when cooking actually improves something and when it just gets in the way. In July, with tomatoes, corn, watermelon, and mangoes at their peak? It mostly just gets in the way, you know?
You’ve got this. Now go to the farmers’ market this weekend and buy too much of everything.
— Chef Julia


Discussion about this post