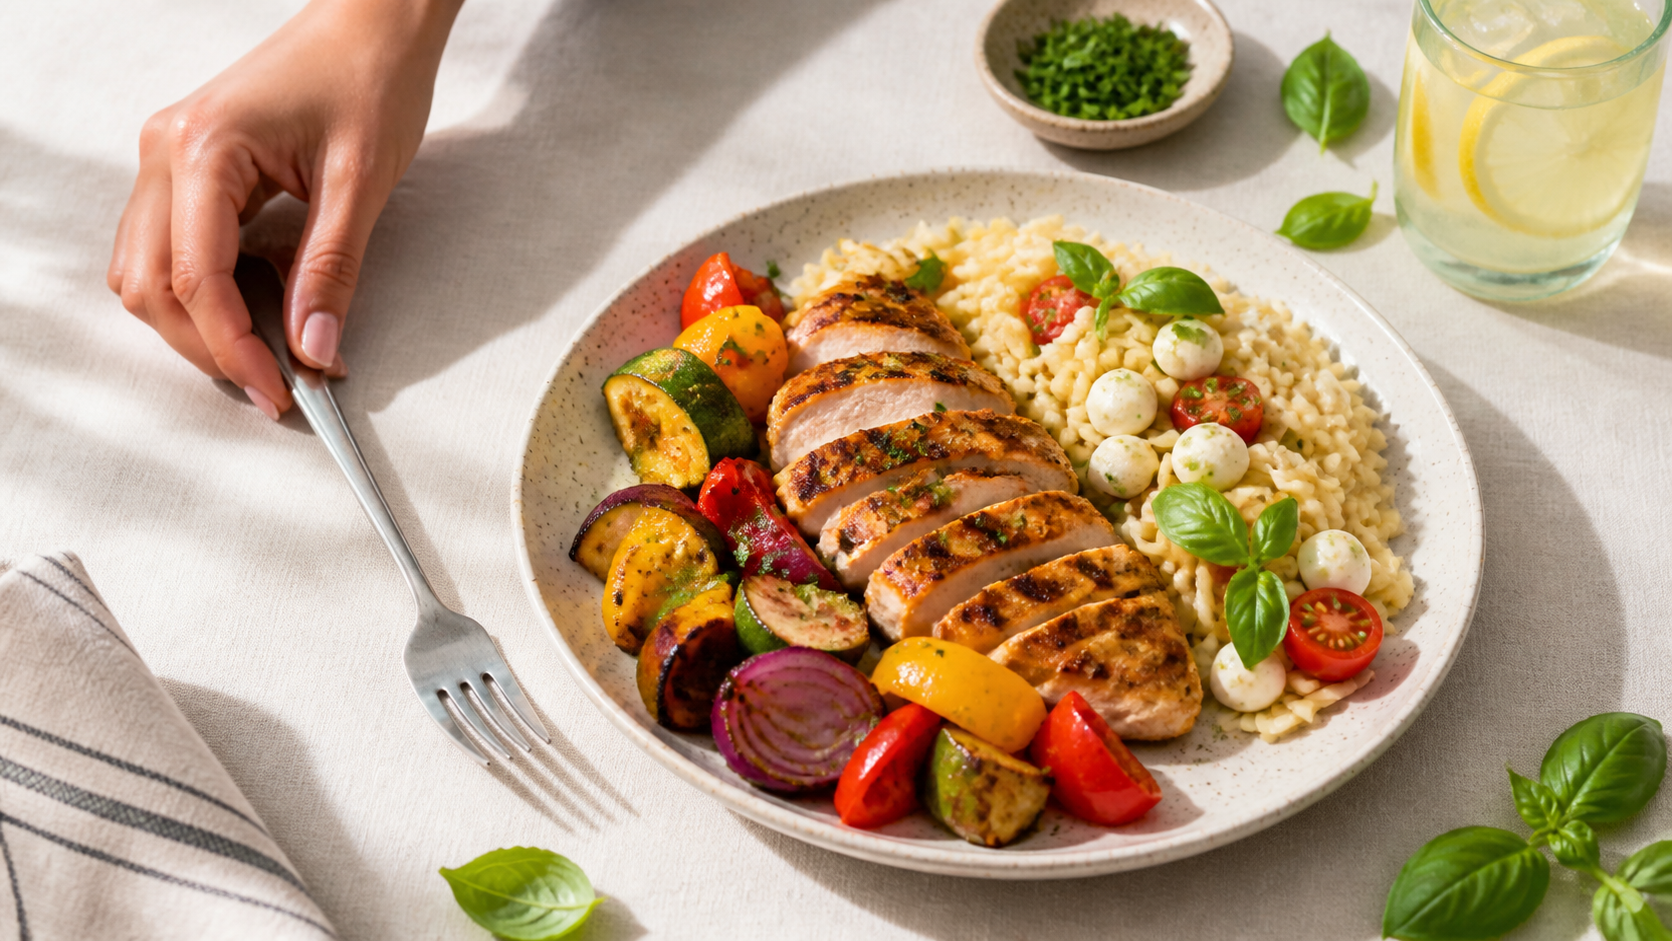
So I want to have an honest conversation about grocery budgets because I think there’s a version of food content out there that pretends budget cooking is either embarrassing or a temporary inconvenience until you can afford better. I find both of those ideas genuinely offensive. I’ve been cooking professionally for fifteen years, and I will tell you without hesitation that some of the most satisfying, most delicious, most creatively interesting food I have ever made came from a tight budget and a near-empty refrigerator, you know?
Last summer, we had a month where the catering jobs were slow, Tyler needed new baseball cleats that cost approximately one kidney, and Marisol’s art supply list for camp was longer than our grocery list. I had to feed four people real dinners—not sad dinners, not apology dinners, not cereal-and-toast dinners—on genuinely limited money for three straight weeks. And here’s what I discovered, ed or maybe rediscovered, because professional kitchens have always known this: cheap ingredients treated with respect and seasoned properly and cooked with a little thought will beat expensive ingredients cooked carelessly every single time. Every. Single. Time.
Here’s the thing about summer specifically — it is the absolute best time of year to eat well on a budget because the produce is extraordinary and cheap simultaneously, which rarely happens with anything worth having, you know? Peak summer corn. Tomatoes so ripe they’re practically falling apart. Zucchini is so abundant that your neighbors leave bags of it on your porch without asking. Fresh herbs for practically nothing. All of it at farmers market prices that are often lower than the grocery store for significantly better quality. Summer is genuinely on your side when you’re cooking on a budget, and I want you to feel that as an advantage rather than a constraint.
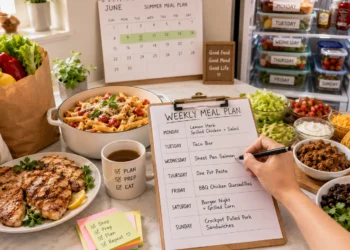
Every dinner in this post serves four people for under $15. I’ve priced them at current Midwest grocery store prices, and I’ve been conservative — meaning I’ve assumed you’re not finding anything on sale, you’re not using a warehouse club, and you don’t have a garden. If any of those things apply to you, you’re doing even better. These aren’t compromised dinners dressed up with optimistic language. They’re genuinely good food that happens to cost almost nothing, and I’m proud of every single one of them, you know?
Dinner 01 — Big Pot of Smoky Red Beans & Rice with Andouille
Total Cost approximately $9| Serves: 4–6 | Time: 35 minutes
So this is the recipe that taught me everything I know about budget cooking, and I mean that literally. I learned it from a chef I worked under early in my career who grew up in Louisiana and made red beans and rice every Monday because that’s what you did — you made red beans and rice on Monday with whatever smoked sausage you could afford. You fed everyone, and it was deeply, completely satisfying every single time without exception. I have been making it ever since, and I will make it for the rest of my life, you know?
Here’s the thing about beans — they are the most underrated ingredient in any home kitchen, and I’ll stand behind that statement in any room. They’re cheap, they’re filling, they’re high in protein and fiber, they absorb flavor from everything around them, and when you give them time in a pot with aromatics and smoked sausage, they become something that tastes like it cost three times what it actually did. I’ve served red beans and rice to professional cooks and watched them close their eyes at the first bite. It’s that kind of food.
I’ll be real with you — the andouille sausage is doing heavy lifting here, and the good news is that a little goes a long way. You don’t need a pound of it. Half a pound, sliced thin and browned properly, perfumes the entire pot, pro, giving you that smoky, spiced, deeply savory backbone that makes the whole dish feel rich and substantial, even though beans and rice are among the cheapest things you can put in a pot, you know?
Marisol asked me last summer why we don’t have this every week, and honestly, I didn’t have a good answer. We basically do now.
Ingredients
- 2 cans red kidney beans, drained and rinsed (about 30 oz total — or dried beans cooked ahead if you’re planning)
- ½ lb andouille sausage, sliced into thin rounds (or any smoked sausage — kielbasa is a great budget substitute)
- 1½ cups long-grain white rice
- 1 medium onion, diced
- 3 stalks of celery, sliced
- 1 green bell pepper, diced (the holy trinity — onion, celery, and bell pepper — is the flavor foundation here and cannot be skipped)
- 4 cloves garlic, minced
- 2 cups chicken broth (or water with a bouillon cube — genuinely fine)
- 1 can diced tomatoes, drained
- 1 tsp smoked paprika
- 1 tsp dried thyme
- ½ tsp dried oregano
- ½ tsp cayenne pepper (adjust to your heat tolerance)
- 2 bay leaves
- Salt and black pepper
- 2 tbsp vegetable oil
- Green onions and hot sauce to serve
Instructions
Step 1. Cook your rice according to package directions while you work on everything else — get it going first because it takes the longest and you want it ready when the beans are done. Fluff it with a fork when it’s done and leave it covered to stay warm and steam through.
Step 2. Heat your oil in the largest, heaviest pot you have over medium-high. Add the andouille slices in a single layer and let them brown without touching for about 2 minutes per side. You want real caramelization on the cut sides — those browned bits are pure flavor, and they’re going to dissolve into the whole pot and season everything, you know? Remove the sausage tplatetee,e but leave every bit of that rendered fat in the pot. That’s your cooking medium for the vegetables, etc., and it’s irreplaceable.
Step 3. Add onion, celery, and bell pepper to the pot with the sausage fat and cook over medium heat for about 6 minutes, stirring occasionally, until everything is softened and the onion is translucent. Add the garlic for another minute. Season with salt, smoked paprika, thyme, oregano, and cayenne. Stir to coat the vegetables in the spices and cook for 30 seconds until fragrant — this blooming step wakes up the dried spices and makes a real difference in the final flavor, you know?
Step 4. Add the drained tomatoes, broth, bay leaves, and drained beans. Return the browned sausage to the pot. Stir everything together, bring to a simmer, and cook uncovered for about 15 minutes, stirring occasionally. As it cooks, use the back of a wooden spoon to smash some of the beans against the side of the pot — not all of them, maybe a quarter to a third — which releases their starch and thickens the whole thing into a creamy, saucy consistency rather than beans floating in thin liquid. That smashing step is the technique that separates good red beans from extraordinary red beans, and I want you to have it, you know?
Step 5. Remove the bay leaves. Taste aggressively and adjust — more salt, more cayenne, a little more smoked paprika if it needs depth. Ladle it generously over the cooked rice in wide bowls—Scatter green onions over the top. Put hot sauce on the table. Eat something that costs under three dollars a person and tastes as good as it belongs in a restaurant, because it genuinely does.
Chef’s Notes & Family Verdict
Tyler ate two full bowls on the first night I made this and then asked what “the smoky stuff” was. I told him it was andouille sausage. He said, “we should put that in everything.” Isaiddi, “welcome to Louisiana cooking, buddy.” He seemed satisfied with that answer.
Marisol is on a personal mission to see how many drops of hot sauce she can add before it becomes “too spicy,” which is a scientific experiment I support in theory and gently supervise in practice. Current record is six drops. We’re all impressed.
This reheats better than almost anything I make — the beans absorb even more flavor overnight, and the whole pot tastes more complex on day two than day one. Make a double batch if you have a big enough pot. Future you on a Wednesday night will feel like past you was a genuinely thoughtful and caring person.
Variations I’ve Tested
Make it fully plant-based by swapping the andouille for a teaspoon of liquid smoke and an extra tablespoon of smoked paprika — the flavor depth is different but genuinely good in its own right and costs even less. Add two cups of chopped kale or collard greens in the last ten minutes for something more substantial and nutritionally complete that the greens people in your life will appreciate. Use black beans instead of kidney beans and swap the andouille for chorizo for a completely different Latin-inspired direction that is equally delicious and equally cheap, you know?
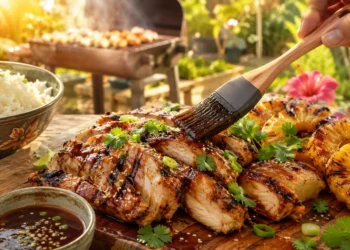
Dinner 02 — Sheet Pan Sausage & Summer Vegetables
Total CoCostapproximately $11 | Serves: 4 | Time: 30 minutes
No, this is the dinner I make when I need something that feels substantial and satisfying and requires approximately zero brain involvement,n,t because some days that’s what the situation calls for,r. I’m not apologetic about it, you know? Everything goes on one pan. One pan goes in the oven. You do something else for 25 minutes. Dinner comes out of the oven looking golden and caramelized,, smelling incredible,, and nobody at the table needs to know that the effort level was somewhere between “actively cooking” and “pointing at things.”
Here’s the thing about summer sausage — by which I mean any inexpensive smoked or Italian sausage link, not the shelf-stable kind — it is one of the greatest budget proteins because it brings its own seasoning, its own fat, and its own flavor to the pan and generously shares all of that with every vegetable it touches. The fat renders out and coats the zucchini,,, peppers,,, and cherry tomatoe,s,, and they roast in this savory, seasoned sausadrippingsings that you cannot replicate with olive oil alone. It’s the cooking equivalent of a generous coworker who shares everything they have and makes everyone around them better, you know?
Last summer, I made this three times in one week during a particularly brutal stretch of hot days, and not one person at my table complained, which, in a household with a 12-year-old who notices repetition and an 8-year-old who has rota,t ing, inexplicable fooopinionsns, is genuinely remarkable.
Ingredients
- 4 Italian sausage links, sweet or hot (about 1 lb total — look for whatever’s on sale)
- 2 medium zucchini, sliced into thick half-moons
- 2 bell peppers, any color, cut into 1-inch pieces
- 1 pint cherry tomatoes, left whole
- 1 large red onion, cut into wedges (keep the layers intact so they don’t fall apart)
- 4 cloves garlic, smashed and left whole (they roast and become sweet and golden and incredible)
- 3 tbsp olive oil
- 1 tsp dried Italian seasoning
- ½ tsp smoked paprika
- Salt and cracked black pepper
- Fresh basil to finish
- Crusty bread or pasta alongside (bread is cheaper and honestly better here)
Instructions
Step 1. Preheat your oven to 425°F — actually hot, not kind of hot. High heat caramelizes the vegetables, gives the sausage a golden crust, and makes everything taste like it was cooked with intention rather than convenience, which it was both of, you know?
Step 2. Slice your sausage links into thick coins — about an inch each. This gives you more surface area to brown and more sausage-to-vegetable contact points, resulting in more flavor transfer throughout the pan. Spread your gessausages, all the esvegetables, and garlic cloves on the largest sheet pan you own. If everything is crowded on one pan, it’ll steam instead of roast, and you’ll lose the caramelization that makes this dish great — use two pans if you need to, or work in batches.
Step 3. Drizzle olive oil over everything, sprinkle with Italian seasoning, smoked paprika, salt, and a generous amount of black pepper. Use your hands to toss everything together until coated — yes, your hands —they’re the best mixing tool you own, and using them means every piece gets touched, coated, and positioned properly on the pan, rather than having dry spots on the bottom and over-oiled spots on top, you know?
Step 4. Spread everything into a single layer — this is the rule, the only rule, the one thing that cannot be compromised. Single-layer means roasting. Piled up means steaming. They are different foods. Roast at 425°F for 20 to 22 minutes, flipping once at the halfway point, until the sausage is golden, the vegetables have caramelized edges, the cherry tomatoes have burst and become jammy, and the garlic is soft and golden and perfect.
Step 5. Tear fresh basil right over the hot pan as it comes out of the oven — the heat wilts it slightly and releases the oils, and the smell at that moment is genuinely one of the best things a kitchen can produce for free. Bring the whole pan to the table with the bread. Let everyone serve themselves straight from the pan, which means one less serving dish to wash. It also gives dinner a rustic, communal quality that makes it feel intentional and warm rather than simple and economical, which it is both of simultaneously, and that’s the whole point, you know?
Chef’s Notes & Family Verdict
Tyler eats the cherry tomatoes first, deliberately, individually, one by one, before addressing the rest of his plate. When I asked why, he said, “because they’re the best part and I want to start with the best part.” I could not argue with that logic.
Marisol makes a small pile of everything on her plate and eats it in careful forkfuls of sausage and vegetables, which she calls “one of each.” She has a system for everything, and I’ve fully accepted that this is just who she is.
The leftovers from this dinner go into a pasta the next night — cook a pound of rigatoni, drain it, toss it with the leftover sheet pan contents warmed in a skillet, and add a splash of pasta water and a handful of parmesan. Two dinners for under fifteen dollars total. That’s the math that keeps a family fed well on a real budget, you know?
Variations I’ve Tested
Use chicken thighs instead of sausage — bone-in, skin-on thighs are often the cheapest protein in the store, and they roast beautifully on a sheet pan in exactly this same situation. Add a can of white beans to the pan in the last 10 minutes for extra protein and substance, almost to the point of the crumble.st Swatheee Italian seasoning for za’atar and serve with warm pita and a dollop of plain yogurt for a Middle Eastern-inspired direction that costs the same and tastes completely different and wonderful.
Dinner 03 — Tomato Egg Drop Shakshuka
Total CoCostapproximately $7 | Serves: 4 | Time: 25 minutes
So here’s the dinner that consistently shocks people when I tell them how cheap it is, because it looks and tastes like something from a brunch restaurant that charges eighteen dollars a plate and uses words like “rustic” and “artisanal” on the menu. It’s eggs poached in a spiced tomato sauce, and it is one of the greatest things you can make for almost no money, you know?
I’ll be real with you — shakshuka became a weeknight regular in our house almost by accident. I had a can of crushed tomatoes, six eggs, half an onion, and a desperation energy one Tuesday evening,, and I made it for the first tim,e, not expecting much. My husband walked in, looked at the pan, and said, “are we having that at a restaurant?” I said, “we’re having it in our kitchen for about two dollars a person.” He looked at me for a long moment and then said: “you’re incredible.” I mean, he was talking about the food, but I’ll take it either way, you know?
Here’s the thing about eggs as a dinner protein — they’re nutritionally complete, they cook in under ten minutes, they absorb flavor from whatever they’re cooked in or alongside, and they cost almost nothing. A six-egg shakshuka feeds four people generously, and the egg carton costs less than almost any other protein you could buy. Using eggs as a dinner ingredient rather than strictly a breakfast ingredient is one of the most practical cooking decisions a budget-conscious person can make, and I want to destigmatize it right now fully.
Ingredients
- 6 large eggs
- 2 cans crushed tomatoes (28 oz total — this is the backbone of the dish, get a brand you like)
- 1 medium onion, diced
- 1 red bell pepper, diced
- 5 cloves garlic, minced
- 2 tbsp olive oil
- 2 tsp smoked paprika
- 1 tsp cumin
- ½ tsp turmeric (optional — adds color and a subtle earthy note)
- ½ tsp red pepper flakes (or more — this dish welcomes heat)
- 1 tsp sugar (balances the acidity of the canned tomatoes)
- Salt and black pepper
- Fresh parsley or cilantro to finish
- Crumbled feta on top if budget allows (it’s about two dollars extra and worth every penny)
- Crusty bread or warm pita, absolutely mandatory
Instructions
Step 1. Heat olive oil in your largest, deepest skillet or a wide Dutch oven over medium heat. Add the onion and bell pepper, and cook for about 7 minutes, stirring occasionally, until the vegetables are tender and the onion is starting to turn golden at the edges. Don’t rush this step — properly softened aromatics are the foundation of the sauce, and if you add the tomatoes before they’re fully cooked, you’ll have bits of raw onion in your finished dish, and that’s not what we’re after, you know?
Step 2. Add the garlic and all the spices — smoked paprika, cumin, turmeric (if using), red pepper flakes — and cook for 1 minute, stirring constantly, until the spices are fragrant and coat the vegetables. This is the blooming step where the flavor of this dish is built. Dried spices in oil get toasty and complex in a way they don’t when you add them to liquid. One minute. It matters enormously.
Step 3. Pour in the crushed tomatoes and add the sugar and a generous pinch of salt. Stir everything together and bring to a simmer. Let the sauce cook, uncovered, for about 8 minutes, stirring occasionally, until it thickens slightly and deepens in color and the whole kitchen smells like something genuinely wonderful is happening. Taste the sauce now — before the eggs go in — and adjust seasoning. More salt? More paprika? More heat? Fix it at this stage because once the eggs are in, you’re committed, you know?
Step 4. Use a spoon to make six wells in the sauce — clear pockets where you can see the bottom of the pan through the tomatoes. Crack an egg carefully into each well. Season the eggs with a small pinch of salt. Cover the pan with a lid and cook over medium-low heat for 5 to 8 minutes, depending on how you like your yolks. Five minutes gives you a runny yolk that bleeds beautifully into the sauce when you break it. Eight minutes gives you a fully set yolk. I am firmly in the six-minute camp because a yolk that’s still slightly jammy in the center is the perfect textural counterpoint to the thick, spiced tomato sauce, and I feel strongly about this.
Step 5. Remove the lid and scatter fresh parsley or cilantro generously over everything. Crumble feta over the top if you’re using it — and you should use it because the salty, tangy feta against the sweet-spiced tomatoes and rich egg yolk is a combination that punches so far above its price point that it almost feels like cheating. Bring the whole pan straight to the table. Put the bread in the center. Tell everyone to tear and dip and scoop and enjoy something that costs seven dollars and tastes as good as going somewhere good for dinner, you know?
Chef’s Notes & Family Verdict
Tyler was skeptical about “eggs for dinner” the first time I made this. He is no longer skeptical. He specifically requests it now and uses his bread to get every last bit of sauce from the pan, which I consider a conversion of the highest order.
Marisol said this tastes “like fancy pizza sauce but with eggs in it,” which is a description I find oddly accurate and have never been able to improve upon. She’s eight. She might be a genius.
The bread is not optional here. I want to be clear about that. The sauce is too good to leave in the pan; you need something to get it out, and a fork doesn’t cut it. Get the best bread you can afford — a cheap baguette or a bag of pita is less than two dollars and turns a seven-dollar dinner into something that feels genuinely complete and satisfying. Budget well spent, you know?
Variations I’ve Tested
Add a can of drained chickpeas to the tomato sauce before the eggs go in for extra protein and substance that make this a more filling dinner for bigger appetites — adds about a dollar to the total Cost and significantly improves satisfaction. Stir in a tablespoon of harissa into the sauce for North African heat and complexity that transforms the whole flavor profile in 30 seconds. Top with a dollop of plain Greek yogurt instead of feta for a cooling, creamy element that costs less and works beautifully against the spiced tomatoes.
Dinner 04 — Corn, Black Bean & Avocado Quesadillas
Total CoCostapproximately $10 | Serves: 4 | Time: 20 minutes
Now here’s the dinner that my kids would eat every single night if I let them, nd honestly, some weeks I practically do, because it’s fast, it’s filling, it uses ingredients I almost always have, and it costs almost nothing while somehow managing to feel like a real meal rather than a “we ran out of ideas” meal, you know?
Here’s the thing about quesadillas — they get underestimated because they’re associated with children’s menus and quick lunches, and I want to formally dispute that positioning, cause a properly made quesadilla with good fillings,, aproperly hot pan, and a properly crispy tortilla is legitimately excellent food that I would eat anywhere. The key words there are “properly made” because a quesadilla made in a pan that isn’t hot enough, stuffed with too many wet ingredients, is a soggy, sad thing that deserves its reputation. A quesadilla made correctly is something entirely different.
The corn and black bean filling here is the move — sweet summer corn cut fresh off the cob, black beans seasoned properly, and pepper jack cheese that melts into everything, and ripe avocado that goes in at the end. Hence, it stays cool and creamy against the hot, crispy tortilla. That temperature contrast is the whole experience, you know?
I developed the specific filling combination during a week when the budget was particularly tight, and I had corn from a farm stand, a can of black beans, and a block of cheese. Tyler ate three of them. I consider that the only review that matters.
Ingredients
- 8 large flour tortillas (the burrito-size ones — more filling capacity and better crisping surface)
- 2 cups shredded pepper jack or cheddar cheese (shred it yourself from a block — cheaper and melts better than pre-shredded)
- 2 ears fresh corn, kernels cut off (about 1½ cups — or frozen corn thawed and dried)
- 1 can black beans, drained, rinsed, and patted dry (dry beans mean crispier quesadillas — wet beans make things soggy)
- 2 ripe avocados
- ½ red onion, finely diced
- 1 jalapeño, seeded and minced (optional — Tyler gets his without, I get mine with)
- Juice of 1 lime
- 1 tsp cumin
- ½ tsp chili powder
- Salt and pepper
- Frescilantro, if you have it
- Sour cream and salsa to serve (store bought, and both — genuinely fine)
Instructions
Step 1. Season your beans and corn together in a bowl — cumin, chili powder, salt, pepper, and half the lime juice. Toss together and taste. This filling needs to be well-seasoned because once it’s inside a tortilla with cheese and the heat is on, you can’t adjust it. Season it until it tastes good, and it’ll taste great inside the quesadilla on its own, you know?
Step 2. Make your quick avocado situation: roughly mash the avocados with the remaining lime juice, red onion (jalapeño if you have it), cilantro (if you have it), and salt. Keep it chunky — this isn’t guacamole, it’s a filling, and texture is your friend here. Set it aside at room temperature while you cook the quesadillas. Cold avocado straight from the fridge inside a hot quesadilla creates a temperature situation I don’t love. In contrast, room-temperature avocado melts slightly against the hot cheese, creating a genuinely wonderful texture.
Step 3. Heat a large skillet or griddle over medium-high until it’s genuinely hot — you should be able to hold your hand 6 inches above it for about 2 seconds before pulling away. No oil needed for flour tortillass—hesthe tortillas ”s natural oils handle the crisping. Lay one tortilla flat in the pan. Scatter a generous layer of cheese on one half, then a scoop of the corn and bean mixture over the cheese, then another layer of cheese on top of the filling. The cheese on both sides of the filling acts as glue, holding everything together when you flip, you know? Fold the empty half over the filled half to make a half-moon.
Step 4. Cook for 2 to 3 minutes until the bottom is deeply golden and crispy — and I mean deeply golden, not pale gold, not cream with some color, but that rich, toasty brown that means the tortilla has properly crisped up and the cheese is fully melted inside. Flip carefully with a wide spatula, then cook for another 2 minutes on the second side. The second side always cooks faster than the first,ttt so watch it closely. Remove to a cutting board and let it sit for one full minute before cutting — this matters because cutting immediately lets all the melted cheese escape,, d you lose the structural integrity of the whole situation.
Step 5. Cut each quesadilla into three triangles. Open each one slightly and tuck a spoonful of the avocado mixture inside. At the same time, it’s still hot — this is the move, this is what makes these different from regular tacos: the cool, creamy avocado against the hot, crispy tortilla and melted cheese is a textural and temperature experience that makes people genuinely stop talking for a moment, you know? Sour cream and salsa on the side for under three dollars a person. Feel good about this.
Chef’s Notes & Family Verdict
Marisol builds what she calls “the perfect triangle”—she holds each piece by the point, rotates it to assess its crispiness level, and then approves or rejects it based on criteria she has never fully explained to me. All of them have been approved so far. I choose not to examine this too closely.
Tyler eats his with an aggressive amount of salsa that I’m not sure his stomach fully endorses,, but he seems committed to the bi,t, so we support him.
These reheat reasonably well in a dry skillet for about a minute per side — much better than the microwave, which destroys the crispiness and makes them sad and limp, which they don’t deserve after all that effort, you know?
Variations I’ve Tested
Add leftover or rotisserie chicken to the filling for a more protein-forward version that still clocks in under $15 for 4 people. Swap the pepper jack for crumbled cotija cheese mixed with a little regular shredded cheese for a more authentic, interesting flavor. A teaspoon of chipotle in adobo mashed into the avocado filling adds a smoky heat that completely elevates the whole thing and costs nothing extra if you keep a can in the pantry, which I always do.
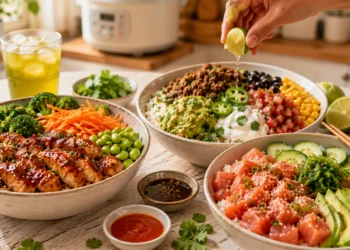
Dinner 05 — Summer Vegetable Fried Rice
Total CoCostapproximately $8 | Serves: 4 | Time: 20 minutes
So this is the dinner that I originally invented as a leftover situation and accidentally made so good that now I make it on purpose from scratch, which I think is the best origin story a recipe can have, you know? Day-old rice, whatever vegetables are looking good and cheap, a few eggs, soy sauce, and a very hot pan. Twenty minutes. Eight dollars. Four happy people and a pan that looks like it was attacked by someone who was very enthusiastic about dinner.
Here’s the thing about fried rice that took me embarrassingly long to learn,, despite fifteen years of professional cooking: the secret is day-old rice and ascreaming-hott pan. Fresh rice has too much moisture and turns into a sticky, clumping mess when you try to fry it. Day-old rice has dried out in the fridge, and the individual grains separate, get coated in oil and sauce, and develop those beautiful, crispy edges that make real fried rice taste so different from everything else. If you don’t have day-old rice, cook it in the morning and spread it on a sheet pan to dry for a few hours. That works too, you know?
The summer vegetable version is my favorite because peak summer produce — corn, zucchini, snap peas, whatever is cheapest and best right now — makes fried rice feel completely different from the takeout version in the best way. It’s bright, fresh, and more interesting, and it costs a fraction of what you’d pay for a takeout order, which at current delivery prices is genuinely substantial savings, you know?
Ingredients
- 3 cups cooked day-old rice (long-grain white rice, jasmine, or brown rice — all work)
- 3 large eggs, lightly beaten
- 2 cups fresh corn kernels (from about 2 ears — or frozen, thawed and dried)
- 1 medium zucchini, diced small
- 1 cup snap peas, roughly chopped (or frozen peas thawed — cheaper and completely fine)
- 3 green onions, sliced (white and green parts separated)
- 4 cloves garlic, minced
- 1 tbsp fresh ginger, grated (or ½ tsp ground ginger in a pinch)
- 3 tbsp soy sauce (or tamari — this is the primary seasoning, ing so don’t be shy)
- 1 tbsp sesame oil (adds that signature fried rice fragrance — don’t skip it)
- 2 tbsp vegetable oil, divided
- 1 tsp rice vinegar
- ½ tsp white pepper (or black pepper — white pepper is more traditional and worth having)
- Optional: a drizzle of chili oil or sriracha to finish
Instructions
Step 1. Get everything prepped and ready before you turn on the heat because fried rice moves fast, and there is no time for chopping vegetables once the wok or pan is hot. This is a mise en place recipe — everything needs to be cut, measured, and within arm’s reach before anything goes near the heat. I mean it. The difference between great fried rice and scrambled fried rice chaos is being organized before you start, you know?
Step 2. Heat your largest skillet or wok — and a wok is genuinely better here if you have one; the curved sides let you toss things properly — over the highest heat your stove can produce. Add 1tablespoon of vegetable oil and cook until just barely smoking. Add the white parts of your green onions, garlic, and ginger, er and stir constantly for 30 seconds. Add zucchini and cook for 2 minutes, frequently stirring, then adden add sna peas and cook for another 2 minutes. The vegetables should have some color and be crisp-tender — not soft, not raw. Push everything to the sides of the pan.
Step 3. Add the remaining oil to the center of the pan. Pour in the beaten eggs and scramble them quickly with a spatula, breaking them into small pieces. When they’re just barely set — still slightly glossy, not fully dry — start pulling the vegetables back into the center and mixing everything. You want small bits of egg distributed throughout rather than large egg pieces that take over, you know?
Step 4. Add the day-old rice to the pan, breaking up any clumps with your spatula as you go. Press the rice down against the hot pan and leave it alone without stirring for about 90 seconds — this is what creates those crispy, slightly toasted bits of rice at the bottom, which are the best thing in fried rice and the reason day-old rice matters. Then toss everything together vigorously. Add soy sauce, sesame oil, rice vinegar, and white pepper, per and to seven to coat every venly. The rice should look glossy and lightly colored from the soy sauce, not wet or soupy.
Step 5. Taste it. This is important — soy sauce levels vary by brand, and you may need a splash more. Does it need more salt? More sesame oil? A little more acid from the rice vinegar? Adjust now and then scatter the green parts of your green onions over the top and give it one final toss. Serve immediately from the pan because fried rice waits for no one — it loses its crispy edges and textural magic as it sits. The best version is the one you eat right now, straight from the pan, while everything is still hot, slightly crispy, deeply savory, and completely wonderful, you know?
Chef’s Notes & Family Verdict
This is the recipe that made Tyler declare that “homemade fried rice is better than the restaurant,, rant” which, coming from a child who considers our local Chinese restaurant a sacred institution, is perhaps the highest compliment he has ever paid to anything I’ve cooked. I received it accordingly.
Marisol ate around the zucchini piecor the first two times I made it, his and on the third time I cut them small, and she ate everything without comment, which is a parenting win so quiet and satisfying that I almost missed it. Almost.
The leftover fried rice reheats perfectly in a dry skillet over medium-high heat for 3es — press it flat in the pan and let the bottom crisp again, and it’s almost better than the first time. The microwave works in a survival situation; on the other hand, it destroys the texture, and I say that as someone who has used the microwave in survival situations and regretted it every time, you know?
Variations I’ve Tested
Add eggs, pres, and pan-fried tofu for a fully plant-based protein that is genuinely satisfying and costs almost nothing extra. A tablespoon of oyster sauce, in addition to the soy sauce, adds richness and depth, pushing this into the extraordinary category for about fifty cents extra. Use cauliflower rice for half the rice component to extend your budget further and quietly add vegetables — mixed with regular rice, it’s undetectable. Savings over a week add up meaningfully.
Here’s what I want you to carry away from all of this: — eating well on a budget is not a lesser version of eating well. It is eating well. It’s understood that a can of beans, treated with respect, seasoned properly, and cooked with intention, is a better dinner than an expensive cut of meat that was handled carelessly. It understands that peak summer tomatoes and fresh corn cost almost nothing right now and taste better than things you’d pay twenty dollars a pound for in February. Sadly, learned more about cooking during the lean months than in any kitchen I’ve ever worked in. I mean that completely and without any reservation at all, you know?
Feed your family well. Spend less. Feel good about both. Happy cooking, friends — Chef Julia ✦ Chicago, IL


Discussion about this post