So let me tell you about the summer I became the undisputed grill queen of our entire neighborhood block, because it started with these kabobs. It ends with me standing at my backyard grill in an apron that says “Chef Mom”—a gift from Marisol, very on-brand for her—while six adults and nine children wait in a line that wraps around my patio furniture. True story. It was the Fourth of July two summers ago, and I’d made four trays of these BBQ chicken kabobs, and I genuinely ran out before everyone had seconds, and I’ve never fully forgiven myself for not making more, you know?
Here’s the thing about kabobs—they’re one of those recipes that people assume are complicated or fussy or require some special knowledge. I really want to dismantle that idea completely because nothing about kebabs is complicated. You cut things up. You put them on a stick. You grill them—the end. The actual skill involved is maybe fifteen percent of what people imagine it is, and the remaining eighty-five percent is just choosing good ingredients and making a marinade that actually tastes like something, you know?
What I’ve learned after years of making kabobs for my family, for catering jobs, for neighborhood cookouts, and for every summer occasion that has ever presented itself is that the marinade is everything. The chicken is the canvas. The vegetables are colored. But the marinade is the painting. Get that right, and the rest of the recipe basically takes care of itself while you stand next to a grill with a cold drink, looking like you know exactly what you’re doing. Which you will, after this.
Now I’ll be real with you about something—I spent years making dry, mediocre chicken kabobs before I figured out the actual secrets, and I’m going to give them all to you upfront so you don’t waste years making dry, mediocre chicken kabobs as I did. Secret one: thighs, not breasts. Secret two: acid in the marinade, but not too much, or it cooks the chicken before the grill does. Secret three: cut everything the same size so it cooks evenly. Secret four: don’t skip the resting time after they come off the grill. Four secrets. That’s genuinely all there is between okay kabobs and the kind of kabobs that make nine children stand in line around your patio furniture, you know?
Marinade Time: 2 hours minimum, overnight preferred | Grill Time: 14–16 minutes | Serves: 6 Effort: Easy once you know the secrets
Ingredients
For the chicken and kabobs:
- 2½ lbs boneless, skinless chicken thighs, cut into 1½-inch pieces (thighs, not breasts—this is non-negotiable, and I’ll explain why below)
- 2 red bell peppers, cut into 1½-inch pieces
- 2 yellow bell peppers, cut into 1½-inch pieces
- 1 large red onion, cut into 1½-inch chunks (keep the layers together so they don’t fall off the skewer)
- 2 medium zucchini, sliced into thick rounds (at least ¾ inch — thin rounds fall apart on the grill)
- 1 pint cherry tomatoes (add these last on the skewer — they cook faster than everything else)
- Metal skewers or wooden skewers soaked in water for 30 minutes (metal is genuinely easier and I’ve converted fully—no soaking, no burning, reusable forever)
For the BBQ marinade:
- ½ cup your favorite BBQ sauce (use a sauce you actually love — this is the backbone of the whole dish)
- 3 tbsp olive oil
- 3 tbsp soy sauce (adds depth and helps the outside caramelize on the grill)
- 2 tbsp apple cider vinegar (the acid that tenderizes without overdoing it)
- 1 tbsp brown sugar (helps create that gorgeous char)
- 4 cloves garlic, minced
- 1 tsp smoked paprika
- 1 tsp onion powder
- ½ tsp black pepper
- ½ tsp chili powder
- Pinch of cayenne (optional — I do a small pinch for the family version, more for the adult tray)
For serving:
- Extra BBQ sauce, warmed, for brushing and dipping
- Fresh parsley or cilantro, roughly chopped
- Lime wedges
- Rice, flatbread, or a big green salad alongside
Instructions
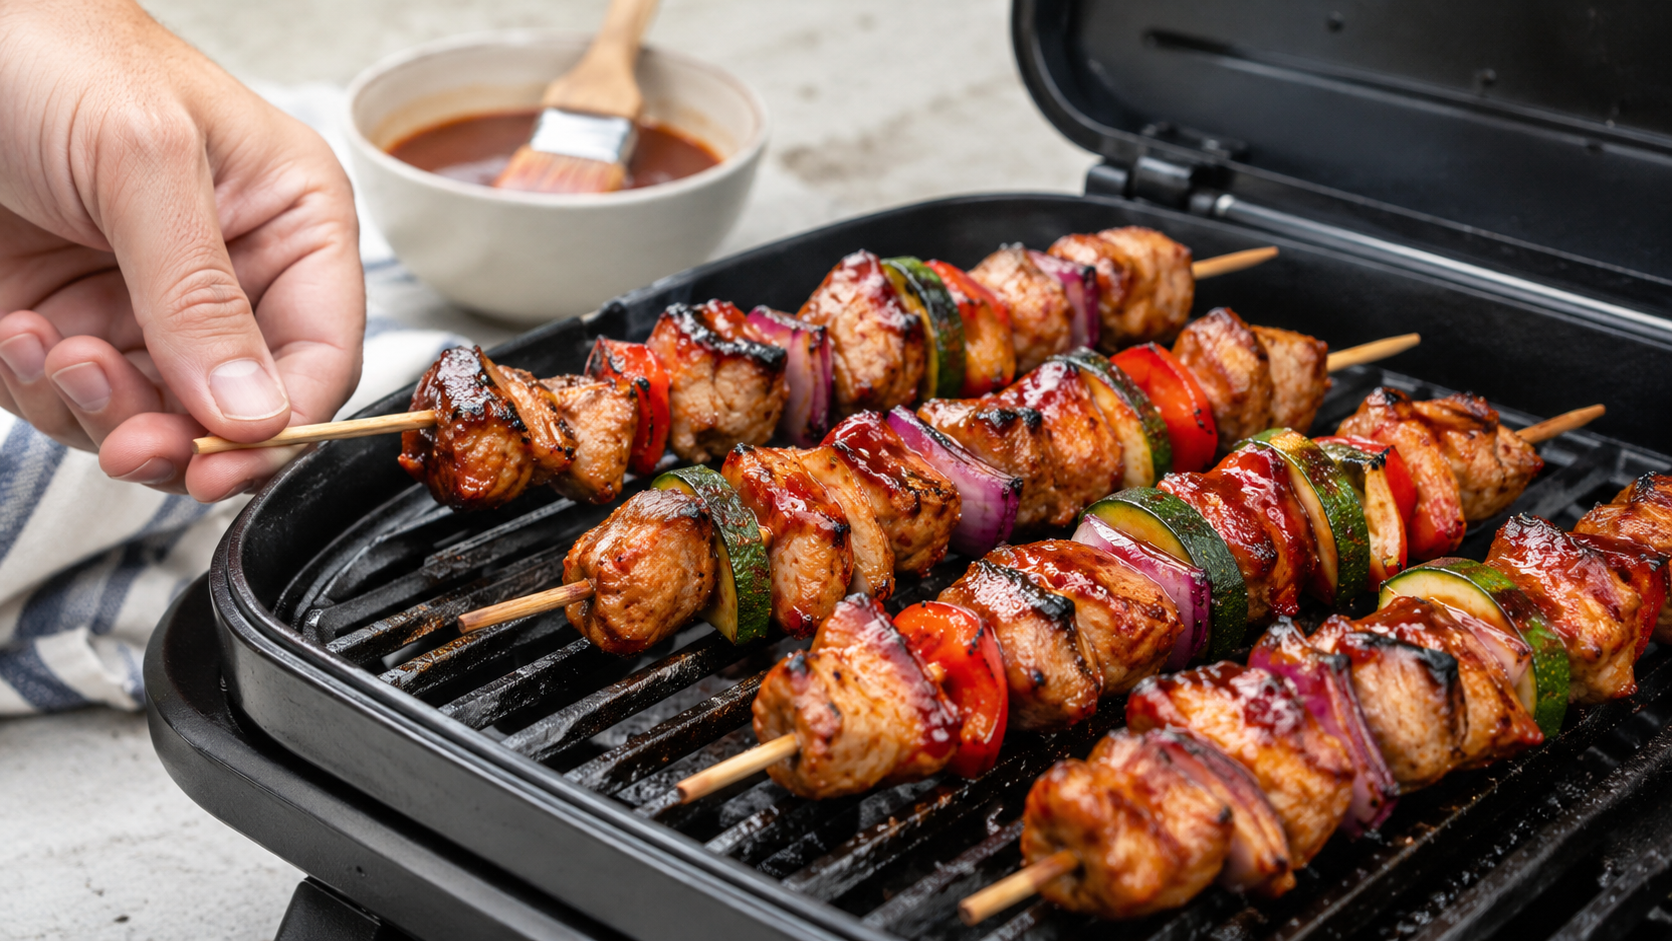
Step 1 — Make the marinade and add the chicken. Whisk together every marinade ingredient in a bowl or measuring cup until completely smooth and combined. It should be dark and glossy, with an absolutely incredible smell—smoky, sweet, and savory all at once. Pour about three-quarters of it over your chicken pieces in a zip-lock bag or shallow dish, making sure every piece is coated. Reserve the remaining quarter in a separate container in the fridge—this becomes your basting sauce later, and you must keep it separate from the raw chicken marinade, you know? Seal everything up and refrigerate for at least 2 hours. Overnight is better. Two nights is excessive, but if it happens, it happens, and the chicken will be phenomenal.
Step 2 — Cut your vegetables and build your skewers. When you’re ready to grill, pull the chicken out of the fridge about 20 minutes beforehand to take the chill off—cold chicken straight from the fridge cooks unevenly, and the outside can char before the inside finishes cooking, which is exactly the situation we are trying to avoid here. While the chicken comes to temperature, cut all your vegetables into roughly the same size as the chicken. This is genuinely the most important prep instruction I can give you: if your onion is twice the size of your pepper and your zucchini is half the size of everything else, nothing will cook at the same rate. You’ll have some things raw and some things burned, and nobody will be happy, you know?
Build your skewers alternating chicken with vegetables—I like chicken, bell pepper, onion, chicken, zucchini, bell pepper, chicken, and then a cherry tomato at the very end. The pattern isn’t sacred, but the principle is: alternate so no two pieces of chicken are touching directly, which helps them cook more evenly and get better color on all sides. Don’t pack everything too tightly — a little space between pieces lets heat circulate. Don’t leave too much space either, or the skewer looks sad and under-committed. You’re looking for confident, generous kebabs, you know?
Step 3 — Get your grill ready and know what you’re working with. Heat your grill to medium-high—around 400°F if you have a thermometer, or the hold-your-hand-six-inches-above-the-grates-for-three-seconds test if you don’t. Clean your grates with a brush and then oil them—fold a paper towel, dip it in vegetable oil, and use tongs to wipe it across the grates. This step prevents sticking, and I’ve watched too many beautiful kabobs lose half their crust to an ungreased grill grate ever to skip it again. If you’re using a charcoal grill—which produces a smoky char that a gas grill cannot fully replicate, I’ll be honest with you—set up a two-zone fire with coals on one side so you can move kabobs to indirect heat if things are cooking too fast.
Step 4 — Grill them right. Lay your skewers on the hot grill, and here is the key instruction that took me embarrassingly long to internalize: leave them alone. Don’t press them down. Don’t move them. Don’t rotate them after 30 seconds to check. Give them 3 to 4 full minutes on the first side before you even think about touching them. When they release easily from the grates without sticking—and they will release easily when they’re ready; they’ll fight you if they’re not—rotate a quarter turn. Another 3 to 4 minutes. Another quarter turn. Another 3 to 4 minutes. One final quarter turn. You’re looking for 14 to 16 minutes total with good color and slight char on all four sides and an internal temperature of 165°F in the chicken pieces.
Here’s the thing about that char—a little bit of blackening on the edges of the chicken and the vegetables is not a mistake. It’s flavored. It’s the Maillard reaction doing its job, creating all these complex, smoky, caramelized compounds that make grilled food taste like grilled food, not like food cooked some other way. Don’t be afraid of a little color, you know?
Step 5 — Baste, rest, and finish. In the last two minutes of cooking, use a brush to baste each kabob with that reserved marinade you kept separate — the one that never touched raw chicken. This adds a fresh, glossy, caramelized layer of BBQ flavor on top of everything, and it’s the move that takes these from really good to OH MY GOSH, the neighbors are coming over uninvited. Do two coats if you have time, letting each one set for about 30 seconds before the next.
Remove the kabobs to a clean platter and let them rest for 5 minutes. I know. I know five minutes feels like forever when you can smell them. But the resting time lets the juices redistribute throughout the chicken, so when you bite in, everything stays juicy and perfect rather than running dry onto the plate. Use those five minutes to warm up your extra BBQ sauce for the table, scatter fresh parsley or cilantro over the platter, and arrange the lime wedges. Then eat. Right now. These kabobs don’t wait, and they don’t need to.
Why Thighs and Not Breasts—A Professional Opinion I Will Defend Vigorously
Here’s the thing—chicken breasts on kabobs are a recipe for dry, disappointing chicken, and I say that with fifteen years of professional cooking behind me and zero apology. Breasts are lean, and they cook fast, and the moment they hit 165°F on a hot grill, they start heading toward 175°F, and by the time your vegetables are properly charred, the chicken is already past the point of no return, you know?
Chicken thighs have more fat, more connective tissue, and dramatically more margin for error on the grill. They stay juicy even if they go a little past temperature. They have more flavor. They absorb marinades more deeply and hold onto them better under direct heat. They char beautifully on the outside while staying tender on the inside. In every possible way, they are the correct chicken for kabobs, and I will not be taking questions at this time.
I’ve converted every person in my family, my catering clients, and approximately fifteen of my neighbors on this point. You’re next.
Chef’s Notes & Family Verdict
Tyler ate four skewers at the Fourth of July cookout and then immediately asked if we could have the leftovers for lunch the next day, which we did, in wraps with extra BBQ sauce and shredded lettuce, and it was arguably better the second time around. He has since declared Kabob Day “the best grill day,” and I’ve added it to the official summer rotation accordingly.
Marisol eats hers by pulling each piece off the skewer individually and eating them in a specific order—vegetables first, chicken last, and cherry tomatoes absolutely first of all because “they’re like little flavor explosions.” She’s eight, and she has a more developed palate and vocabulary than most adults I know. I’m very proud.
My husband handles the grill when we have company over, and I stand nearby being available for consultation, which is a dynamic that works well for everyone. He follows my instructions exactly, then takes full credit for the kabobs with the neighbors, which I allow because I am a generous person and because I made the marinade and cut all the meat. We both know what’s really happening here, you know?
The charred bits that fall off the skewers onto the grill grates are not a loss — they’re the cook’s tax. I eat them immediately before anyone notices. This is my kitchen; those are my rules.
Make-Ahead Strategy That Will Change Your Summer Entertaining
Here’s my full game plan for stress-free kabob entertaining, developed over years of feeding crowds without completely losing my mind.
The night before: make the marinade, cut the chicken, and get it marinating. Cut all the vegetables and store them in separate containers in the fridge. Cut the reserved basting sauce and keep it covered.
In the morning, build the skewers and lay them on sheet pans, cover them tightly with plastic wrap, and refrigerate until 20 minutes before grilling. This is the move that makes the actual cooking feel effortless—you walk out to the grill with a tray of fully assembled kebabs, and you look like you have your entire life together, you know?
At the party: grill, baste, rest, plate, and receive compliments. That’s your whole job at that point. Everything else is already done.
This approach works for anywhere from four skewers on a Tuesday to forty skewers on the Fourth of July. Scale up the marinade and the vegetables; the technique stays the same. I’ve fed crowds of thirty-plus with this method, and the only thing that changes is how many sheet pans I’m working with.
Variations I’ve Tested
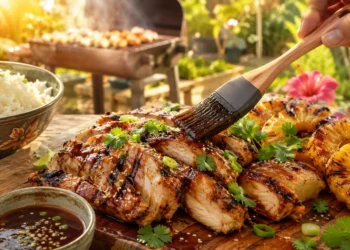
The teriyaki version: Swap the BBQ marinade for a mix of soy sauce, mirin (or rice wine), brown sugar, garlic, and ginger. Same technique, completely different flavor profile, equally extraordinary results. This version goes over rice with sesame seeds and sliced green onions, and it feels like an entirely different meal, you know?
Pineapple addition: Thread chunks of fresh pineapple between the chicken and vegetables. The pineapple caramelizes on the grill and becomes sweet and slightly smoky, and the combination with the BBQ chicken is genuinely one of the great summer flavor combinations. Canned pineapple works in a pinch, but fresh is worth it here.
Mediterranean riff: Replace the BBQ marinade with lemon juice, olive oil, garlic, oregano, and a little cumin. Add halloumi cheese cubes to the skewers—it grills without melting and gets this incredible golden crust. Serve with tzatziki instead of extra BBQ sauce and warm pita, and suddenly you’re in a completely different culinary territory, which I love, you know?
The all-vegetable skewer: For your vegetarian guests—and there are always vegetarian guests; we’ve all been there—build skewers with extra bell peppers, zucchini, red onion, mushrooms, and cherry tomatoes. Use the same marinade. Grill the same way. The vegetables char and caramelize, and the BBQ marinade does the same to them as it does to the chicken. These are genuinely excellent, and the mushrooms, in particular, become almost meaty and wonderful on the grill.
Spice it up significantly: Add a tablespoon of chipotle peppers in adobo, blended smooth, to the marinade. The smoky heat from the chipotle, combined with the charred grill flavor, is the most complex and delicious to prepare. I prepare this version for adults-only summer gatherings when I want something bold and unapologetic. It makes people close their eyes involuntarily when they eat it, and that is the reaction I am always chasing, you know?
Grill Troubleshooting From Someone Who Has Made Every Mistake
If your chicken is charring too quickly on the outside before it’s cooked through, your grill is too hot, or your pieces are too large. Move when your grill is too hot, or your pieces are too large for the skewers. To ly, indirectly heat the lid, and let them finish cooking through gentler, ambient heat. This is what the two-zone fire setup is for.
If your vegetables are falling off the skewers, they’re cut too thin, or you’re turning them too aggressively. Cut thicker pieces, turn less frequently, and be more patient. The grill is doing the work. Let it be.
If the cherry tomatoes are exploding and creating chaos, this is actually normal and mostly fine. Cherry tomatoes on skewers are a little dramatic — they burst, releasing juice and steam, and occasionally roll off entirely. I put them at the very end of the skewer precisely because of this. Consider them the unpredictable, chaotic element of an otherwise well-organized kabob. They always taste incredible despite their behavior, you know?
If your wooden skewers are catching fire, you didn’t soak them long enough, or they’re too thin. Soak for at least 30 minutes, use thick skewers, and switch to metal skewers when you inevitably get tired of this problem. Metal skewers genuinely changed my life, and I cannot recommend the switch strongly enough.
These kabobs are summery. They’re the smell of the grill when everyone’s outside, the sun is going down, and nobody wants to go home yet. They’re the things people remember about your cookout long after they’ve forgotten everything else. Make them once, and they’ll be in your permanent rotation from June through September. I genuinely promise you that. Now go fire up that grill—you’ve got this.
Happy cooking, friends! — Chef Julia ✦ Chicago, IL


Discussion about this post