So I want to talk about the word “healthy” for a second because it gets thrown around in ways that make me a little crazy, you know? Healthy doesn’t mean sad. “Healthy” doesn’t mean a bowl of plain lettuce that you eat while staring out the window wishing it were pizza. Healthy in my kitchen means food that’s genuinely good for you AND genuinely delicious, and those two things are not in conflict, I promise you. I’ve spent fifteen years cooking professionally, and the most important thing I’ve learned is that good ingredients treated almost always beat complicated recipes trying to compensate for mediocre ones.
Last summer, I made a real commitment to getting dinner on the table in under 30 minutes on weeknights without sacrificing flavour or nutrition—and not because some wellness account told me to, but because Marisol had evening swim practice four days a week. Tyler had baseball, and I physically could not spend an hour cooking every night without losing my mind completely. Necessity is the mother of invention and also apparently of excellent weeknight dinners, you know?
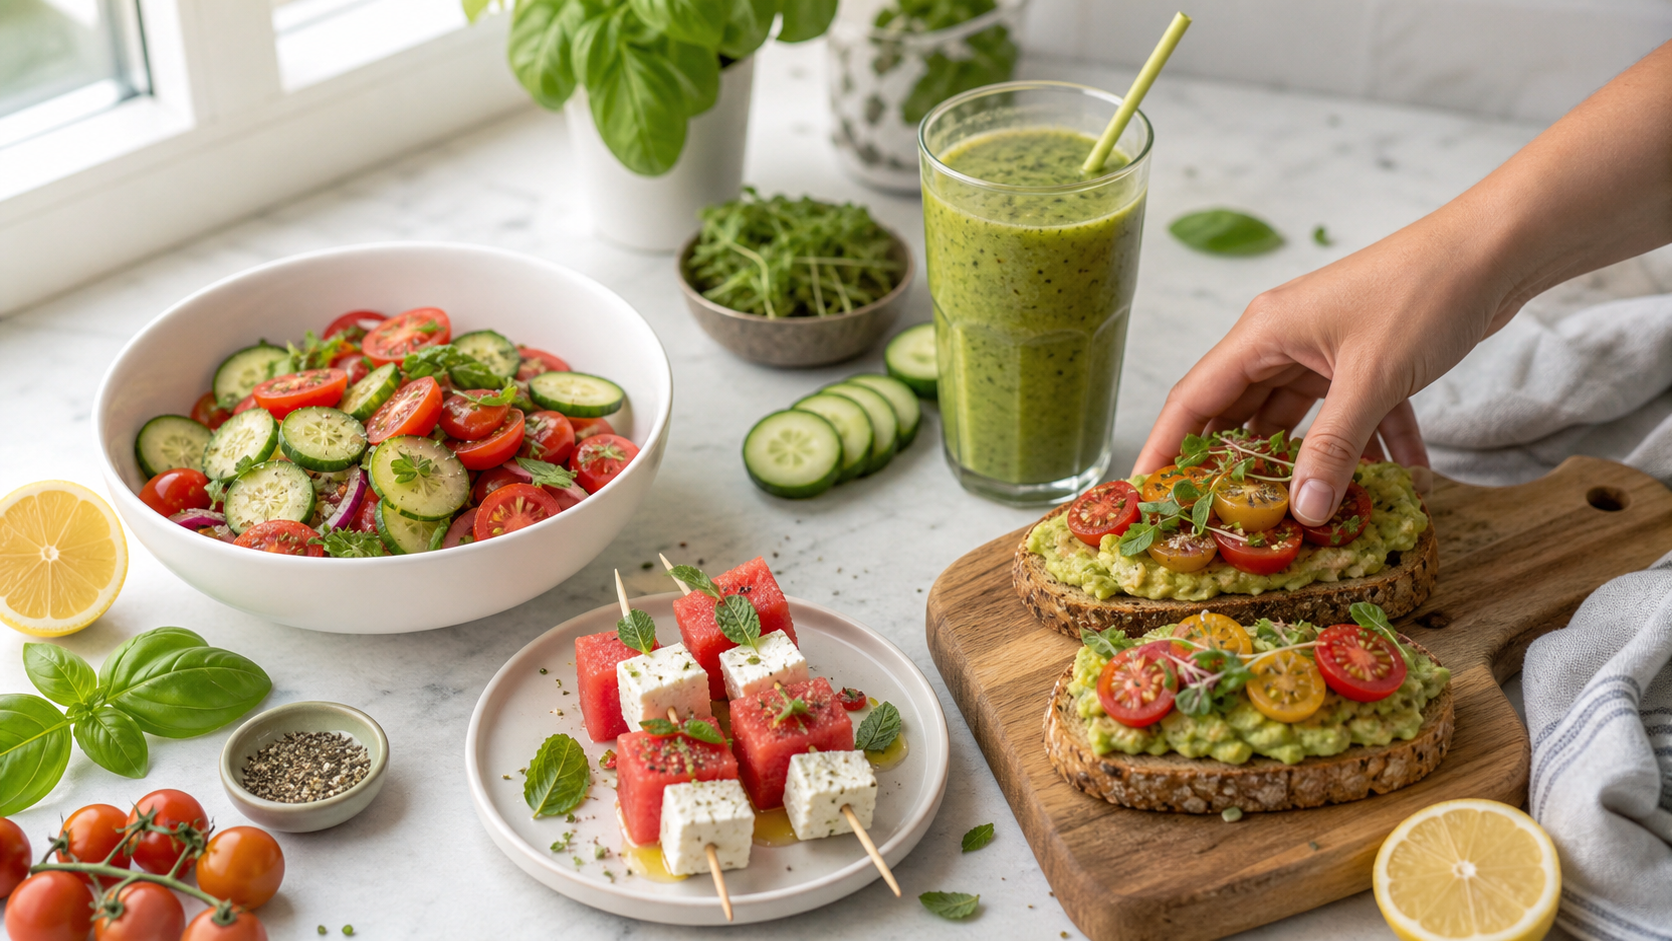
Here’s the thing I discovered: summer is actually the easiest time of year to eat healthy and fast at the same time, because the produce is doing all the heavy lifting for you. Peak summer vegetables and fruits taste so good on their own that you barely have to do anything to them. A perfect tomato. A ripe peach. Fresh corn cut right off the cob. These things don’t need elaborate preparation — they need good olive oil, good salt, and maybe five minutes of heat. That’s it. That’s the whole secret.
These four recipes are what I’m actually cooking right now. Not aspirational recipes; I made them once on a Sunday when I had time. The real ones. The Tuesday night ones. The ones that make my family genuinely happy and get us out of the kitchen and onto the back porch before it gets dark. Let’s go.
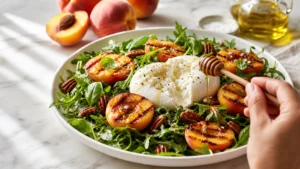
Recipe 01 — Grilled Peach & Arugula Salad with Burrata
Time: 18 minutes | Serves: 4 | Effort: Easy
So this is the recipe that made Tyler—my 12-year-old who has famously complicated feelings about salad—say, “Okay, I actually like this one.” “And I want you to understand what a significant moment that was in our household. I stood very still and said, “I’m glad,” in a completely calm voice, then waited until he left the kitchen before doing a quiet victory lap around the island.
Here’s the thing about grilled fruit: it’s one of those cooking moves that seems fancy but is genuinely one of the simplest things you can do. Peaches hit a hot grill pan, and within about three minutes, they’re caramelised, jammy, warm, and sweet in this completely different, more complex way than a raw peach. And against peppery arugula and creamy, cold burrata? OH MY GOSH. It’s a combination that tastes like summer figured itself out, you know?
I’ll be real with you—this salad works because every element is doing exactly one job. The arugula is peppery and fresh. The grilled peach is sweet and smoky. The burrata is cool, creamy, and rich. The prosciutto—if you use it—adds salt and savoury depth; the honey-and-balsamic dressing ties everything together. When every ingredient has a clear role,e and you don’t overcrowd it, a salad becomes something genuinely special rather than just a pile of stuff in a bowl.
Ingredients
- 3 ripe but firm peaches, halved and pitted (firm is important — too ripe and they fall apart on the grill)
- 5 oz fresh arugula (baby arugula if you can find it — more tender and less aggressive)
- 2 balls fresh burrata (about 4 oz each — let them come to room temp for 20 minutes before serving)
- 4 slices prosciutto, torn into pieces (optional but excellent)
- ¼ cup walnuts or pecans, roughly chopped (toast them if you have 3 minutes — worth it)
- Fresh basil leaves, torn
- 3 tbsp good olive oil, divided
- 2 tbsp balsamic glaze (the thick syrupy kind — not regular balsamic vinegar)
- 1 tbsp honey
- Salt and cracked black pepper
Instructions
Step 1. Get your grill pan screaming hot over medium-high—hotter than you think you need, you know? Brush the cut sides of your peaches with about a tablespoon of olive oil and season with just a tiny pinch of salt. Place them cut-side-down on the hot pan and don’t touch them for 3 full minutes. You want actual grill marks and caramelisation, not just warm fruit. Flip and cook another minute on the skin side, then remove to a plate. They should be golden, slightly softened, and smell incredible.
Step 2. While the peaches cook, make your dressing in the bottom of a large bowl: the remaining olive oil, half the balsamic glaze, honey, salt, and pepper. Whisk with a fork until combined. Taste it—it should be sweet and tangy, with a little richness. Adjust from there.
Step 3. Add your arugula to the bowl and toss gently to coat in the dressing. You want every leaf lightly coated, not drowning. Spread it out on a large platter or serving bowl—I always serve this family-style because it looks absolutely gorgeous, and honestly, plating individual salads is more effort than I want to spend on a Tuesday, you know?
Step 4. Slice your grilled peach halves and nestle them throughout the arugula. Tear the burrata open right over the salad and let it fall in creamy pieces everywhere—this is not a moment for neatness. Scatter the prosciutto, walnuts, and fresh basil over everything. Finish with the remaining balsamic glaze drizzled over the top and a good crack of black pepper.
Step 5. Bring it to the table immediately. This salad does not wait. Burrata is at its best in the first five minutes after you tear it open, and the contrast of warm peaches against cool burrata is the dish’s whole magic. Eat it now, you know?
Chef’s Notes & Family Verdict
Marisol ate the burrata pieces first — all of them, strategically, before anyone else noticed — and then looked completely innocent about it. I couldn’t even be annoyed because, honestly, same.
Tyler went back for seconds, which, as previously established, is the highest honour a salad can bestow. My husband added extra prosciutto to his plate without asking, which is how I knew it was a winner.
Don’t save this for a special occasion. Make it on a Wednesday with farmers’ market peaches and cheese, grocery-store Burrata, and feel genuinely fancy about your life for about twenty minutes. You deserve those twenty minutes.
Variations I’ve Tested
Swap peaches for nectarines or ripe plums — both grill beautifully and have that same sweet-tart thing going on. Replace the burrata with good ricotta or fresh mozzarella if your grocery store doesn’t regularly carry burrata. Add grilled chicken or shrimp to make it a complete protein-forward dinner rather than a starter or side. The combination of stone fruit and peppery greens with a creamy cheese is endlessly versatile—fig season in early fall; this same approach with fresh figs is one of the best things I make all year.
Recipe 02 — Spicy Tuna Stuffed Avocados
Time: 12 minutes | Serves: 4 | Effort: Super Easy — No Cooking

Now this is my secret weapon for the nights when I absolutely cannot bring myself to turn on a single burner and also need to feed two children and feel like I’ve done something nutritionally responsible. No cooking. No heat. Barely any dishes. And it looked so good on the plate that Tyler genuinely asked me if we were having a “special dinner” the first time I made it, which was a Thursday, and there was nothing special about it, you know.
Here’s the thing—high-quality canned tuna has a moment right now, and I am fully here for it. Not the sad, dry, packed-in-water tuna that makes you feel vaguely depressed just looking at it. I mean good tuna packed in olive oil, ideally from a trusted brand, the kind that tastes clean and rich and actually like something you want to eat. It costs a little more. It is worth every penny. This is a five-ingredient recipe, and one of those ingredients is the tuna, so please don’t cut corners here.
I’ll be real with you—I was sceptical about canned tuna as a dinner protein for years because of my culinary background. Fresh fish forever; canned fish is a compromise. And then I tasted the good stuff, and I had to revise my position completely. No shame. Growth is good, you know?
Ingredients
- 4 ripe avocados, halved and pitted (ripe but not mushy — they need to hold their shape as a bowl)
- 2 cans good-quality tuna in olive oil, drained (about 5 oz each)
- 3 tbsp Japanese mayonnaise (Kewpie brand if you can find it — it’s richer and slightly sweeter than regular mayo)
- 1–2 tsp sriracha (adjust to your heat preference — I do 2 tsp for adults, 1 for the kids’ bowls)
- 1 tbsp soy sauce or tamari
- 2 tsp sesame oil
- 3 green onions, thinly sliced
- 1 tsp rice vinegar
- Sesame seeds to finish
- Optional: sliced cucumber, shredded nori, or everything bagel seasoning on top
- Lime wedges to serve
Instructions
Step 1. Drain your tuna thoroughly—press it against the side of the strainer to squeeze out as much oil as possible. Transfer to a bowl and break it up slightly with a fork. You want some texture here, not a completely smooth paste, so don’t go too far, you know?
Step 2. Add the mayo, sriracha, soy sauce, sesame oil, rice vinegar, and half the green onions to the tuna. Mix until everything is combined. Taste it. This is your moment — does it need more heat? More salt from the soy sauce? More acid from the vinegar? The balance you’re looking for is creamy, a little spicy, a little tangy, and rich. Adjust until you get there.
Step 3. Halve your avocados and remove the pits—if your pit is stubborn, tap a sharp knife into the centre of it firmly and twist. It’ll come right out. If your avocado half-pit hole is small, scoop out a little extra avocado to make room for a generous amount of tuna. Season the avocado flesh with a tiny pinch of salt and a squeeze of lime right now before you add the tuna.
Step 4. Spoon the spicy tuna mixture generously into each avocado half. Don’t be stingy—pile it up slightly over the top of the avocado. Scatter the remaining green onions and sesame seeds over everything. Add any extra toppings you’re using. Lime wedges on the side.
Step 5. Serve immediately—avocados start to brown once they’re cut, so this isn’t a make-ahead situation unless you squeeze extra lime juice over the flesh before filling and wrap them tightly. Eat them as a starter, a light dinner with a side salad, or—my personal move—two halves with a bowl of rice and call it a full meal.
Chef’s Notes & Family Verdict
Marisol declared this “fancy sushi at home.” She proceeded to eat every single bite, which is genuinely miraculous for a child who went through an eight-month phase of refusing anything with “spicy” in the description. The sriracha level I use for her is one teaspoon, and apparently, that hits the sweet spot between flavorful and “my mouth is on fire.”
Tyler made his own second batch after finishing the first. I watched him do it and said nothing. This is called a win, and I’m taking it.
If you have leftover tuna mixture—which you won’t, but theoretically—it’s incredible on rice crackers, cucumber rounds, or just wrapped in a sheet of nori as a five-second snack. It keeps in the fridge for a day and gets better as the flavours meld.
Variations I’ve Tested
Use canned salmon instead of tuna for a different, slightly richer flavour profile—the sriracha mayo combination works just as beautifully. Add diced mango or cucumber to the tuna mixture for freshness and crunch, making every bite more interesting. For a completely kid-friendly no-heat version, skip the sriracha and add a teaspoon of honey to the mayo instead—sweet tuna and avocado is a genuinely wonderful combination that Marisol now requests by name.
Recipe 03 — Zucchini Noodle Bowls with Walnut Pesto & Roasted Cherry Tomatoes
Time: 22 minutes | Serves: 4 | Effort: Easy

So here’s the recipe that genuinely converted me on zucchini noodles, and I say that as someone who spent a solid two years being sceptical about zucchini ‘noodles’ pretending to be pasta. I know. I know how it sounds. But the thing is, I never hated zucchini noodles because they’re not pasta. I hated them because most people cook them wrong and end up with a watery, sad, textureless pile that makes everyone feel like they’re being punished for something, you know?
The secret — and this is a real professional kitchen secret — is that you do not cook zucchini noodles. You barely warm them. Two minutes in a hot pan with good olive oil, tossed quickly, and served immediately. That’s it. The second you cook them for five minutes, they release all their water and collapse into a soggy mess, and everyone’s right back to thinking zucchini noodles are a bad idea. They’re not a bad idea. They’re a technical problem.
Here’s the thing about walnut pesto: it’s cheaper than pine-nut pesto, nuttier and more complex in flavour, and it takes about 4 minutes to make in a food processor. I used to feel slightly embarrassed pulling out a jar of store-bought pesto in my professional-chef-person life, and now I want to tell every home cook that homemade pesto is so fast and so much better than the jarred stuff that the thirty seconds it takes to open your food processor are genuinely worth it. This is my formal position on pesto.
Ingredients
- 4 medium zucchini, spiralized or peeled into ribbons with a vegetable peeler (ribbons are actually easier and work beautifully)
- 2 pints cherry tomatoes
- 3 tbsp olive oil, divided
- Salt and pepper
- 2 cups fresh basil, packed (one large bunch)
- ½ cup walnuts, roughly chopped (plus extra for serving)
- 2 cloves of garlic
- ½ cup good Parmesan, grated (plus extra for serving)
- Juice of half a lemon
- ¼ cup olive oil (for the pesto)
- Optional: grilled chicken, white beans, or a soft-boiled egg for protein
Instructions
Step 1. Start your tomatoes first because they take the longest. Toss the cherry tomatoes with a tablespoon of olive oil, salt, and pepper on a sheet pan. Roast at 425°F for 15 minutes, until they’re blistered and bursting, and some are starting to caramelise at the edges. If any of them burst and release their juice onto the pan, that jammy liquid is going to go right into your bowl, so don’t drain it—it becomes part of the sauce, you know?
Step 2. While the tomatoes roast, make your walnut pesto. Add basil, walnuts, garlic, parmesan, lemon juice, a big pinch of salt, and pepper to a food processor. Pulse several times until roughly chopped. Then, while the machine is running, stream in your quarter cup of olive oil until you have a thick, vibrant green pesto. Taste it. More salt? More lemon? More Parmesan? Adjust it. This pesto is also incredible on everything else you will ever cook for the rest of the summer, so make a big batch if you’re in the mood.
Step 3. Pat your zucchini noodles completely dry with paper towels—this is the step most people skip, and it’s the reason most zucchini noodle dishes end up watery. Dry zucchini noodles—every time. Get a large skillet very hot over high heat, add a tablespoon of olive oil, and add the zucchini. Toss quickly and constantly for exactly two minutes — no more. Season with salt. They should be just barely warmed through and still have some bite. Pull them off the heat immediately.
Step 4. Add the pesto to the zucchini right in the pan and toss to coat. The residual heat will warm the pesto slightly, and everything comes together into this gorgeous, vibrant, green-coated situation that smells absolutely incredible. Add your roasted tomatoes right on top, including all those jammy juices from the pan.
Step 5. Divide into bowls. Top with extra walnuts, extra parmesan, and a crack of black pepper. If you’re adding a protein—and I usually do to make it a complete dinner—grilled chicken, sliced and piled on top of a boiled egg, nestled in centrentis are perfect. This bowl is genuinely beautiful, and it took you twenty-two minutes. Feel good about that.
Chef’s Notes & Family Verdict
This is the recipe that has the most interesting reaction split in my family. Tyler is deeply suspicious of zucchini noodles on principle—he knows they’re not pasta and feels it’s a kind of deception—but he eats them in full when they’re covered in pesto and topped with those burst tomatoes. I’ve chosen not to draw attention to this inconsistency. We serve it and move on.
Marisol loves this, especially watching the tomatoes burst when she presses them with her fork, which she does before eating any of them. It’s a whole production. I have stopped trying to intervene.
The walnut pesto will keep in the fridge for five days with a thin layer of olive oil pressed over the surface to prevent browning. I make a big jar of it in July and put it on everything—pasta, sandwiches, grilled fish, roasted vegetables, and pizza. It is genuinely one of the most useful things you can have in your refrigerator in summer.
Variations I’ve Tested
Swap the walnut pesto for a sun-dried tomato pesto—blend sun-dried tomatoes, basil, garlic, parmesan, and olive oil—for a completely different, more intensely flavoured version. Add a drained can of white beans, tossed with the zucchini, for a plant-based protein boost that pairs beautifully with the pesto. Use this exact pesto on regular pasta for the nights when zucchini noodles aren’t going to fly—it is a genuinely perfect quick pasta dinner that my whole family loves without complication.
Recipe 04 — Ginger Miso Glazed Salmon with Cucumber Slaw
Time: 25 minutes | Serves: 4 | Effort: Medium

Now this is the one I make when I want everyone at the table to feel like we went somewhere nice for dinner, you know? It looks like a restaurant dish. It tastes like a restaurant dish. And I have made it on school nights in under 25 minutes while simultaneously helping with homework and answering seventeen questions about what’s in the fridge. If I can do it under those conditions, you can absolutely do it under yours.
Here’s the thing about miso—it’s one of those ingredients I genuinely wish more home cooks had in their refrigerators, because it does something almost no other single ingredient can. It adds depth. It adds umami. It adds a beautiful, complex, slightly sweet, slightly salty layer of flavour that makes food taste like it’s been cooking longer than it actually has. A tablespoon of miso in a marinade or a sauce does the work of thirty minutes of simmering. That’s why professional kitchens love it. That’s why your refrigerator needs a container of it, you know?
I’ll be real with you—I resisted cooking salmon at home for years because I always overcooked it and it made me feel like I’d let myself down as a professional cook. The trick finally internalised was taking out of it the pan earlier than I felt comfortable. Salmon continues cooking off the heat, and the residual time between the pan and the plate brings it to perfection. A little translucency in the centre is not underdone salmon—it’s perfectly done salmon. Trust the process.
Ingredients
- 4 salmon fillets, about 6 oz each, skin on (skin on protects the fish and gets crispy in the pan—don’t remove it)
- 3 tbsp white miso paste (white miso is milder and sweeter than red — perfect for glazing fish)
- 2 tbsp honey
- 1 tbsp soy sauce
- 1 tbsp rice vinegar
- 1 tsp fresh ginger, grated
- 1 tsp sesame oil
- 1 tbsp neutral oil for cooking (vegetable or avocado oil — olive oil smokes too fast here)
For the cucumber slaw:
- 2 English cucumbers, julienned or cut into thin matchsticks
- 1 large carrot, julienned
- 3 tbsp rice vinegar
- 1 tsp sesame oil
- 1 tsp honey
- 1 tsp soy sauce
- 1 tbsp sesame seeds
- Fresh cilantro or mint
Instructions
Step 1. Make the miso glaze first: whisk together miso, honey, soy sauce, rice vinegar, grated ginger, and sesame oil until completely smooth. Miso can be clumpy, so take an extra second to check for lumps. Taste it—it should be sweet, salty, deeply savoury, and a little tangy. This glaze is genuinely good enough to put on everything, and I encourage you to make extra for the week.
Step 2. Make your cucumber slaw next, so it has time to marinate slightly while the salmon cooks. Toss your julienned cucumber and carrot with rice vinegar, sesame oil, honey, soy sauce, and a pinch of salt. Add sesame seeds and torn cilantro or mint. Toss well and set aside—even 10 minutes of marinating makes a real difference if you’re after the flavours you’re after here, you know?
Step 3. Pat your salmon completely dry—I know I say this every time, and I mean it every time. Dry fish = better sear = better crust = better dinner. Season lightly with salt. Heat your neutral oil in a skillet over medium-high heat until shimmering. Add the sausages, skin-side up, and cook for 4 minutes without touching them. Flip.
Step 4. Now brush the miso glaze generously over the top of each fillet—the cooked side facing up. Cook another 3 minutes, then brush with another coat of glaze. The glaze will caramelise slightly, get sticky and gorgeous, and the smell at this point will make everyone wander into the kitchen, asking what’s happening. The salmon is done when it flakes at the thickest part but still has a slightly translucent centre.e Pull it off the heat right at that moment.
Step 5. Serve the salmon over a pile of that cucumber slaw—the cool, crunchy, tangy slaw against sticky, sweet-savoury fish is the whole point of this dish, and it’s genuinely one of the best flavour combinations I’ve stumbled into in years. Extra miso glaze drizzled around the plate if you want it to look beautiful. Rice on the side. Dinner is done, and it is seriously amazing.
Chef’s Notes & Family Verdict
Tyler—who spent two years claiming he didn’t like salmon—ate an entire fillet of this and asked for the cucumber slaw recipe “for his future life.” He’s twelve. I’m not entirely sure what he means. But I wrote it down for him anyway.
Marisol said it looked “like something from a Japanese restaurant,” which, coming from her, is an extremely high compliment, since she considers our local Japanese restaurant the pinnacle of dining excellence.
This glaze works beautifully on chicken thighs, tofu, shrimp, and pork tenderloin—I’ve tried all of them, and every version is excellent. Make a big jar of the miso glaze and keep it in the fridge for the week. In the future, you will be very grateful.
Variations I’ve Tested
Add a tablespoon of gochujang to the miso glaze for a Korean-inspired spicy-sweet version that is absolutely incredible and takes this dish in a completely different direction. Serve the salmon over plain steamed rice with just the glaze and a sprinkle of sesame seeds for a simpler, more streamlined version on nights when the slaw feels like too much. Use the same glaze on a block of firm tofu, slice it, and pan-fry it the same way for a fully plant-based version that is genuinely one of the best things I’ve made this summer.
Here’s what I want you to take away from all of this—healthy summer cooking is not a sacrifice, it’s not a compromise, and it’s not a punishment for enjoying food too much in winter. These are tomatoes at their absolute peak. It’s the best version of a peach you’ll ever eat. It’s fresh basil from the garden or the farmers market or, honestly, even the little plastic container from the grocery store. It’s food that’s good because the ingredients are good, and the ingredients are good right now, in summer, in a way they genuinely aren’t at any other time of year. Use that. Cook simply. Eat well. Enjoy the season while it’s here, you know?
Happy cooking, friends! — Chef Julia ✦ Chicago, IL


Discussion about this post