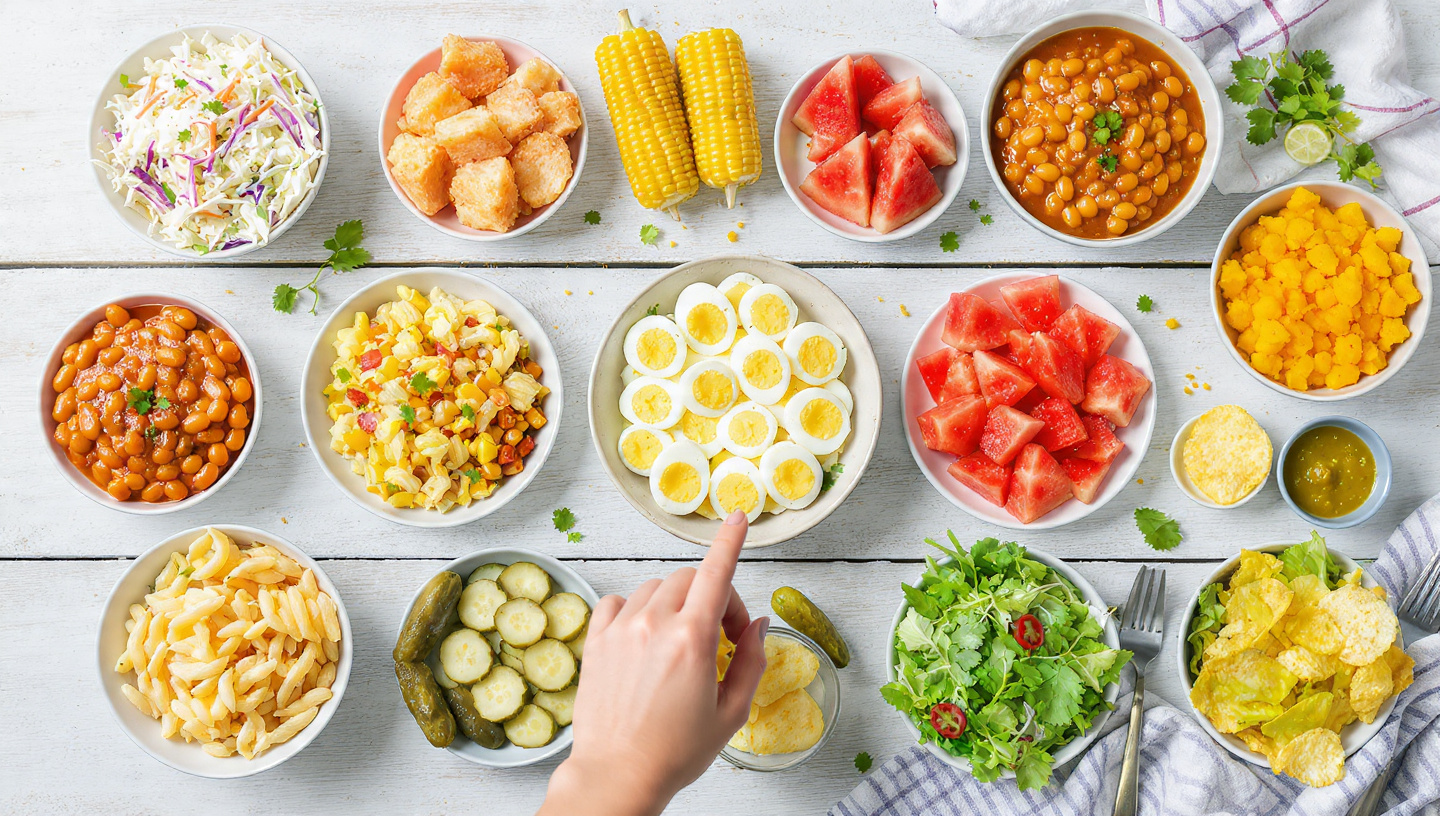
So I’ve spent 15 years cooking professionally, and I’ll be real with you — the most stressful cooking I’ve ever done isn’t in a restaurant kitchen. It’s trying to get a cookout spread on the table while my 8-year-old is asking for a popsicle and my 12-year-old just invited three friends over without telling me… You know? These 15 side dishes have consistently saved me time. They’re fast, they use stuff you actually have, and most importantly, they disappear from the table in about six minutes flat. You’ve got this!
1. Creamy Dill Coleslaw
The first time I brought this dish to a neighborhood cookout, my neighbor literally asked me to write the recipe on a napkin on the spot. No joke — she kept that napkin in her purse for a month.
Now, coleslaw gets a bad rap because most store-bought versions taste like sad cabbage swimming in sugary glue. This version is bright and creamy, with just enough dill to make you feel fancy without actually being fancy… You know?
Why This Recipe Matters: It’s a 10-minute side dish that looks like you spent way more time on it. It feeds a crowd, it travels well, and it goes with literally everything you’re throwing on the grill.
Ingredients
- 1 bag (14 oz) shredded coleslaw mix—don’t shred it yourself; life’s too short
- ½ cup mayonnaise — Duke’s if you can find it, trust me on this
- 2 tbsp apple cider vinegar
- 1 tbsp sugar
- 1 tsp celery seed
- 2 tbsp fresh dill (or 1 tsp dried)
- ½ small red onion, finely diced — optional but so worth it
- Salt and pepper to taste
Instructions
- Dump the coleslaw mix into a big bowl. I mean BIG—you’ll thank me when you’re tossing it.
- In a small bowl, whisk together mayo, vinegar, sugar, and celery seed until smooth. Taste the dressing. More vinegar for tang, more sugar if your family likes it sweet… You know your crowd.
- Pour the dressing over the slaw and toss like you mean it. Get every strand coated.
- Fold in the dill and red onion. Season generously with salt and pepper.
- Here’s the key: refrigerate for at least 30 minutes. The slaw needs time to soften and really soak up all that flavor, you know?
Julia’s Tip: Make this the night before. I’m serious. Overnight coleslaw is next-level. The flavors meld, and it gets this creamy, tangy thing going that you can’t rush.
Chef’s Notes — Family Verdict: My 12-year-old Emma declared this “actually good coleslaw,” which, coming from a kid who picks the vegetables off everything, is basically a Michelin star. My husband goes back for thirds every single time. Every. Single. Time.
Variations
- Spicy kick: Add 1 tsp hot sauce and a pinch of cayenne to the dressing
- Asian-inspired: Swap mayo for sesame oil, add rice vinegar, and add a splash of soy sauce
- Lighter version: Half mayo, half Greek yogurt — still super creamy, I promise
2. Herb Butter Corn on the Cob
My son Jake once ate four ears of corn at one cookout. FOUR. I stopped counting after that because it was either pride or mild concern, and I chose pride.
So plain corn is fine. Herb butter corn is a religion. The whole trick is making a compound butter—which sounds chef-y but really means smashing stuff into softened butter—and letting it melt all over that hot corn… You know?
Why This Recipe Matters: It takes corn from “side dish” to “the thing everyone’s talking about,” and you only need one extra step and about five more minutes of effort.
Ingredients
- 6 ears of corn, husked
- 6 tbsp unsalted butter, softened — leave it out for 30 minutes beforehand!
- 2 tbsp fresh parsley, chopped
- 1 tsp garlic powder
- ½ tsp smoked paprika—this is the secret weapon; don’t skip it
- Zest of 1 lime
- Salt and black pepper
- Optional: Cotija cheese crumbled on top
Instructions
- Mash the butter with parsley, garlic powder, smoked paprika, lime zest, salt, and pepper in a small bowl. Use a fork—no fancy gadgets needed.
- Roll the butter into a log using plastic wrap and refrigerate while you cook the corn. Or honestly, leave it in the bowl.
- Grill corn over medium-high heat for 12–15 minutes, turning every few minutes until charred in spots. Or boil in salted water for 8 minutes if you don’t feel like messing with the grill today — no judgment.
- Pull the corn to the heat and immediately slather it with the herb butter while it’s still piping hot, so the butter melts right in.
- Sprinkle with Cotija if you’re feeling fancy. You deserve it.
Julia’s Tip: I’ll be real with you — make double the butter. It keeps for 3 months in the freezer and is incredible on literally everything. Salmon, steak, and toast. TOAST. You’re welcome.
Chef’s Notes — Family Verdict Not gonna lie, the first time I made these with Cotija on top, my 8-year-old Jake said, “What’s the white stuff?” and I said, “Special snow,” and he ate three ears. Parenting wins and cooking wins.
Variations
- Street corn style: Add mayo + chili powder + lime right after grilling for full elote vibes
- Dairy-free: Vegan butter works beautifully with the herb mix
- Foil packet method: Wrap corn in foil with butter mixture and bake at 400°F for 25 minutes
3. Classic Potato Salad
My mother-in-law told me completely seriously that my potato salad is better than hers. I have never let this go, and I plan to bring it up at every family gathering for the rest of my life.
Here’s the thing about potato salad: most people undercook the potatoes or overdress them and then wonder why it’s either crunchy or a soggy mess. There’s a middle ground, and I’ve been perfecting it for years. This is the one… You know?
Why This Recipe Matters: No cookout is complete without it. This version is the one people will quietly slide onto the table and return to for seconds when they think no one’s watching.
Ingredients
- 3 lbs Yukon Gold potatoes—please not russet, they go too mealy
- ¾ cup mayonnaise
- 2 tbsp yellow mustard
- 2 tbsp apple cider vinegar
- 4 hard-boiled eggs, chopped
- 3 stalks of celery, diced
- ½ cup dill pickle relish
- ¼ cup red onion, finely diced
- Paprika for dusting on top
- Salt and pepper — be generous here
Instructions
- Cut potatoes into 1-inch chunks. No need to peel Yukon Golds—the skin is your friend and saves 10 minutes. Put them in a big pot and cover with cold salted water.
- Bring to a boil, then cook 12–15 minutes until fork-tender. A fork should slide in easily without making the potato crumble.
- THIS IS THE MOVE: Drain the potatoes and immediately toss them with the vinegar while they’re still hot. Hot potatoes absorb flavor. Cold potatoes just get coated on the outside. Huge, huge difference, you know?
- Let potatoes cool for 15 minutes — don’t skip this step or your dressing will melt into nothing.
- Mix mayo and mustard, pour over potatoes, then fold in eggs, celery, relish, and red onion. Season aggressively with salt and pepper.
- Refrigerate for at least 2 hours. Dust with paprika right before serving.
Julia’s Tip: Season again after it’s cold. Cold food needs more salt than warm food — this fact surprises people. Taste it right before serving and add another pinch. You’ll be shocked at the difference.
Chef’s Notes — Family Verdict OH MY GOSH, both my kids eat this, which is basically a miracle because Emma “doesn’t eat mayonnaise”—she does if she doesn’t know it’s there. My husband once ate it for breakfast, cold, right out of the container. That’s the review right there.
Variations
- German style: Skip mayo entirely; use a warm bacon vinaigrette instead
- Lighter: Half mayo, half Greek yogurt with lots of fresh herbs
- Tex-Mex: Add black beans, corn, cilantro, and lime juice
4. Grilled Corn Salsa
I threw this together on one July 4th when the store was out of regular seltzer, and everyone was already arriving. It disappeared before the potato salad. I was offended for a day, then I just leaned into it.
So grilling the corn before making salsa seems like an extra step, but I promise it takes maybe 10 minutes and completely transforms the flavor. What about the char and sweetness that develop on the grill? There is nothing like it, you know?
Why This Recipe Matters This doubles as a dip and a side dish, which is a beautiful thing at a cookout where you’re juggling approximately forty things at once.
Ingredients
- 4 ears of corn, grilled and kernels cut off
- 1 cup cherry tomatoes, halved
- ½ red onion, finely diced
- 1 jalapeño, seeded and minced
- ½ cup fresh cilantro, roughly chopped
- Juice of 2 limes
- 2 tbsp olive oil
- 1 tsp cumin
- 1 avocado, diced — add this RIGHT before serving
- Salt to taste
Instructions
- Grill corn over high heat for about 8 minutes, turning every couple of minutes. You want good char marks — that’s the flavor right there.
- Let the corn cool for 5 minutes, then stand each ear in a large bowl and slit down the length to cut off the kernels. They’ll fly everywhere. The result is fine. This is cooking, you know?
- Add tomatoes, red onion, jalapeño, and cilantro to the bowl.
- Whisk lime juice, olive oil, and cumin, then pour over everything. Toss well and season with salt.
- Add the avocado right before serving so it doesn’t get brown and sad on you.
Julia’s Tip: No grill? Drain a can of corn, pat it dry, and cook it in a screaming-hot cast-iron skillet for 5 minutes without stirring. You’ll get beautiful char spots, and it’s honestly almost as good.
Chef’s Notes — Family Verdict: Jake asked me to put the dish in his school lunch in a thermos once. That’s how much this kid loves it. Emma picked out the jalapeño pieces but ate everything else, which in my house is basically a standing ovation.
Variations
- Add black beans for extra heartiness
- Swap cilantro for basil if your crowd hates cilantro—we’ve all been there
- Mango + corn is an absolutely mind-blowing combination if you want to get wild
5. Smoky BBQ Baked Beans
Now, I grew up eating canned baked beans at every single cookout, and I thought that was just what baked beans were. Then I made these, and I genuinely could not go back. I’m sorry, Mom, but it’s true.
Here’s the thing — we’re starting with canned beans and doctoring them up, not making beans from scratch. We’re busy parents at a cookout, not contestants on a cooking competition show, you know?
Why This Recipe Matters: These taste like they’ve been simmering all day, but they come together in about 30 minutes on the stovetop. The smoked paprika does all the heavy lifting.
Ingredients
- 2 cans (15 oz each) white beans or navy beans, drained
- 4 strips of bacon, chopped—or smoked sausage for extra heartiness
- ½ onion, diced
- 3 cloves garlic, minced
- ½ cup ketchup
- ¼ cup brown sugar, packed
- 2 tbsp apple cider vinegar
- 1 tbsp Worcestershire sauce
- 1 tsp smoked paprika
- 1 tsp dry mustard
- Salt and black pepper
Instructions
- Cook the onion in the drippings for 5 minutes, until soft. Add garlic and cook 1 more minute.
- Cook bacon in a medium saucepan over medium heat until crispy. Remove the bacon, leaving about 2 tbsp of drippings in the pan—that’s flavor, not waste.
- Add ketchup, brown sugar, vinegar, Worcestershire, smoked paprika, and dry mustard. Stir it all together.
- Add beans and stir to coat. Bring to a gentle simmer.
- Simmer uncovered for 20 minutes, stirring occasionally, until the sauce thickens and everything comes together.
- Stir in the bacon at the end. Season with salt and pepper.
Julia’s Tip: These are even better the next day. Make them the evening before your cookout, then reheat slowly. The sauce gets deeply sticky and smoky overnight, and it is seriously amazing.
Chef’s Notes — Family Verdict My husband declared these “the best beans I’ve ever had” and then immediately asked if we had leftover hot dogs to put in them. Men. Both kids eat them, which is a miracle because beans are usually on the rejected list. I’m not questioning it.
Variations
- Vegetarian: Skip bacon, add 1 tsp liquid smoke, and use olive oil for cooking the onions
- Spicy: Add chipotle peppers in adobo sauce—just one or two; they’re intense
- Slow cooker: Dump everything in on low for 6 hours if you want to set and forget it
6. Sun-Dried Tomato Pasta Salad
So I used to be a boring pasta salad person—elbow pasta, Italian dressing, done. Then I started playing around with sun-dried tomatoes and artichoke hearts, and suddenly I was the person people text asking to “please bring that pasta thing” to every cookout. It’s a good place to be, you know?
Why This Recipe Matters: It feeds a crowd, it makes ahead beautifully, and it’s different enough from every other pasta salad on the table that people actually notice it.
Ingredients
- 12 oz rotini or fusilli pasta
- ½ cup sun-dried tomatoes in oil, roughly chopped — use the oil too!
- 1 can (14 oz) artichoke hearts, drained and quartered
- ½ cup kalamata olives, halved
- 4 oz fresh mozzarella, cubed or use mini mozzarella balls
- ¼ cup fresh basil, torn
- ½ cup Italian dressing — store-bought is completely fine
- 2 tbsp red wine vinegar
- Salt and pepper
- Parmesan for serving
Instructions
- Cook pasta according to package directions in well-salted water. It should be fully cooked, not al dente—pasta salad pasta needs to be a little more done than regular pasta, you know?
- Drain and immediately rinse with cold water to stop cooking. Shake off as much water as you can.
- In a large bowl, combine pasta with sun-dried tomatoes, artichoke hearts, olives, and mozzarella.
- Pour dressing over and add red wine vinegar and Parmesan well.
- Refrigerate for at least 1 hour. Add fresh basil and Parmesan right before serving.
Julia’s Tip: Pasta absorbs dressing as it sits, so it’ll look a little dry when you pull it out of the fridge. Add a splash more Italian dressing and toss again right before serving; this fixes everything.
Chef’s Notes — Family Verdict Not gonna lie, my kids pick out the olives. But they eat everything else, so I count it as a success. My husband thought there was “fancy cheese” in it and was suspicious for a moment before deciding he loved it. Mini mozzarella balls will do that.
Variations
- Add salami or pepperoni for a more filling pasta salad
- Swap mozzarella for feta and use Greek dressing for a Mediterranean version
- Toss in spinach or arugula right before serving for some greens
7. Watermelon Feta Mint Salad
Here’s the thing—I was skeptical about this too. Cheese and fruit? At a cookout? It sounded like something on a restaurant menu I can’t afford. But I tried it once at a friend’s party and stood at the table eating it for an embarrassingly long time… you know?
Why This Recipe Matters: It’s the most refreshing thing on any summer table. Zero cooking. Ten minutes. And it looks absolutely stunning.
Ingredients
- 6 cups seedless watermelon, cubed into bite-size pieces
- 4 oz feta cheese, crumbled—the block kind you crumble yourself is so much better
- ¼ cup fresh mint leaves, roughly torn
- ¼ red onion, very thinly sliced
- Juice of 1 lime
- 2 tbsp olive oil
- Pinch of flaky sea salt
- Optional: 1 tbsp honey drizzled over the top
Instructions
- Spread watermelon on a large platter —it’s better on a platter than in a bowl, trust me.
- Scatter feta, mint, and red onion over the top.
- Whisk together lime juice and olive oil, then drizzle over everything.
- Finish with a pinch of flaky salt and the honey, if using.
- Serve immediately—this does NOT sit well, so make it right before you eat.
Julia’s Tip: Slice the red onion paper-thin and soak it in cold water for 10 minutes before using. It tames the harsh bite, leaving you with a mild, sweet onion flavor that doesn’t overpower other flavors. Game changer, you know?
Chef’s Notes — Family Verdict Emma — my 12-year-old — actually requested this for her birthday dinner last summer. Not the cake. This. I don’t know what to do with that information, but I’m proud of her taste. Jake eats the watermelon and leaves the feta, which is fine—more feta for me.
Variations
- Add cucumber for extra crunch and a cooling effect
- Swap feta for goat cheese if that’s what you have
- Add arugula underneath to turn it into a more substantial salad
8. Deviled Eggs — The Real Way
Now I know everyone has their deviled egg recipe, and everyone thinks theirs is the best. I’m here to tell you mine actually is, and I have the empty platter to prove it at every single cookout since 2017.
So the “real way” means we’re not skimping on the filling and we’re actually seasoning it, unlike some recipes I’ve seen that are basically just mayo and sadness… You know?
Why This Recipe Matters: Deviled eggs disappear faster than anything else on the table. Always. Making a double batch takes almost no extra effort, and it’s always the right call.
Ingredients
- 12 large eggs
- ⅓ cup mayonnaise
- 2 tbsp yellow mustard
- 1 tbsp apple cider vinegar
- 1 tbsp dill pickle juice—yes, really; yes, it matters
- 1 tsp smoked paprika, plus more for topping
- Salt and white pepper
- Fresh chives for garnish
Instructions
- Place eggs in a single layer in a pot and cover with cold water by 1 inch. Bring to a boil over high heat, then immediately turn off the heat, cover the pot, and let it sit for exactly 12 minutes.
- Transfer eggs to an ice bath immediately. Let them sit for 10 minutes — this is what makes them peel cleanly.
- Peel the eggs, slice them in half lengthwise, and pop the yolks into a bowl.
- Mash yolks with mayo, mustard, vinegar, pickle juice, and smoked paprika until completely smooth—season well with salt and white pepper.
- Spoon or pipe filling back into egg white halves. Dust with paprika and snip fresh chives over the top.
Julia’s Tip: I’ll be real with you—I use a Ziploc bag with the corner snipped off to pipe the filling. It looks beautiful, costs nothing, and goes straight into the trash. No pastry bag needed. We’ve all been there, trying to wash out a pastry bag and regretting our choices, you know?
Chef’s Notes — Family Verdict Jake calls these “egg boats” and has eaten six in one sitting. That’s the review. My husband eats them standing at the counter before I’ve even set them on the table, which drives me absolutely crazy, but also tells me everything I need to know about this recipe.
Variations
- Bacon and jalapeño: Top with crispy bacon bits and a thin jalapeño slice
- Avocado: Replace half the mayo with mashed avocado for a lighter, greener filling
- Everything bagel: Top with everything bagel seasoning instead of paprika
9. Jalapeño Popper Dip
So this one came out of pure laziness. I was supposed to make actual jalapeño poppers—stuffed, wrapped in bacon, the whole production—and I ran out of time. I threw all the same ingredients into a baking dish instead, and it was honestly better. Everyone loses their mind over this every time I make it… You know?
Why This Recipe Matters: It’s got all the flavor of jalapeño poppers with about a tenth of the effort. You can make it ahead and bake it when people arrive.
Ingredients
- 2 packages (8 oz each) cream cheese, softened
- 1 cup sour cream
- 1 cup shredded pepper jack cheese, divided
- 1 cup shredded sharp cheddar, divided
- 1 can (4 oz) diced green chiles
- 3 fresh jalapeños, seeded and diced — keep some seeds if you like heat
- 4 strips of bacon, cooked and crumbled
- ½ tsp garlic powder
- ½ tsp onion powder
- Salt to taste
- Tortilla chips, crackers, or sliced baguette for serving
Instructions
- Preheat oven to 375°F.
- Beat cream cheese and sour cream together until smooth. This is easier if your cream cheese is room temperature—cold cream cheese will fight you, you know?
- Stir in half the pepper jack, half the cheddar, green chiles, jalapeños, most of the bacon, garlic powder, and onion powder. Season with salt.
- Spread into a baking dish (8×8 or similar). Top with the remaining cheeses and bacon.
- Bake 20–25 minutes until bubbly and golden on top.
- Let cool for 5 minutes before serving with chips — the molten cheese will absolutely destroy someone’s mouth if you don’t wait.
Julia’s Tip: Make the whole thing the night before, cover and refrigerate it unbaked, and then pop it in the oven when your guests arrive. The house smells amazing, you look like you’ve been cooking all day, and you’ve actually been relaxing. That’s the goal, you know?
Chef’s Notes — Family Verdict: My husband made me promise to make this at every single cookout forever. That’s the kind of contract I’m willing to sign. Emma tolerates it. Jake eats it with an alarming quantity of chips for an 8-year-old.
Variations
- Lighter: Use Neufchâtel instead of cream cheese and light sour cream
- Extra spicy: Leave jalapeño seeds in and add a few dashes of hot sauce to the mixture
- Vegetarian: Skip the bacon and add smoked paprika for that smoky depth
10. Cucumber Tomato Vinaigrette Salad
Now I’ve been making this salad since before I even knew I was a cook. My mom made it, her mom made it, and somehow it never gets old. It’s the simplest thing on this whole list, and it just works every single time… you know?
Why This Recipe Matters: It’s bright, it’s cool, it cuts through all the rich food at a cookout, and it literally takes 8 minutes. Eight minutes, people.
Ingredients
- 2 large English cucumbers, sliced into rounds
- 2 cups cherry tomatoes, halved — or 3 Roma tomatoes, diced
- ½ red onion, thinly sliced
- ¼ cup fresh parsley or dill, chopped
- 3 tbsp red wine vinegar
- 3 tbsp olive oil
- 1 tsp sugar
- 1 clove garlic, minced or grated
- Salt and black pepper — be generous
Instructions
- Slice cucumbers and halve tomatoes. Put them in a big bowl.
- Add red onion and fresh herbs.
- Whisk vinegar, olive oil, sugar, and garlic together until the sugar dissolves.
- Pour dressing over vegetables, toss well, and season aggressively with salt and pepper.
- Let it sit at room temperature for at least 15 minutes before serving. The veggies need that time to release their juices and mingle with the dressing, you know?
Julia’s Tip: Don’t skip the sugar. Just a teaspoon. It balances the vinegar, making everything taste rounder and more complete. You won’t taste it as sweet—you’ll notice the salad tastes really, really good.
Chef’s Notes — Family Verdict This is the one salad my kids actually eat without being bribed or negotiated with. I don’t question it. I’m just making it. My husband eats it straight from the bowl with a spoon, standing at the counter, which I have given up trying to stop.
Variations
- Add feta and kalamata olives for a Greek version
- Toss in some chickpeas to make it more substantial
- Swap red wine vinegar for balsamic for a richer, sweeter dressing
11. Caprese Skewers
Here’s the thing—regular caprese salad is beautiful. Caprese on a skewer is beautiful AND portable, and at a cookout, portable wins every time. Nobody wants to chase a tomato across their paper plate, you know?
Why This Recipe Matters: Zero cooking. Looks stunning. Takes 10 minutes. That’s a triple win, and we should all be celebrating it.
Ingredients
- 1 pint cherry tomatoes
- 8 oz fresh mozzarella balls (ciliegine size — the little ones)
- Fresh basil leaves
- 3 tbsp good olive oil
- 1 tbsp balsamic glaze—get the store-bought kind; it’s perfect
- Flaky sea salt and cracked black pepper
- Toothpicks or small skewers
Instructions
- Thread each skewer with one tomato, one folded basil leaf, and one mozzarella ball. That’s literally it.
- Arrange on a platter.
- Drizzle with olive oil and balsamic glaze right before serving.
- Finish with flaky salt and cracked pepper.
Julia’s Tip: I’ll be real with you—the quality of your olive oil and balsamic glaze matters a lot here because the ingredients are simple. This isn’t the time for the bottle that’s been in the pantry since 2019. Get a fresh one. The difference is real, you know?
Chef’s Notes — Family Verdict Emma, my 12-year-old, who is currently going through a “sophisticated food” phase, declares this her favorite thing I make. Jake eats the tomatoes off the skewer and leaves the cheese, which honestly tracks perfectly with his whole vibe.
Variations
- Add a small folded piece of prosciutto to each skewer for a more filling appetizer.
- Swap balsamic glaze for pesto drizzle—a completely different flavor, equally amazing.
- Use marinated mozzarella from the deli counter if you have it—instant upgrade.
Guacamole Guacamole
So I grew up thinking guacamole was just avocado and lime, because that’s what we always had, and it was fine. TGuacamolerted loading it up, and now plain guacamole seems like an unfinished sentence to me, you know?
Why This Recipe Matters: It disappears in minutes, and it’s one of those things where people genuinely ask you how you made it, like it’s some mystery when actually it took you 12 minutes.
Ingredients
- 4 ripe avocados — they should feel like pressing on a ripe peach
- Juice of 2 limes, plus zest of 1
- ½ red onion, finely diced
- 1 jalapeño, seeded and minced
- ½ cup cherry tomatoes, quartered
- ½ cup fresh cilantro, chopped
- 2 cloves garlic, grated or finely minced
- 1 tsp cumin
- Salt — more than you think
Instructions
- Cut avocados in half, remove pits, and scoop flesh into a bowl.
- Add lime juice and salt immediately and mash to your preferred texture. I like mine chunky—totally up to you.
- Fold in red onion, jalapeño, tomatoes, cilantro, garlic, and cumin.
- Taste and adjust. More lime? More salt? More jalapeño? Trust your mouth here.
- Pressing plastic onto the surface of the guac. Immediately is the key. Keep tasting and keep adding. Most people under-salt it and then wonder why it tastes flat. Also, make this right before serving. Guacamole does not wait for anyone, you know?
Chef’s Notes — Family Verdict: Jake eats this with a spoon. An actual spoon, not chips. I find this endearing. Emma puts it on literally everything she’s eating, which tells me she has excellent taste. My husband claims he doesn’t like avocado, but consistently eats a third of this bowl, so.
Variations
- Mango guacamole: Add ½ cup diced mango for a sweet, tropical twist
- Pomegranate: Top with pomegranate seeds for color and a little pop of sweetness
- Creamy version: Add 2 tbsp sour cream for a richer, slightly milder dip
13. Sweet Corn Pudding
Now I know what you’re thinking: pudding? At a cookout? And I’m telling you, this is the one side dish that makes people stop mid-conversation to ask what it is. It’s sweet, savory, custardy, and completely unlike anything else on the table… You know
Why This Recipe Matters: It goes in the oven, comes out when you need it, and pairs beautifully with smoky grilled meat in a way that feels almost magical.
Ingredients
- 2 cans (15 oz each) whole kernel corn, drained
- 1 can (15 oz) cream-style corn—this is the base; don’t skip it
- 1 box (8.5 oz) Jiffy corn muffin mix
- 2 eggs
- 1 cup sour cream
- ½ cup butter, melted
- 1½ cups shredded sharp cheddar, divided
- Salt and pepper
Instructions
- Preheat oven to 350°F. Grease a 9×13 baking dish.
- In a large bowl, mix the two cans of corn, the muffin mix, eggs, sour cream, and melted butter until just combined.
- Stir in 1 cup of the cheddar. Season with salt and pepper.
- Pour into the prepared baking dish. Top with the remaining ½ cup of cheddar.
- Bake 45–50 minutes until golden on top and set in the center. A toothpick should come out with just a few moist crumbs, not wet batter.
- Let rest 10 minutes before serving.
Julia’s Tip: This reheats beautifully. Make it the day before, refrigerate, and reheat covered with foil at 325°F for about 20 minutes. At a big cookout, this is a genuinely lifesaving move, you know?
Chef’s Notes — Family Verdict OH MY GOSH. Both my kids call this “the corn cake” and request it by name. My husband once said it was his favorite thing I make, which I took as both a compliment and a slight against my other cooking, but here we are. It’s just that good.
Variations
- Spicy: Add one can of diced green chiles and pepper jack instead of cheddar
- Sweeter version: Add 2 tbsp of honey to the batter and use less cheese
- Gluten-free: Use a GF corn muffin mix — works just as well
14. Broccoli Ranch Salad
So here’s the thing—raw broccoli salads have a reputation problem because most of them are under-seasoned and sad. This one is NOT sad. This one has bacon, sunflower seeds, dried cranberries, and a ranch dressing so good you’ll want to put it on everything… You know?
Why This Recipe Matters: It travels well, gets better as it sits, and is one of those side dishes that people who claim they “don’t like salad” go back for seconds. We’ve all been there at the table pretending to be surprised when someone says they like vegetables now.
Ingredients
- 1 large head of broccoli, cut into very small florets—seriously, small
- ½ cup bacon bits or 6 strips cooked bacon, crumbled
- ⅓ cup red onion, finely diced
- ⅓ cup dried cranberries
- ¼ cup sunflower seeds
- ½ cup sharp cheddar, shredded
For the dressing:
- ½ cup mayonnaise
- ¼ cup sour cream
- 2 tbsp apple cider vinegar
- 1 tbsp sugar
- 1 packet (1 oz) ranch seasoning mix
- Salt and pepper
Instructions
- Cut broccoli into the smallest florets you can manage — nobody wants a huge hunk of raw broccoli. Make them bite-sized so every piece gets coated in dressing.
- Whisk all dressing ingredients together. Taste and adjust—more vinegar for tang, more sugar for sweetness.
- Combine broccoli, bacon, red onion, cranberries, sunflower seeds, and cheddar in a big bowl.
- Pour dressing over and toss to coat every single piece.
- Refrigerate for at least 1 hour—2 hours is better. The broccoli softens just slightly, and the flavors come together beautifully.
Julia’s Tip: Don’t be tempted to make the florets big. Small florets mean more surface area for dressing, and more surface area for dressing means more flavor in every single bite. This is the one non-negotiable, you know?
Chef’s Notes — Family Verdict: Jake ate broccoli without a fight. This is all I have to say. Emma asked for it in her lunch, which means I’m now making double batches every time. I couldn’t be prouder of this recipe.
Variations
- Add sliced almonds instead of sunflower seeds for a different crunch
- Swap cranberries for golden raisins if that’s what you have
- Vegetarian: Skip bacon; add extra sunflower seeds and smoked almonds for that savory depth
15. Grilled Veggie Platter
Now I’m ending on this one because a grilled veggie platter is the most underrated cookout side dish of all time, and I will stand by that claim forever. It’s colorful, it’s smoky, it feeds the vegetarians at your party without making them feel like an afterthought, and it makes you look like a very intentional host even when you are absolutely winging it… You know?
Why This Recipe Matters: It goes alongside everything. It works at room temperature. You can prep the veggies the day before and grill them when you’re ready. And it looks absolutely beautiful on a big platter.
Ingredients
- 2 zucchini, sliced lengthwise into planks
- 2 yellow squash, sliced lengthwise
- 1 red bell pepper, quartered
- 1 yellow bell pepper, quartered
- 1 red onion, cut into thick rings
- 8 oz mushrooms — whole baby bellas or portobello caps
- 1 bunch of asparagus, woody ends trimmed
- ¼ cup olive oil
- 3 cloves garlic, minced
- 1 tsp Italian seasoning
- Salt and pepper generously
- Fresh lemon juice for finishing
- Fresh parsley for serving
Instructions
- In a large bowl or zip-lock bag, toss all vegetables with olive oil, garlic, Italian seasoning, salt, and pepper. Let them marinate while your grill heats up — even 15 minutes makes a difference.
- Heat grill to medium-high. Grill in batches because crowding is the enemy of good char marks.
- Cook times vary: peppers and onions need about 8–10 minutes, zucchini and squash 6–8 minutes, asparagus 4–5 minutes, and mushrooms 6–8 minutes. You want visible grill marks and tender — not mushy — vegetables.
- Arrange on a big platter as you go. The colors are the show here.
- Finish with a squeeze of lemon juice and a scattering of fresh parsley right before serving.
Julia’s Tip: Make a simple dipping sauce while the veggies grill: mix ½ cup Greek yogurt with 2 tbsp olive oil, 1 minced garlic clove, lemon juice, and salt. Set it alongside the platter. It sounds small, but it absolutely elevates the whole thing, you know?
Chef’s Notes — Family Verdict I will not pretend my kids go crazy over this one—Jake eats the mushrooms and declares victory. But every single adult at every cookout I’ve ever brought this to goes back for more and asks how I seasoned them. It’s just olive oil, garlic, and a hot grill. That’s the secret. Sometimes, simple really is the whole point.
Variations
- Add halloumi cheese to the grill—it holds its shape beautifully and gets delicious golden edges.
- Drizzle finished veggies with balsamic glaze for a fancier presentation. Parmesan over pasta the next day, with a splash of olive oil and a sprinkle of Parmesan. Lunch every day.
So there you have it — 15 sides that have shown up to every single cookout, block party, birthday, and “it’s finally warm outside” dinner I’ve thrown in the last several years. The thing I want you to remember is that no one is grading you on this. Cookout food is supposed to be fun. It’s supposed to make people happy. And every single one of these recipes will do exactly that without making you lose your mind in the kitchen first. You’ve got this!
— Chef Julia
Working mom. Professional cook. Suburban Chicago. Currently outnumbered by a 12-year-old who thinks she runs things and an 8-year-old who absolutely does.


Discussion about this post