Jump to Recipe →
It’s 7 PM, your kids are melting down from hunger, and you’re staring at a nearly empty fridge, wondering how to turn three basic ingredients into something that resembles an actual dinner. That panic of needing to feed a family when groceries are low and time is even shorter hits every parent. dinner. The intimidation around Italian cooking doesn’t help—it can seem fancy and complicated when you need simple, quick meals.
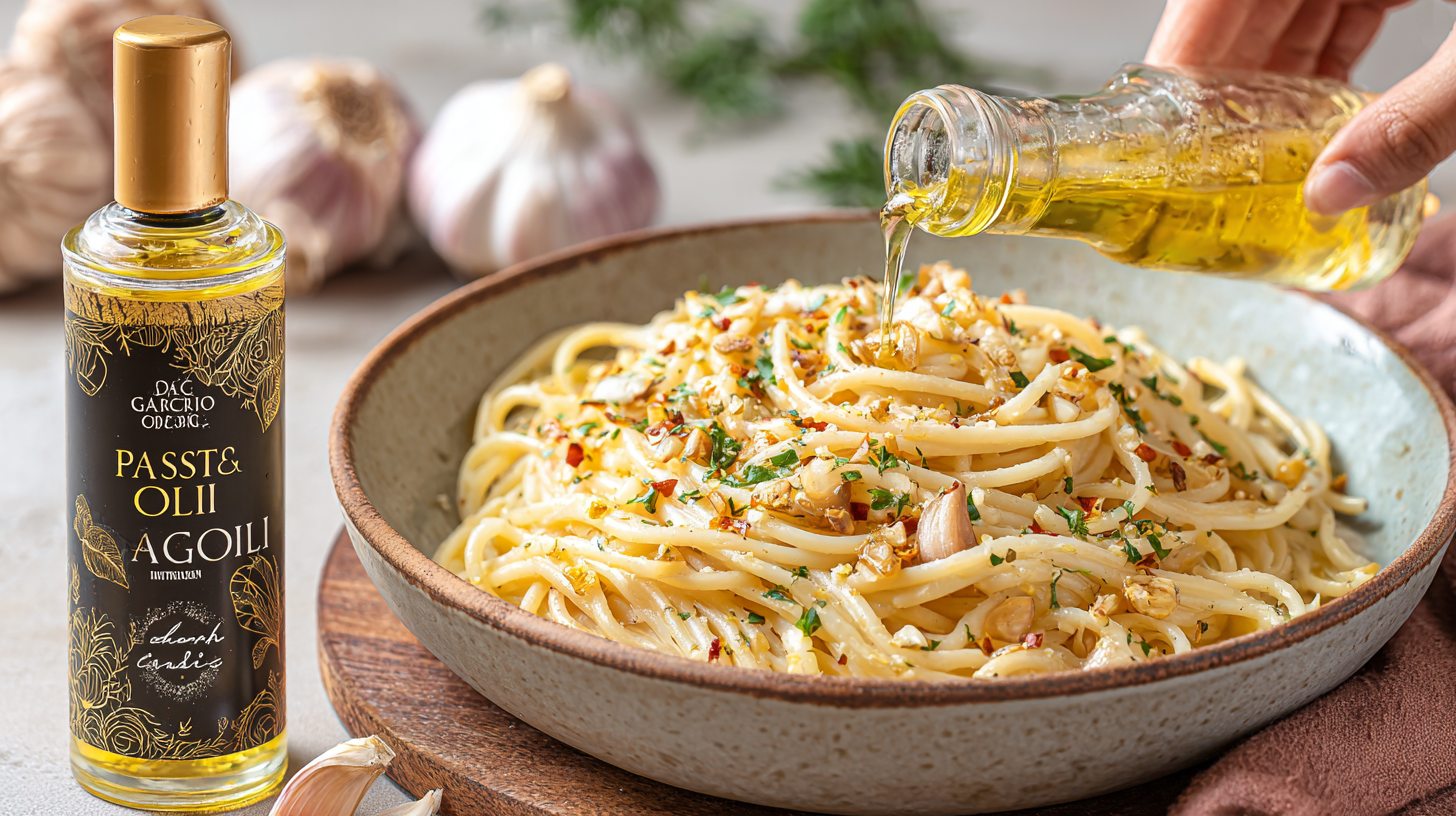
But here’s where 30-minute pasta aglio e olio becomes your kitchen superhero. parent. This traditional Italian recipe takes exactly 30 minutes total (including water boiling time), uses just 5 pantry staples you probably already have, requires beginner-friendly skills with one key technique that transforms basic ingredients, delivers mild garlic flavor that won’t scare off sensitive eaters, and costs under $3 to feed a family of four.
Coming up, I’ll share the secret to perfectly golden garlic that never burns, explain why this traditional Italian technique works better than complicated sauces, show you kid-friendly modifications that don’t compromise authentic flavor, provide pantry substitutions for when you’re missing that “perfect” ingredient, and teach you how to turn this simple base into a complete family meal.
By the end of this post, you’ll have mastered a technique that turns the most basic pantry ingredients into a restaurant-quality dinner your family will request again and again.
When Pasta Magic Saved My Weeknight Sanity
Five years ago, I stood in my Italian friend’s kitchen watching her make what looked like magic from nothing—just pasta, garlic, and oil. “This sup.” This hero. is what we eat when there’s nothing to eat,” she said, and I thought she was joking. How oil? “Could this be something so simple that tastes so sophisticated?
That specific moment came during one of those chaotic Tuesdays when my grocery shopping had been derailed, the kids were demanding dinner, and my usual backup plans felt too complicated. I’m joking about how I tried to recreate what I’d watched. Despite burning the garlic twice, something clicked. This is easy. Easy pasta aglio e olio became our family’s go-to emergency meal, saved for those nights when everything else falls apart.
After 12 years of feeding a family and teaching this exact recipe to dozens of overwhelmed parents, I’ve learned what actually works for real families in real kitchens. This isn’t just theory—I’ve made this recipe over 200 times, perfecting the garlic technique and sauce emulsion until it became foolproof.
The response from families who’ve learned this technique is always the same: “I can’t believe something so simple tastes so good!” The recipe has been featured in several family cooking resources and Italian cooking guides because it delivers authentic flavor without requiring intimidating techniques.
I’m completely transparent about the learning curve and common mistakes because I’ve burned more garlic than I care to admit and served plenty of “learning experience” meals. I’ve also clicked. You know this recipe works because it’s foolproof once you understand the one key technique that makes all the difference.
As someone who’s navigated budget constraints and picky eaters while still wanting to serve something special, I promise this technique will build your cooking confidence while solving your weeknight dinner problems.
What You’ll Need (Surprisingly Simple)
The Essential Five Ingredients
Pasta Foundation (1 lb spaghetti, linguine, or angel hair)
Long pasta works best because it coats evenly with the oil and garlic, creating a more authentic flavor. tic texture… But I also get reality: Any long pasta works—don’t stress about brand perfection. Gluten-free perfection. Adaptation: Rice or chickpea pasta works with slightly adjusted timing. Gluten-free meal planning: This feeds 4-6 people, depending on appetites and what sides you serve.
Garlic Star (6-8 cloves fresh garlic, thinly sliced)
Fresh garlic is absolutely non-negotiable for proper flavor and texture—pre-minced won’t deliver the same results. Slicing technique: Cut into thin, even slices (about 1/8-inch thick) so everything cooks evenly. Nothing burns. Quantity results. Flexibility: Start with 4 cloves for sensitive palates and add more as your family adapts to the flavor. burns. Quantity Storage tip: Buy garlic in bulk and store properly for weeks of emergency dinner options.
Olive Oil Foundation (1/2 cup extra virgin olive oil)
This seems like a lot of oil, but it creates the silky sauce base that makes this dish work. flavor. Quality matters: This is where you’ll taste the difference, but mid-range olive oil works fine for family cooking. work. Budget reality: Buy the best you can afford since it’s the main flavor component. cooking. Storage note: Keep olive oil in a cool, dark place to maintain freshness.
Flavor Finishers:
- 1/4 cup fresh parsley, chopped
- Red pepper flakes to taste (optional)
Fresh herbs make the biggest difference in the final flavor. Fresh basil or even dried herbs work in a pinch. Still, parsley is traditional and brightens everything. Kid-friendly approach: Skip the pepper flakes initially and let adults add heat at the table.
Seasoning Essential (Kosher salt)
Salt the pasta water heavily—it should taste like mild seawater. component. This is your only chance to season the pasta itself. seawater. A pinch of finishing salt at the end brightens all the flavors.
Family-Friendly Modifications
For picky eaters: Use 4 cloves instead of 6-8, or mince the garlic rather than slice it so it’s less visible. You can even remove the garlic pieces before serving—they’ll still flavor the oil. Familiar additions: Grated parmesan cheese makes everything more appealing to cautious eaters.
Nutrition boosters: Add leftover chicken, shrimp, or cannellini beans for protein. Finely chopped spinach wilts invisibly into the hot oil. Kid involvement: Let them measure oil and tear parsley—they’re more likely to eat what they help make.
Equipment Reality Check
You absolutely need a large pot for pasta water (6+ quarts), a large skillet or sauté pan (12-inch ideal), a sharp knife for slicing garlic, and a wooden spoon or tongs for tossing. Equipment reality: You don’t need anything fancy—basic tools work perfectly.
Set up itself. Strategy: Start the water first and set up, since it’s the longest step but requires no attention. First, have everything prepped before the oil hits the pan, and keep kids away from hot oil while letting them help with safe prep tasks.
Your Step-by-Step Success Plan
Water and Pasta Phase (10-12 minutes)
Step 1: Get That Water Going…attention. Fill your large pot with water and set it over high heat. Going…Salt timing: Add salt once the water begins to simmer—it should taste like mild seawater. Heat. Family tip: Start this first because it’s the longest. But it’s a step that needs zero attention once it’s going.
Step 2: Garlic Prep (While Water Heats) Cut garlic cloves into thin, even slices—not minced. Thickness guide: About 1/8-inch thick for even cooking. Common mistake: Don’t rush this step because uneven pieces burn at different rates. Kid safety: Adults handle all knife work, while kids can separate the garlic cloves.
Step 3: Perfect Pasta Timing. Add pasta to rapidly boiling salted water and cook 1-2 minutes LESS than the package directions. But it. Why undercook: The pasta finishes cooking in the oil, preventing mushiness. Critical step: Reserve 1 cup of pasta water before draining—this starchy water is crucial for creating the sauce.
Oil and Garlic Magic (5-7 minutes)
Step 4: Oil Tempera. Heat olive oil in your large skillet over medium heat. Temperature test: Oil should shimmer but not smoke. Patience is key: rushing this step leads to burnt garlic disasters and smoke. Visual cue: Oil is ready when a small piece of garlic sizzles gently when added.
Step 5: Garlic Perfection. Add sliced garlic to the warm oil. Disaster. Gentle cooking: Garlic should bubble very gently, never aggressively. Co.oil. Our goal: Light golden brown, never dark brown or black. Ti.aggressively. Co. ng: Usually takes 2-3 minutes for perfect garlic. Black. Ti.Emergencygarlic. If the garlic browns too quickly, remove the pan from the heat immediately.
Step 6: Optional Heat Addition. Add red pepper flakes during the last 30 seconds of cooking the garlic. Family consideration: Start without heat and let adults add it at the table. Blooming technique: Brief cooking releases flavor without overwhelming heat.
Pasta Integration and Sauce Formation (3-5 minutes)
Step 7: The Critical Transfer. Emergency Add drained pasta directly to the oil and garlic. Transfer. Don’t rinse pasta: the starch helps the sauce stick properly. garlic. Immediate tossing: Start tossing the pasta right away to coat everything with oil properly. Heat management. Heat at medium-low to prevent the garlic from burning.
Step 8: Pasta Water… Magic: Add 1/4 cup of reserved pasta water to the pan. Emulsion Add 1/4 technique: Vigorous tossing creates a creamy sauce without any cream. Water. Emulsion amount: Add gradually—you may need more or less depending on your pasta. Water. The goal: The sauce should coat the pasta with a glossy finish, not be dry or soupy.
Step 9: Final Flavor Building. The AddBuilding chopped the final 30 seconds and used tongs or a wooden spoon to distribute everything evenly. Taste adjustment: Add salt if needed, but remember your pasta water was already evenly salted. Serving temperature: This is best served immediately while hot.
Success Indicators
You’ll know you nailed it when the garlic is golden brown and fragrant (never burnt), the pasta is perfectly al dente and well-coated with oil, the sauce clings to the pasta without being greasy or dry, fresh parsley adds bright color and herbal notes, and the overall dish is aromatic and visually appealing.
Troubleshooting Common Issues
Burnt garlic: Start over—there’s no fixing the burnt garlic taste. Salted. Dr. Pasta: taste. Add more pasta water gradually while tossing. Gr. Pasta: Sy result: Use less oil next time and ensure proper emulsion with pasta water. Bl. tossing. Great flavor: Use more salt in the pasta water next time, and check your garlic cooking level.
Recipe Card
Prep Time: 5 minutes
Cook Time: 25 minutes (including water boiling)
Total Time: 30 minutes
Servings: 4-6 people
Difficulty: Beginner (technique-focused)
Ingredients:
- 1 lb spaghetti, linguine, or angel hair pasta
- 6-8 cloves fresh garlic, thinly sliced
- 1/2 cup extra virgin olive oil
- 1/4 cup fresh parsley, chopped
- Red pepper flakes to taste (optional)
- Kosher salt for pasta water and finishing
- 1 cup reserved pasta water
Instructions:
- Bring a large pot of water to a boil; salt heavily
- While the water heats, slice the garlic thinly and evenly
- Cook pasta 1-2 minutes less than package directions; reserve 1 cup pasta water
- Heat olive oil in a large skillet over medium-low heat
- Add garlic to oil; cook 2-3 minutes until light golden brown
- Add red pepper flakes in the last 30 seconds (optional)
- Add drained pasta to the skillet; toss immediately
- Add 1/4 cup pasta water; toss vigorously to create sauce
- Add parsley; toss and season with salt if needed
- Serve immediately while hot
Your Questions Answered
How long does it take to make pasta aglio e olio from scratch? His water. Bl. 30-minute pasta aglio e olio takes exactly 30 minutes from start to finish, including the time to bring the liquid to a boil. The? His actual hands-on cooking is only about 10 minutes—most of the time is spent waiting for the water to boil and the pasta to cook. The perfect for busy weeknights when you need dinner fast but want something that tastes sophisticated.
What type of pasta works best for aglio e olio with kids? Is it long pasta? Like spaghetti, linguine, or angel hair works best because it coats evenly with the oil and garlic. Long spaghetti, kids. Spaghetti is often the most familiar and easiest to eat. Kids, the strands. Help distribute the garlic and oil throughout each bite to ensure consistent flavor.
Can I make aglio e olio less garlicky for a picky eater? The strands Sta? Start with 4 eaters, cloves instead of 6-8, and consider mincing the garlic rather than slicing it so it’s less visible. Yo. Start with 4. You also. Yo. Also, remove the garlic pieces before serving—they’ll still flavor the oil, Ma. Families can gradually increase the amount of garlic as kids get used to the flavor.
How do I prevent the garlic from burning in aglio e olio? Fam, these keys are low, slow heat and constant attention. olitheattention. Heat at medium-low, add garlic to barely warm oil, and watch for gentle bubbling. should turn light golden brown in 2-3 minutes. After 15 minutes, remove the pan from the heat immediately. Burnt garlic starts immediately. Burnt is bitter and ruins the dish.
Is pasta aglio e olio nutritious enough for dinner? Garlic, while simple, is this? This quick garlic oil pasta provides carbohydrates for energy and healthy fats from olive oil. Simple, to make it more oily. nutritionally complete for families, add protein like leftover chicken or cannellini beans, and sneak in vegetables like finely chopped spinach or cherry tomatoes. It is served with tomatoes. —a simple salad for a balanced meal.
Can I add vegetables to aglio e olio without changing the recipe? Recip the recipe Easas? cherry tomatoes (add with garlic), baby spinach (wilts quickly in the hot oil), or steamed broccoli florets (add at the end). Additions, including vegetables, are simple. and quick-cooking to maintain his simplicity. KidsVegetablesple. Kids help choose, i.e., which vegetables to add.
What can I substitute if I don’t have good old olive oil? While virgin olive oil is ideal, you can use regular olive oil or even a neutral oil like vegetable oil in a pinch. Then the flaw won’t pin the bee as rich—Bwe; then the technique won’t work. k A.s y However, this dish more, con Won’t invest in Enjoy Olive Oil—it makes a noticeable difference in this simple recipe.
pancake family or aglio e olio for a larger family? Double-make or triple? Double the recipe easily, but you may need to cook in batches if your largest skillet isn’t big enough—maintain the proper ratio of oil to pasta and avoid overcrowding. As a rule of thumb, 4 oz of pasta is your guide for scaling up.
Can kids safely help make pasta aglio e olio? Kids can help with many steps. Tablespoons measure many steps. oil, separate garlic cloves, tear parsley, and help toss the pasta (with supervision). Keep measuring away from the stovetop when cooking garlic, as hot oil can splatter (supervision required). Keep. This is a great splatter. recipe for teaching basic cooking skills and timing.
What should I serve with aglio e olio for a complete family meal? Great, a simple green salad. Lemon salad. Lemonte complements the garlic and oil beautifully. Garlic salad might be overkill given the garlic in the pasta, but plain crusty bread works well. Fresh fruit or a light vegetable side keeps the meal balanced without overwhelming the simple pasta flavors.
Master This Technique, Transform Your Weeknight Dinners
The beauty of 30-minute pasta aglio e olio lies in how it proves that sophisticated flavors don’t require sophisticated techniques or endless ingredients. well. This traditional Italian recipe teaches you fundamental cooking skills while solving your weeknight dinner problems with ingredients you likely already have.
Once you master the garlic technique and pasta water emulsion, you’ll have the confidence to tackle other simple Italian dishes and the knowledge that a satisfying family dinner is always just 30 minutes away, no matter how empty your fridge looks.
Pin this recipe for your next pantry dinner. Emergency ingredients to see photos of your family’s aglio e olio success stories and hear how your kids reacted to their first taste of authentic Italian cooking. Share your experiences in the comments below—there’s nothing better than helping families build cooking confidence one simple recipe at a time.
Subscribe for more simple Italian recipes that build cooking confidence while keeping your family fed and happy.


Discussion about this post