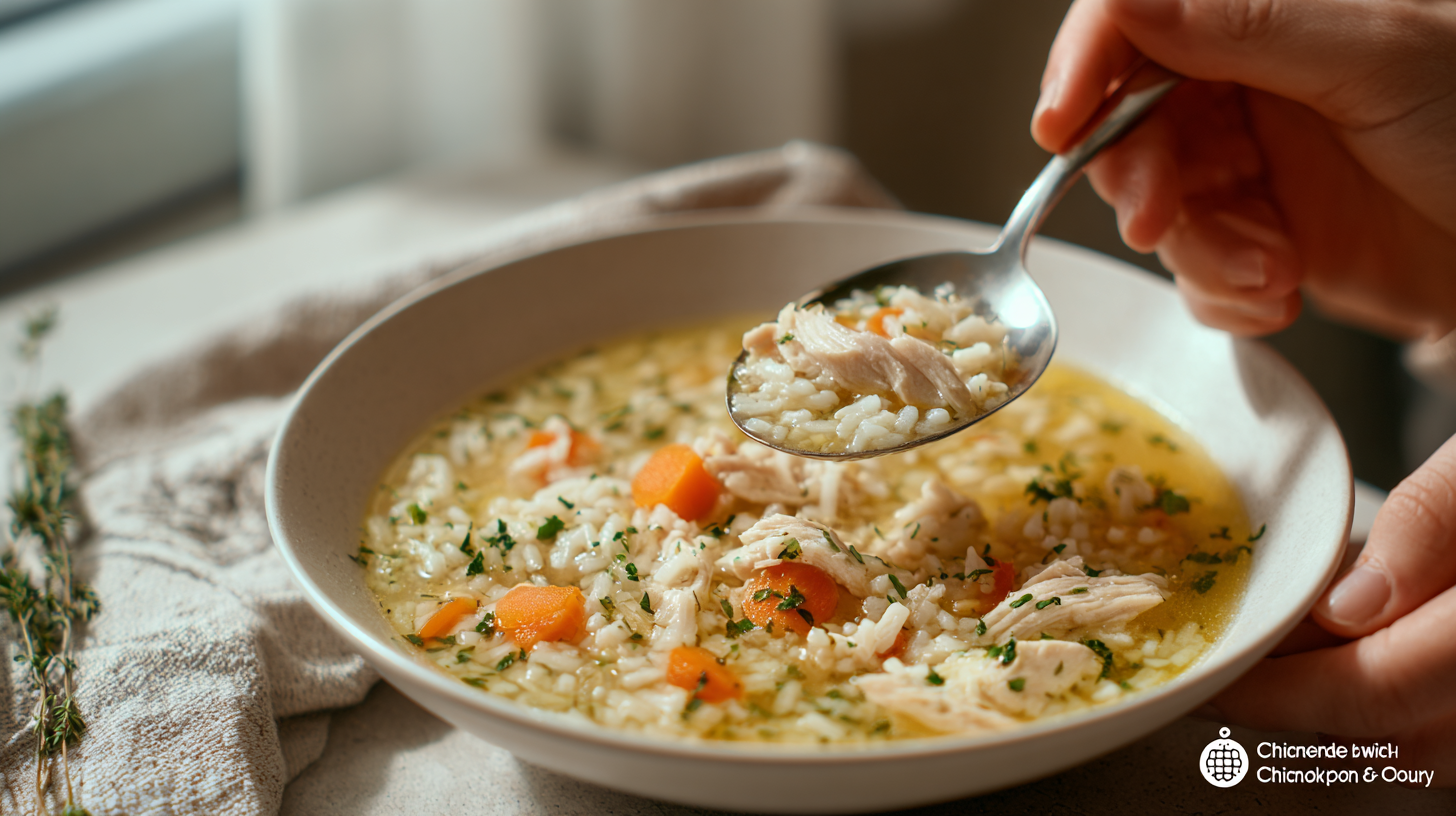
30-Minute Meals: Quick Chicken and Rice Soup
There’s something absolutely magical—no, that word gets thrown around too much these days—there’s something genuinely transformative about the smell of homemade soup bubbling away on your stove. It’s like… you know how some people talk about “hygge” and all that Danish coziness? Well, this is the American version, except it actually works and doesn’t require you to buy expensive candles.
The aroma wraps around your entire kitchen like the world’s best hug, promising comfort in every single spoonful.
I get it, though. You’re probably thinking soup sounds amazing, but isn’t it one of those mysterious all-day affairs that requires some kind of culinary wizardry? Trust me, I used to think the exact same thing! When I first started cooking—and I’m talking about that terrifying period right after college when suddenly nobody was making food appear magically in the dining hall anymore—soup-making felt about as approachable as performing brain surgery while riding a unicycle.
But here’s what I discovered after years of kitchen disasters and minor victories: this cozy chicken and rice soup proves that real homemade comfort food can happen in just 30 minutes. And yes, it’s absolutely perfect for beginners who are still figuring out which end of the knife to hold. (Kidding! But only sort of.)
This isn’t just another recipe to bookmark and forget about—it’s your gateway into the wonderful world of actually knowing what you’re doing in the kitchen. Simple enough that you won’t have a complete meltdown, quick enough for those nights when everyone’s starving at 6 PM, and soul-warming enough to make people genuinely happy to be sitting around your table.
The beautiful part? Success is basically guaranteed if you follow these steps that I’ve refined through teaching countless nervous home cooks who were convinced they’d somehow mess up boiling water.
When you tackle this 30-minute quick chicken and rice soup, you’ll master fundamental soup-making skills that unlock dozens of other recipes, learn to cook chicken safely without the paranoia, discover timing secrets that prevent mushy disasters, and pick up seasoning techniques that make everything taste like it came from someone’s beloved grandmother’s kitchen.
From Soup Catastrophe to Comfort Food Hero (My Messy Journey)
Growing up, my grandmother’s kitchen existed in this perpetual state of something incredible simmering away—rich, golden chicken broth that seemed to bubble with actual magic, herbs that danced in the steam like tiny flavor fairies, and this unmistakable aroma that somehow communicated “everything will be okay” in a language that bypassed your brain and went straight to your heart.
Her soups were legendary. Not Instagram-famous legendary, but real family legendary—the kind that could cure heartbreak, bad days, and those weird winter colds that make you feel like you’re dying but you’re probably not.
When I first moved into my own apartment (a shoebox with a kitchen the size of a postage stamp), I was absolutely terrified to attempt soup from scratch. It seemed so… I don’t know, so full of opportunities for spectacular failure? I remember standing there, staring at a package of chicken like it might suddenly come to life and judge my cooking skills.
My first attempts were, frankly, disasters that would make Gordon Ramsay weep. Rubbery chicken that could’ve doubled as a hockey puck, vegetables that had given up all hope of maintaining any structural integrity, and broth that tasted like disappointment mixed with regret.
This recipe? It was born from those early kitchen disasters and the incredibly patient phone conversations with family members who talked me through each step like I was defusing a bomb instead of making dinner.
After helping dozens—maybe hundreds? – of nervous new cooks making their first homemade soups, I’ve figured out exactly what separates success from total catastrophe. I remember precisely how overwhelming it felt to wonder if that chicken was actually cooked or if I was about to accidentally poison my dinner guests. (Spoiler alert: nobody died, but the anxiety was real.)
Those feelings of complete uncertainty? They’re totally normal, and they’re exactly why I’ve stripped this recipe down to its absolute essentials, removing anything that might make you second-guess yourself or reach for your phone to order takeout instead.
This has become the “first soup success story” for countless people in my cooking classes. Nothing—and I mean nothing—makes me happier than getting those triumphant photos of students showing off their first perfect pot of homemade soup, grinning like they just climbed Mount Everest in their pajamas.
Here’s what I need you to understand: if you can successfully boil water and read directions without your house burning down, you can absolutely make this soup. It’s that straightforward, that accessible, and that foolproof.
Everything You Need (And I Promise It’s Not Complicated)
The Protein Situation (Feeding 4-6 Actually Hungry People):
Let’s start with our star ingredient—you’ll need about 1 pound of boneless, skinless chicken, and here’s my first piece of wisdom that might save your dinner: choose chicken thighs over breasts if you can. I know, I know, everyone always says breast meat is “better,” but thighs are infinitely more forgiving for nervous cooks. They stay tender and juicy even if you accidentally cook them a bit too long, which—let’s be honest—is probably going to happen at least once.
You’ll also want 2 tablespoons of olive oil for the browning magic, plus salt and black pepper for seasoning. Nothing fancy, nothing that requires a trip to some specialty store that only exists in foodie neighborhoods.
The Flavor Foundation (This is Where the Magic Lives):
This part is absolutely crucial—don’t even think about skipping it. Gather up 1 medium onion that you’ll dice into small pieces (roughly 1 cup worth), 2 medium carrots sliced into rounds, 2 celery stalks chopped up, and 3 cloves of garlic that need mincing. If the thought of mincing garlic makes you want to cry (literally or figuratively), just use 1 teaspoon of garlic powder instead. Life’s too short for garlic anxiety.
The Liquid Gold & Rice Component:
You’ll need 6 cups of low-sodium chicken broth—or, if budget is a concern because groceries cost approximately the same as a small car these days, 6 cups of water mixed with 3 bouillon cubes works beautifully. For rice, grab 3/4 cup of long-grain white rice like jasmine or just regular white rice from whatever brand doesn’t require you to take out a second mortgage.
Oh, and if you have a bay leaf hanging around in your spice cabinet (you know, that mysterious leaf that everyone owns but nobody really knows what to do with), toss it in. It’s optional but adds this lovely depth that makes people think you actually know what you’re doing.
Simple Seasonings That Pack a Punch:
Keep it beautifully uncomplicated: 1 teaspoon dried thyme (or 1 tablespoon fresh if you’re feeling fancy), 1/2 teaspoon dried oregano, salt and pepper to taste, and 2 tablespoons fresh parsley for serving if you want that Instagram-worthy pop of green color.
Equipment You Probably Already Own:
The gorgeous thing about this recipe—and I cannot stress this enough—is that you likely already have everything you need gathering dust in your kitchen! Essential tools include a large pot or Dutch oven (at least 6 quarts), a reasonably sharp knife, a cutting board, a wooden spoon, measuring cups and spoons, and a can opener if you’re using canned broth.
The “would be nice to have” category includes a ladle for elegant serving, an instant-read thermometer that eliminates all chicken-doneness guesswork, and proper soup bowls that make everyone feel like they’re dining at a cozy bistro instead of your regular weeknight kitchen table.
Beginner Secrets That Actually Work:
Let me share some insider knowledge that will absolutely set you up for success. When choosing between thighs and breasts, thighs are your best friend—they’re practically impossible to overcook into leather, and they taste richer too. Fresh chicken is definitely easier to work with than frozen, but frozen works if you remember to thaw it completely first. The real secret is cutting everything into uniform 1-inch pieces so it all cooks at the same rate.
For vegetables, here are some life-changing prep tips: to minimize those inevitable onion tears, stick your onion in the freezer for about 10 minutes before cutting. Aim for carrot rounds that are roughly 1/4-inch thick for even cooking, and if your celery has those annoying tough strings, just run a vegetable peeler down them to remove the stringy bits.
Rice success is all about type and timing—long-grain varieties like jasmine hold their shape beautifully in soup, while short-grain rice turns into mushy sadness. For soup specifically, don’t rinse your rice beforehand; that starch actually helps thicken the broth naturally. But timing—that’s the real key to preventing rice disasters.
Smart Substitutions & Money-Saving Hacks:
Let’s talk budget-friendly swaps because groceries are expensive and we’re all trying to eat well without going broke. Instead of fancy boxed broth, try 6 cups water plus 3 bouillon cubes—it tastes nearly identical for a fraction of the cost. For herbs, remember this magic ratio: 1 teaspoon dried equals 1 tablespoon fresh. No fresh garlic? One-fourth teaspoon of garlic powder equals 1 fresh clove.
Want dietary modifications? Use no-salt broth if you’re watching sodium and season gradually to your taste. Craving something heartier? Add diced potatoes when you add the carrots. Have leftover rotisserie chicken sitting in your fridge? This recipe is absolutely perfect for giving it new life.
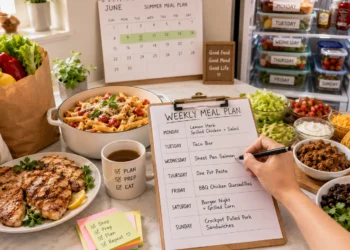
Prep-Ahead Strategies for Sanity:
Make your life exponentially easier by chopping all vegetables the night before and storing them in the refrigerator. Measure out all spices into a small bowl before you start cooking—trust me on this one. Most importantly, arrange all ingredients on your counter before you begin cooking. This prevents that frantic cabinet-searching that inevitably happens right when you need something immediately.
Your 30-Minute Journey from Panic to Perfect Bowl
Phase 1: The Foundation Work (5 minutes that matter)
Step 1: Assembly and Prep Everything First (3 minutes of organization) Start by washing your chicken thoroughly—and I mean really washing it, not just a quick rinse—then pat it completely dry and cut it into uniform 1-inch pieces. Smaller pieces cook faster and more evenly, which is exactly what we want for this timeline. While you’re in prep mode, dice that onion, slice the carrots into rounds, chop the celery into bite-sized pieces, and mince your garlic.
Measure out your rice and set it aside where you can grab it easily, open those broth cans or prepare your bouillon mixture, and get all your seasonings measured and ready to go.
Here’s a lesson that literally changed my cooking game forever: having absolutely everything prepped before you start the actual cooking prevents those moments of sheer panic when you realize you forgot to measure something and now your onions are burning while you frantically search for the oregano.
Step 2: The Chicken Seasoning Ritual (2 minutes) Pat those chicken pieces dry again with paper towels—this step is crucial for achieving beautiful browning instead of sad steaming. Season both sides generously with salt and pepper, then just let them sit there while you heat your oil.
Why does this matter so much? Dry chicken develops that gorgeous golden-brown color that adds incredible flavor depth, and seasoning now means the flavor penetrates throughout the entire soup instead of just sitting on the surface.
Phase 2: Building the Flavor Foundation (10 minutes of aromatic paradise)
Step 3: The Chicken Browning Magic (4-5 minutes) Heat your olive oil in that large pot over medium-high heat until it shimmers slightly—you’ll know it’s ready when it looks almost alive, moving and gleaming. Add your seasoned chicken pieces in a single layer, and here’s the hard part: resist the urge to move them around! Let them cook undisturbed for 2-3 minutes until the bottom side is golden brown and beautiful, then flip and cook another 2 minutes.
Critical beginner note: don’t stress about cooking the chicken completely through at this stage. We’re building flavor layers here—the chicken will finish cooking perfectly in the soup itself.
Step 4: The Vegetable Symphony (4-5 minutes) Add your diced onion directly to the pot with the chicken—no need to remove anything. Cook, stirring occasionally, for 2-3 minutes until the onion starts softening and smelling absolutely incredible. Then add your carrots and celery, cooking everything together for about 2 more minutes. Finally, add that minced garlic and cook for just 30 seconds until your entire kitchen smells like heaven.
The goal here is vegetables that are softened but still have some texture—they’ll continue cooking in the soup, so don’t worry about getting them completely tender right now.
Phase 3: The Soup Transformation (15 minutes of pure comfort creation)
Step 5: Liquid Gold Addition (2 minutes) Pour in your chicken broth, making absolutely sure to scrape up all those gorgeous browned bits from the bottom of the pot—this is pure flavor gold that would be tragic to waste! Add your thyme, oregano, and that bay leaf if you’re using it. Bring everything to a vigorous boil over high heat.
Those browned bits? They’re called fond in fancy cooking terms, but I just call them deliciousness stuck to the pan that needs to be rescued.
Step 6: The Rice Integration (10 minutes of patience) Once you’ve got a good rolling boil going, reduce the heat to medium-low to maintain a gentle, consistent simmer. This is the crucial moment—add your rice to the pot, stirring just once to distribute it evenly throughout. Cover and let it simmer for exactly 10 minutes, stirring occasionally to prevent any sticking disasters.
Timing alert: don’t add rice too early in this process, or you’ll end up with mushy, unappetizing rice that resembles baby food more than a soup ingredient.
Step 7: The Final Check and Seasoning (3 minutes) Check that your chicken is completely cooked through—it should be white throughout with absolutely no pink areas visible, and if you have a thermometer, it should read 165°F. Your rice should be tender, and vegetables should be easily pierced with a fork. Remove that bay leaf if you used one (nobody wants to bite into that surprise), then taste your creation and adjust seasoning with salt and pepper.
Safety reminder: when in doubt, cook it longer. Slightly overcooked soup is infinitely better than unsafe soup that might make someone sick.
Phase 4: The Victory Lap (5 minutes to perfection)
Step 8: Final Taste and Texture Perfection Sample that beautiful, steaming broth and adjust seasonings as needed—this is your moment to make it absolutely perfect for your family’s taste preferences. If the soup seems too thick, add a bit more broth or even just water. If it seems too thin, let it simmer uncovered for a few more minutes to concentrate those flavors.
Step 9: Serve with Pride and Love. Ladle your gorgeous creation into bowls while it’s still steaming—there’s something magical about that first curl of steam rising from a freshly ladled bowl of homemade soup. Sprinkle with fresh chopped parsley if you’re using it, and serve alongside crackers, crusty bread, or just enjoy it exactly as it is in all its simple glory.
Pro tip: wide, shallow bowls show off your beautiful soup best and make everyone feel like they’re getting restaurant-quality presentation.
Troubleshooting for When Things Go Sideways: Chicken looking dry and sad? Lower your heat and add more broth—gentle cooking is always the answer. Rice turning into mush? Next time, add it later or use less liquid. Vegetables becoming too soft and losing their will to live? Cook them for less time initially since they keep cooking in the hot soup. Flavor tasting bland and boring? Add salt first, then adjust other seasonings gradually. Soup ended up too salty? Add more broth or water and a tiny pinch of sugar to balance everything back out.
All Your Burning Questions Answered (Because I’ve Been There)
Can I use leftover or rotisserie chicken instead of raw chicken? Oh my goodness, yes! This actually makes the whole process even easier, which is saying something. Skip that browning step entirely and just add 2-3 cups of shredded cooked chicken during the final 5 minutes of cooking to heat it through. Your soup will be ready even faster, and honestly? It tastes just as wonderful. Sometimes I buy rotisserie chicken specifically for this recipe because I’m feeling lazy, and that’s totally okay.
What type of rice works best without turning into complete mush? Long-grain white rice, like jasmine or regular old white rice, holds its shape beautifully in soup environments. Avoid short-grain or instant rice at all costs—they turn into gummy, sad little pellets that nobody wants in their soup. The real secret is adding rice at precisely the right moment and not overcooking it into submission.
How do I know when chicken is actually safe to eat without paranoia? Chicken reaches safe territory at 165°F internal temperature, but if you don’t have a thermometer, cut into the thickest piece—it should be completely white throughout with zero pink areas. Clear juices (not pink or red) are another reliable indicator. When in doubt, cook it longer. Nobody has ever gotten sick from slightly overcooked chicken.
Can I make this ahead for meal prep without it turning weird? Yes, but here’s the thing about rice—it’s like that friend who overstays their welcome. It keeps absorbing liquid and expanding even after you think it’s done. Store your soup in the fridge for up to 3 days, but you’ll probably need to add extra broth when reheating to get the consistency back to normal.
What vegetables should I add and when without messing everything up? For your very first attempt, stick with the holy trinity of soup vegetables: onions, carrots, and celery. These are tried-and-true classics that virtually everyone enjoys. Add harder vegetables like carrots earlier; softer ones like peas or spinach in the final minutes. Start simple, build confidence, and then get creative later.
Why did my soup turn out like the Dead Sea or completely flavorless? Always taste as you cook—this cannot be emphasized enough! Start with less salt than you think you need because you can always add more, but removing salt is basically impossible. If it’s too salty, dilute it with more broth or water. If it’s bland, add salt first, then other seasonings. Different broth brands have wildly different sodium levels, so adjust accordingly.
How do I prevent rice from becoming disgusting soup mush? Don’t add rice too early! Wait until your soup is actively simmering, then add rice and cook for only the specified time. Avoid aggressive stirring once rice is in there—gentle stirring prevents breaking those delicate grains into sad little pieces.
Can I freeze this for future lazy dinner nights? You can freeze it, but rice gets weird and mushy when frozen and reheated—it’s just the nature of the grain. For best results, freeze the soup base without rice, then add fresh rice when you’re ready to reheat and serve. It’ll keep frozen for up to 3 months if properly stored.
What kitchen tools do I absolutely need versus nice-to-have? Bare minimum requirements: large pot (at least 6 quarts), reasonably sharp knife, cutting board, and wooden spoon. That’s literally it. An instant-read thermometer is helpful for chicken doneness peace of mind, but you can definitely succeed without one if you’re comfortable with visual checks.
How can I make this more filling for teenagers who eat everything in sight? Add diced potatoes with the carrots for extra heartiness, or stir in a can of white beans during the final few minutes. For more protein, use more chicken or add some cooked beans. Keep modifications simple while you’re mastering the basic technique—you can get fancy later.
You Actually Did It! (And Why That Matters More Than You Know)
You just created homemade soup from actual scratch—not from a can, not from a packet, but from real ingredients that you transformed into something wonderful with your own two hands. That’s genuinely something to celebrate, and I’m not just saying that to be nice.
There’s this incredible satisfaction that comes from filling your entire home with the aroma of something you created yourself. It’s different from any other accomplishment—more primal somehow, more connected to the fundamental human act of nurturing yourself and others through food.
You’ve learned essential cooking techniques that will serve you well in countless other recipes. This isn’t just about soup; you’ve mastered timing, seasoning, building flavors in layers, and most importantly, you’ve proven to yourself that you can actually cook real food.
Once you’ve conquered this basic version—and you have conquered it, don’t let anyone tell you otherwise—try experimenting with different vegetables or herbs to make it uniquely yours. Maybe some fresh dill next time, or a handful of spinach, or diced potatoes for extra comfort. Every legendary cook started with simple recipes exactly like this one. You’re on the right path, and this is just the beginning of your culinary adventure.
But here’s the thing that really matters: there’s nothing more heartwarming than sharing a bowl of soup you made yourself with people you care about. Food prepared with love and intention tastes different—everyone who sits at your table will taste that care in every single spoonful.
I absolutely love seeing photos of first-time soup successes! Tag me on social media with your creation—these victory posts genuinely make my entire day brighter. Remember, every expert started as a complete beginner who was probably terrified of messing up boiling water. Be patient with yourself, celebrate these small victories, and don’t be afraid to ask questions.
Want to keep building that cooking confidence? Join my newsletter for more beginner-friendly recipes and gentle guidance that meets you exactly where you are in your cooking journey. Check out these related articles that other nervous new cooks have found incredibly helpful: “10 Essential One-Pot Meals Every New Cook Should Master,” “Beginner’s Guide to Seasoning Without Fear,” and “Kitchen Basics That Actually Build Confidence.”
Your soup-making journey starts here, and honestly? I couldn’t be more excited to see where it takes you next.


Discussion about this post